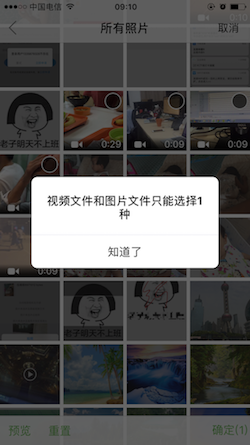
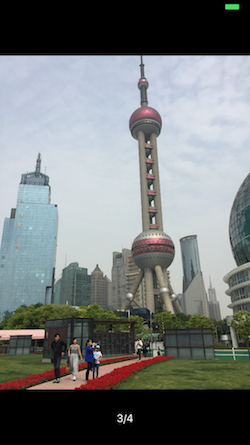
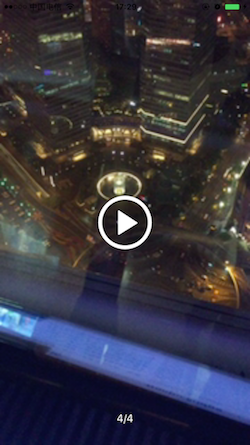
- iOS 8.0+
- swift 3.0+
- collectionView的滚动优化
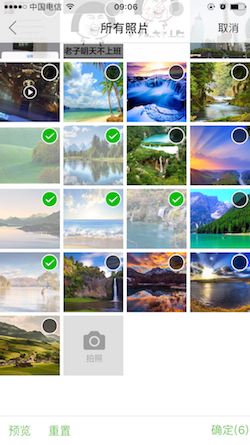
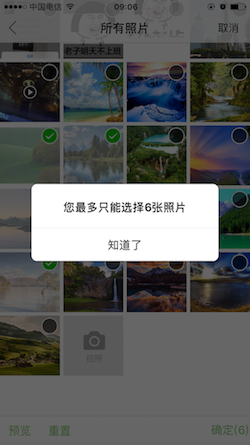
- 图片多选,设置最大可选择的照片数量,对选择后的照片进行压缩处理
- 点击图片进行查看,可缩放
- 视频预览、视频播放、照片预览
- 屏蔽视频文件
- 屏蔽图片资源显示视频资源
- 重置选中状态、预览、异步下载图片
- 视频文件和图片文件不能同时选择
- 图片编辑操作(马赛克,涂鸦,性能得到很大改善)
- 下载iCloud中的照片或者视频文件,显示下载进度
- 单选模式下图片可按照比例裁剪
- 导航栏颜色、状态栏颜色随意配置,默认是毛玻璃效果
- 本地化,支持英文
- 支持git图展示
- 优化collectionView的滚动效果
- 支持改变主题色
-2.2.9:优化横屏问题
-2.3.0:优化命名规范问题(CLImagePickersTool统一改成CLImagePickerTool,中间的s去掉了)
-2.3.2:fix bug
-3.0.0: 重大升级
-
支持swift4.2
-
访问相册方法部分过期,新方法可以传入当前控制器,也可以不传,当不传入当前控制器时,CLImagePickerTool内部会获取当前窗口的控制器,建议当获取不到时,可传入当前控制器。
-
支持设置tineColor(按钮颜色,图片颜色高度定制)
-
增加相册中是否展示拍照图片,默认展示,public var showCamaroInPicture = true
-3.0.2 适配iphone XS
- 修复相册底部弹出的问题。
-3.0.3 修复单选情况下设置tineColor,确定按钮的颜色没有改变的问题
-3.0.4 开放PopViewUtils
-3.0.5 适配swift5.0语法
-3.0.6 优化AnotherViewController样式
-3.0.7 dismiss完成后再触发回调函数
-3.0.8 适配pad
-3.0.9 fix 相册中隐藏拍照图片的问题
-3.1.0 适配ios13,修复部分bug
-3.1.1 适配港版手机相册名称问题
-3.1.2 修复拍照线程问题
1.由于该库设计的图片较多,类也较多,为了避免和项目中的文件冲突建议使用pod管理,有什么问题和需求可及时提出。
pod 'CLImagePickerTool'
建议使用下面的方式及时下载最新版 pod 'CLImagePickerTool', :git => 'https://github.com/Darren-chenchen/CLImagePickerTool.git'
2.支持carthage管理 github "Darren-chenchen/CLImagePickerTool"
3.注意项目需要配置相机相册权限,ios11之后新增照片保存权限也需要添加
<string>访问相机</string>
<key>NSPhotoLibraryUsageDescription</key>
<string>访问相册</string>
<key>NSPhotoLibraryAddUsageDescription</key>
<string>存储照片</string>1.基本用法,默认相机选择在内部、图片多选、支持选择视频文件
// superVC 当前的控制器 MaxImagesCount最多选择的照片数量
let imagePickTool = CLImagePickerTool()
imagePickTool.setupImagePickerWith(MaxImagesCount: 6, superVC: self) { (asset,cutImage) in
    print("返回的asset数组是\(asset)")
 }

 3.0.0 新增方式
 imagePickTool.cl_setupImagePickerWith(MaxImagesCount: 6) { (asset,cutImage) in
    print("返回的asset数组是\(asset)")
 }
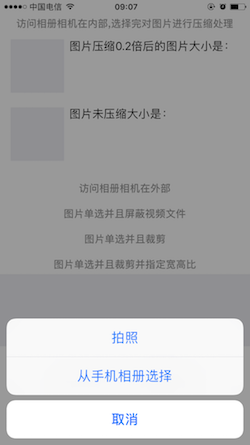
2.设置相机选择在外部 imagePickTool.cameraOut = true
// 注意此时CLImagePickerTool要声明为全局变量,不然代理方法不走
let imagePickTool = CLImagePickerTool()
imagePickTool.cameraOut = true
imagePickTool.setupImagePickerWith(MaxImagesCount: 6, superVC: self) { (asset,cutImage) in
     print("返回的asset数组是\(asset)")
 }
3.设置只支持照片文件,不支持视频文件imagePickTool.isHiddenVideo = true
let imagePickTool = CLImagePickerTool()
imagePickTool.isHiddenVideo = true
imagePickTool.setupImagePickerWith(MaxImagesCount: 6, superVC: self) { (asset,cutImage) in

}
4.设置图片单选,屏蔽多选
let imagePickTool = CLImagePickerTool()
imagePickTool.singleImageChooseType = .singlePicture
imagePickTool.setupImagePickerWith(MaxImagesCount: 6, superVC: self) { (asset,cutImage) in

}
5.单选图片,选择完成后进行裁剪操作imagePickTool.singlePictureCropScale = 2 //宽/高
let imagePickTool = CLImagePickerTool()
imagePickTool.singleImageChooseType = .singlePictureCrop
imagePickTool.setupImagePickerWith(MaxImagesCount: 1, superVC: self) { (asset,cutImage) in

}
6.可以选择视频和图片,但是视频文件和图片文件不能同时选择
let imagePickTool = CLImagePickerTool()
imagePickTool.onlyChooseImageOrVideo = true
imagePickTool.setupImagePickerWith(MaxImagesCount: 6, superVC: self) { (asset,cutImage) in

}
7.设置单选模式下图片可以编辑(涂鸦,马赛克等操作)
let imagePickTool = CLImagePickerTool()
imagePickTool.singleImageChooseType = .singlePicture
imagePickTool.singleModelImageCanEditor = true
imagePickTool.setupImagePickerWith(MaxImagesCount: 6, superVC: self) { (asset,editorImage) in
    self.img.image = editorImage
}
8.只显示视频文件,不显示图片文件
let imagePickTool = CLImagePickerTool()
imagePickTool.isHiddenImage = true
imagePickTool.setupImagePickerWith(MaxImagesCount: 6, superVC: self) { (asset,editorImage) in

}
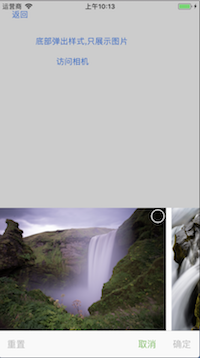
9.底部弹出样式
let imagePickTool = CLImagePickerTool()
imagePickTool.setupImagePickerAnotherWayWith(maxImagesCount: 3, superVC: self) { (asserArr, img) in
    print("成功返回\(asserArr)")
}
10.配置导航栏的颜色
let imagePickTool = CLImagePickerTool()
imagePickTool.navColor = UIColor.red
imagePickTool.navTitleColor = UIColor.white
imagePickTool.statusBarType = .white
imagePickTool.setupImagePickerWith(MaxImagesCount: 6, superVC: self) { (asset,editorImage) in

}
11.设置相机选择在外部,图片可编辑
imagePickTool2.cameraOut = true
imagePickTool2.isHiddenVideo = true
imagePickTool2.singleImageChooseType = .singlePicture
imagePickTool2.singleModelImageCanEditor = true
imagePickTool2.setupImagePickerWith(MaxImagesCount: 1, superVC: self) { (asset,editorImage) in
}
12.部分属性介绍
// 是否隐藏视频文件,默认不隐藏
public var isHiddenVideo: Bool = false
// 是否隐藏图片文件,显示视频文件,默认不隐藏
public var isHiddenImage: Bool = false
// 设置单选图片,单选图片并裁剪属性,默认多选
public var singleImageChooseType: CLImagePickerToolType?
// 设置相机在外部,默认不在外部
public var cameraOut: Bool = false
// 单选模式下图片并且可裁剪。默认裁剪比例是1:1,也可以设置如下参数
public var singlePictureCropScale: CGFloat?
// 视频和照片只能选择一种,不能同时选择,默认可以同时选择
public var onlyChooseImageOrVideo: Bool = false
// 单选模式下,图片可以编辑,默认不可编辑
public var singleModelImageCanEditor: Bool = false
// 配置导航栏的颜色,默认是毛玻璃效果
public var navColor: UIColor? = nil
// 配置导航栏文字的颜色
public var navTitleColor: UIColor? = nil
// 配置状态栏的颜色
public var statusBarType: CLImagePickerToolStatusBarType = .black
// 相册中是否展示拍照图片
public var showCamaroInPicture = true1.选择照片以后在返回的PHAsset对象,在CLPickerTool类中提供了PHAsset转image的方法,并可以设置图片压缩。
// 获取原图,异步
// scale 指定压缩比
// 内部提供的方法可以异步获取图片,同步获取的话时间比较长,不建议!,如果是iCloud中的照片就直接从icloud中下载,下载完成后返回图片,同时也提供了下载失败的方法
 //assetItem 获取成功对应的Phasset对象
var imageArr = [UIImage]()
CLImagePickerTool.convertAssetArrToOriginImage(assetArr: asset, scale: 0.1, successClouse: {[weak self] ((image,assetItem) in
        imageArr.append(image)
        self?.PhotoScrollView.picArr.append(image)

        // 图片下载完成后再去掉我们的转转转控件,这里没有考虑assetArr中含有视频文件的情况
        if imageArr.count == asset.count {
            PopViewUtil.share.stopLoading()
        }
}, failedClouse: { () in
    PopViewUtil.share.stopLoading()
})
该方法是异步方法,当选择图片较多时可能会等待,我们可以提示一个加载框表示正在处理中,其实如果是本地已经存在的图片,那么下载起来会很快,主要是考虑有些图片是本地没有的,存在于iCloud中,那么下载需要时间。同时也有可能下载失败。
在某些情况下我们不需要原图,只需要缩略图即可,而且获取缩略图的速度是非常快的,我们只需要指定一下需要的图片尺寸即可。如下:
let imagePickTool = CLImagePickerTool()
imagePickTool.setupImagePickerWith(MaxImagesCount: 10, superVC: self) { (asset,cutImage) in
	print("返回的asset数组是\(asset)")

//获取缩略图,耗时较短
let imageArr = CLImagePickerTool.convertAssetArrToThumbnailImage(assetArr: asset, targetSize: CGSize(width: 80, height: 80))
	print(imageArr)
}
2.如果是视频文件,提供了PHAsset转AVPlayerItem对象的方法
CLImagePickerTool.convertAssetToAvPlayerItem(asset: self.asset!, successClouse: { (playerItem) in
    DispatchQueue.main.async(execute: {
			// 执行你的操作
    })
}, failedClouse: {

}) { (progress) in
    print("视频下载进度\(progress)")
}
3.你会发现在选择完图片后提供了2个回调参数 (asset,cutImage) ,在一般情况下使用asset来转化自己想要的指定压缩大小的图片,而cutImage只有在单选裁剪的情况才会返回,其他情况返回nil
4.关于状态的颜色配置 在这个库中设置状态颜色改变需要2部操作
1)在info.plist文件中设置View controller-based status bar appearance为yes。
<key>UIViewControllerBasedStatusBarAppearance</key>
<true/>
2)新增一个UINavigationController扩展,为什么要加入扩展,因为preferredStatusBarStyle这个方法只有在没有导航控制器的页面才会生效
extension UINavigationController {
	open override var preferredStatusBarStyle: UIStatusBarStyle {
	if self.topViewController == nil {
	    return .default
	}
	return self.topViewController!.preferredStatusBarStyle
	}
}
3)在base中设置导航栏的颜色
override var preferredStatusBarStyle: UIStatusBarStyle {
    if CLPickersTools.instence.statusBarType == .black {
        return .default
    }
    return .lightContent
}
5.单独访问相机需要注意的问题,需要将CLImagePickerTool设置成全局变量,不然相机的代理方法不走。因为局部变量的话CLImagePickerTool会及时销毁,代理自然就不走了。
// 如果是单独访问相机,一定要声明为全局变量
let imagePickTool = CLImagePickerTool()
// 相机在外部
@IBAction func clickBtn2(_ sender: Any) {
    imagePickTool.cameraOut = true
    imagePickTool.setupImagePickerWith(MaxImagesCount: 6, superVC: self) { (asset,cutImage) in
        print("返回的asset数组是\(asset)")
    }
}
6.单选模式下,才有图片编辑功能,多选模式下没有图片编辑功能。 图片裁剪和图片编辑不能同时进行


