Topics:
How to Install VirtualBox on Ubuntu?
Introduction:
VirtualBox is a powerful free tool by Oracle for running a virtual operating system on your computer. In this tutorial learn how to install VirtualBox on Ubuntu and other Debian-based Linux distributions.
Prerequisites:
A user account with sudo privileges
A terminal window (Ctrl+Alt+T)
Option 1: Install VirtualBox from Ubuntu Repositories
The easiest way to install VirtualBox is by using the official Ubuntu repositories.
-
Open a terminal, and enter the following to update the repository:
sudo apt-get update
-
Download and install VirtualBox by running:
sudo apt-get install virtualbox
-
Next, install the VirtualBox Extension Pack:
sudo apt-get install virtualbox—ext–pack
Read the VirtualBox Extension Pack Personal Use and Evaluation License and select to confirm you understand. VirtualBox extension pack license.
Accept the terms of the VirtualBox PUEL license by selecting and hitting Enter. Configuring VirtualBox Extension Pack.
Finally, the output displays you have successfully installed "Oracle VM VirtualBox Extension Pack". Output displaying you have successfully installed VirtualBox Extension Pack.
The Extension Pack enhances VirtualBox by adding USB 2.0 and 3.0 support, remote desktop, and encryption.
Top Option 2: Installing VirtualBox from Oracle’s Repositories
Often the default repositories do not have the latest versions of the software. They may work for test environments, but some users need the latest security or functionality patches. This process is more in-depth but installs the most recent version of VirtualBox on Ubuntu.
Install Supporting software:
The software-properties-common package is required to run Virtualbox on Ubuntu. It allows you to add new software repositories.
Enter the following into a terminal window:
sudo apt-get install software–properties–common
Install GPG keys:
GPG keys allow you to verify and communicate with the VirtualBox repository.
To download and install GPG keys, use the commands:
wget -q https://www.virtualbox.org/download/oracle_vbox_2016.asc -O- | sudo apt-key add -

wget -q https://www.virtualbox.org/download/oracle_vbox.asc -O- | sudo apt-key add –
Add VirtualBox Repository to Ubuntu
To add the VirtualBox repository, enter the command :
echo "deb [arch=amd64] http://virtualbox.org/virtualbox/debian $(lsb_release -cs) contrib" | sudo tee /etc/apt/sources.list.d/virtualbox.list
Install Latest Version of VirtualBox
-
Start by updating the package lists:
sudo apt-get update
-
To Install VirtualBox 6.1 on Ubuntu, use the command:
sudo apt-get install virtualbox–6.1
At the time of writing this article, the latest VirtualBox version is 6.1.26. It was designed for 64-bit operating systems. If you’re running a 32-bit OS, you can use VirtualBox 5.2 instead.
To install VirtualBox 5.2, enter the following:
sudo apt-get install virtualbox–5.2
Install VirtualBox Extension Pack
The VirtualBox Extension Pack enhances the functionality of your virtual machines. It adds additional tools like USB 2.0 and 3.0, Remote Desktop, and encryption.
-
Enter the following:
-
Import the Extension Pack:
sudo VBoxManage extpack install Oracle_VM_VirtualBox_Extension_Pack-6.1.26.vbox-extpack
Confirm the installation, then allow the process to complete.
Using VirtualBox
-
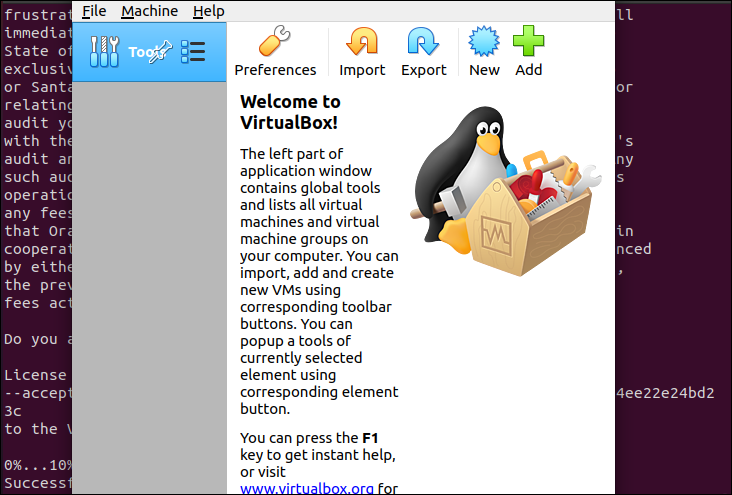
Launch the VirtualBox interface by entering the following:
virtualbox
-
After VirtualBox launches, a graphic interface will load. Use the Add or New button to create a new virtual machine. A dialog will open. Select the operating system and version you’d like to create, then click Next.
-
The dialog will offer you several options for the virtual machine. This is where you allocate memory, hard drive, and other resources to the virtual machine. Use default options if you are unsure about customizing this,
-
Once you finish, a new virtual machine is available in the left column. Select it, and click the green arrow Start button. A new window will open and boot up the virtual machine.
🔚
Checking Your Hardware:
Before you begin, you must check if your CPU supports virtualization. KVM requires CPU virtualization extensions, such as Intel VT-x or AMD-V.
lscpu | grep Virtualization:
Using the cpu-checker Tool
-
Update your package repositories by running the below command.
apt update -y
-
Execute the below command to install the cpu-checker package.
apt install -y cpu-checker
-
Finally, check if your CPU supports virtualization by running this command.
kvm-ok
If you get the following result, your CPU supports virtualization with KVM.

If your CPU is not capable of virtualization, you’ll get the following result instead. In this case, your current hardware is sufficient, and you cannot install KVM.

Installing KVM on Ubuntu:
Now that you have verified that your CPU supports virtualization, you are ready to install KVM on your Ubuntu server. This guide uses Ubuntu 20.04, but the steps should be similar for other versions of Ubuntu.
To install KVM on Ubuntu, run the below apt command. The list below breaks down the packages you’re installing.
qemu-kvm – This package provides accelerated KVM support. This package is a userspace component for QEMU, which is responsible for accelerating KVM guests.
libvirt-daemon-system – This package provides the libvirt daemon and management tools. The libvirt daemon is responsible for creating, managing, and destroying virtual machines on your server.
libvirt-clients – This package provides the libvirt command-line interface for managing virtual machines.
bridge-utils – This package provides the userland utilities for configuring virtual network bridges. On a hosted virtualization solution like KVM, a network bridge connects the guest VM network to the host network.
virt-manager – This package provides a graphical user interface (GUI) for managing virtual machines.
apt install qemu-kvm libvirt-clients libvirt-daemon-system bridge-utils -y
If your Ubuntu host has a desktop environment, install the virt-manager package, which provides a graphical user interface (GUI) for managing virtual machines.
apt install virt-manager -y
-
To enable the libvirt daemon to start automatically at boot, run the below command.
systemctl enable libvirtd
-
To check the status of the libvirt daemon, run the below command:
systemctl status libvirtd
The service status should be enabled and active (running).

If libvirtd is not running, run the below command to start the daemon.
systemctl start libvirtd
Finally, run the below command to check if KVM is loaded in the kernel. The output of this command will show the kvm modules loaded in the kernel. At this point, you’ve successfully installed KVM.
lsmod | grep -i kvm

Creating Your First Virtual Machine in KVM:
You’re ready to create your first virtual machine now that you’ve installed KVM. In this section, you will learn how to create a VM using the Virtual Machine Manager (GUI) and the command line.
Using the virt-manager (GUI):
Follow the below steps to create a VM using the Virtual Machine Manager. This section applies only if your Ubuntu host has a desktop environment. If not, skip this section.
-
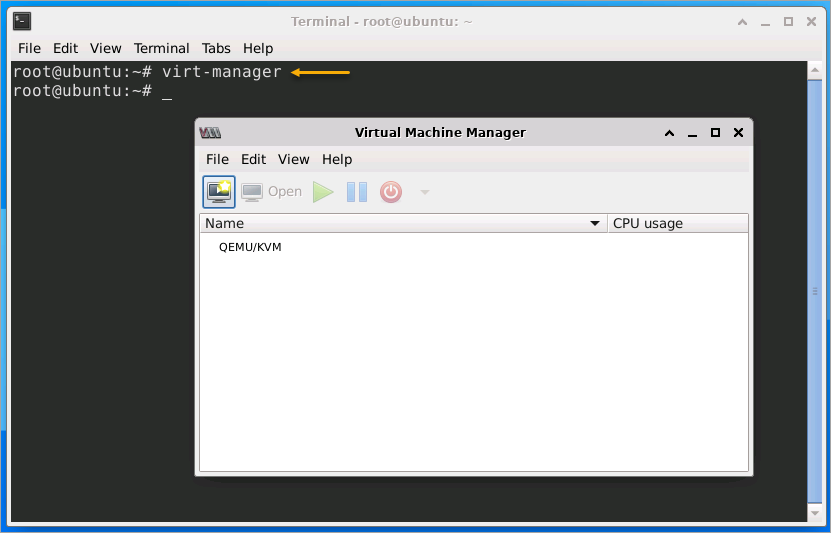
Run the below command to launch the Virtual Machine Manager.
virt-manager
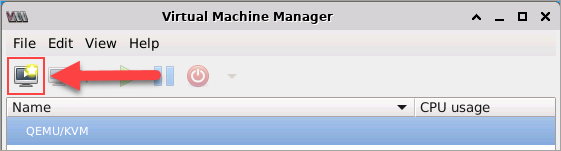
- To create a new VM, click the computer icon on the top left.
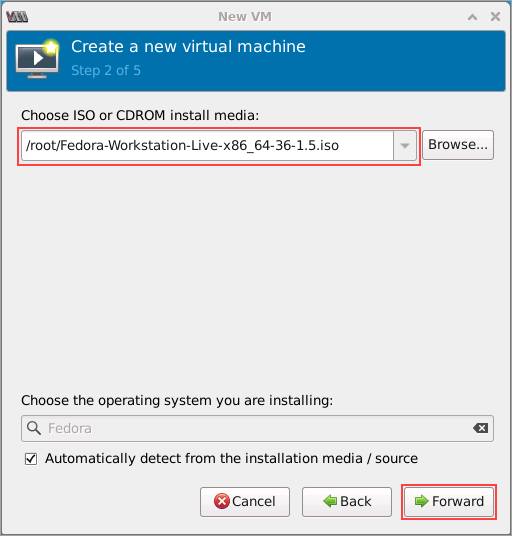
- On the New VM window, select Local install media(ISO image or CDROM) and click on Forward.

- Click Browse —> Browse Local to choose the ISO image of the operating system you want to install. This example will set the ISO file at /root/Fedora-Workstation-Live-x86_64-36-1.5.iso.
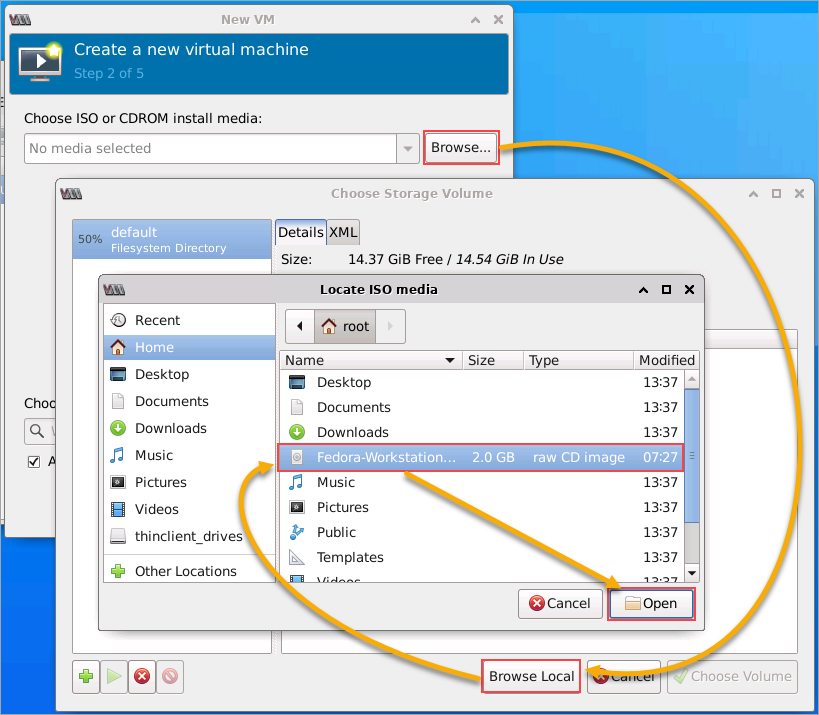
- Click on Forward after choosing the ISO.
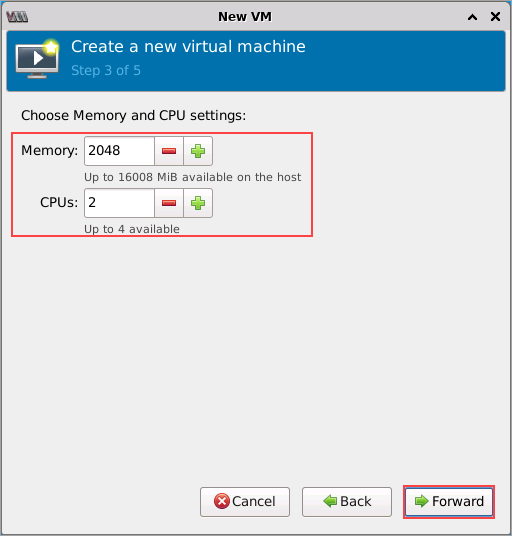
- In the next window, adjust your VM’s CPU count and memory allocation. Ensure that the values you choose are sufficient. This example leaves the default values unchanged. Click Forward to proceed.
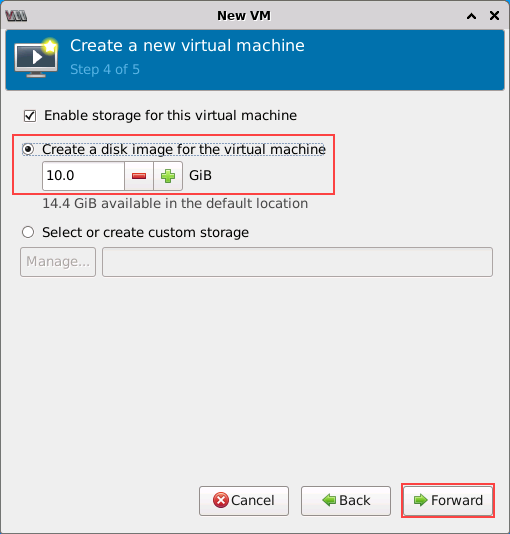
- Next, set the disk image size for this VM. Increase or decrease the disk size as needed. For this demonstration, the disk size of 10 GB is acceptable for the VM. Click Forward to move to the next step.
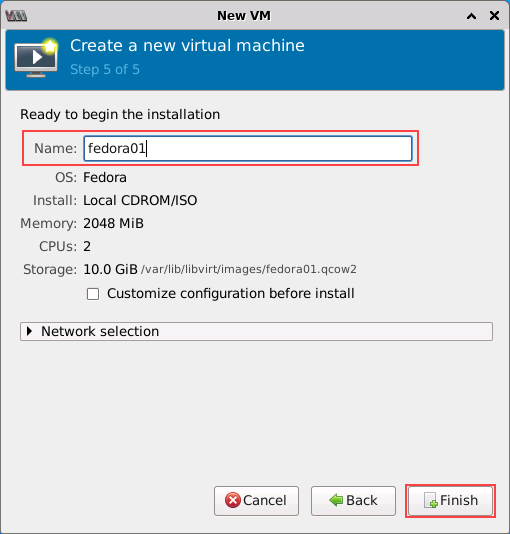
- Next, type in the VM name or leave the default. In this example, the VM name will be fedora01. Leave everything else unchanged and click on Finish to create the VM.
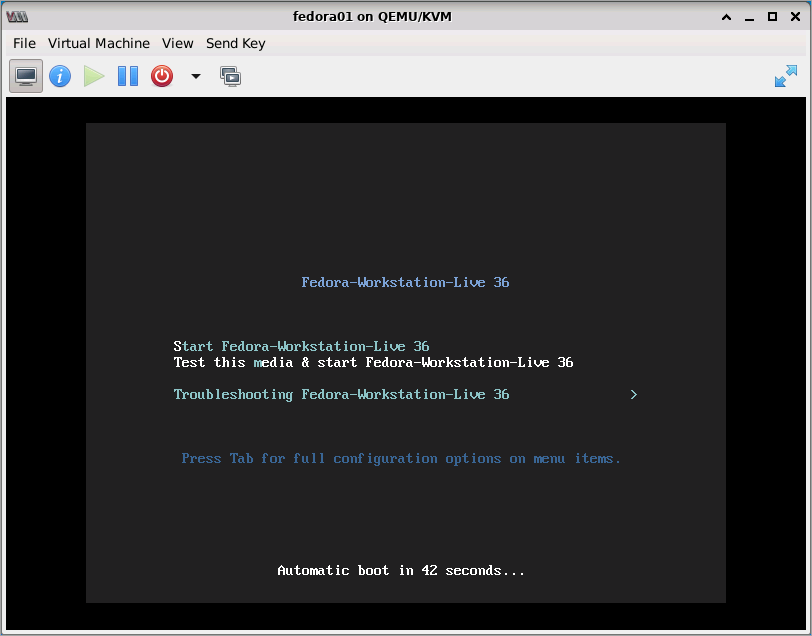
- Once KVM has created the VM, the VM console will show up, and you can now install the operating system as usual.
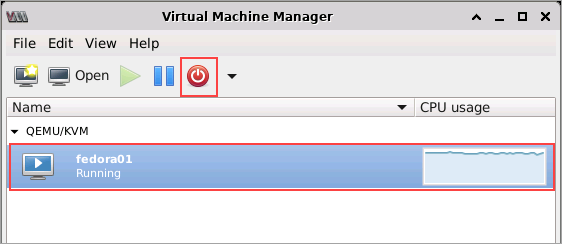
- At this point, you now have one VM, as you can see in the Virtual Machine Manager. After finishing the operating system install, shut down the VM by clicking the power button icon.
Using the virt-install (CLI):
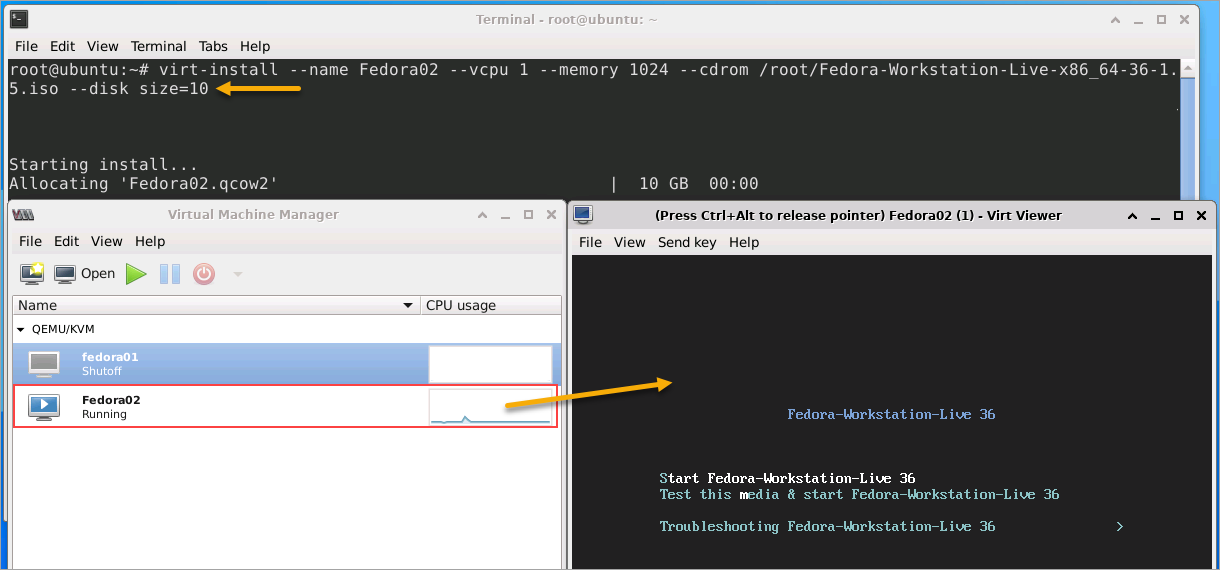
If you prefer working with the command line, virt-install will be your tool when creating new VMs. Run the below command to create a VM with the following details.
--name Fedora02 – Set the VM name as Fedora02.
--vcpu 1 – Allocate 1 vCPU to the VM.
--memory 1024 – Allocate 1024MB of RAM to the VM.
--cdrom /root/Fedora-Workstation-Live-x86_64-36-1.5.iso – Specifies the ISO file location containing the operating system installer.
--disk size=10 – Specifies the VM disk size in GB (10).
--graphics listen=0.0.0.0 – Configures the display server to listen on all interfaces.
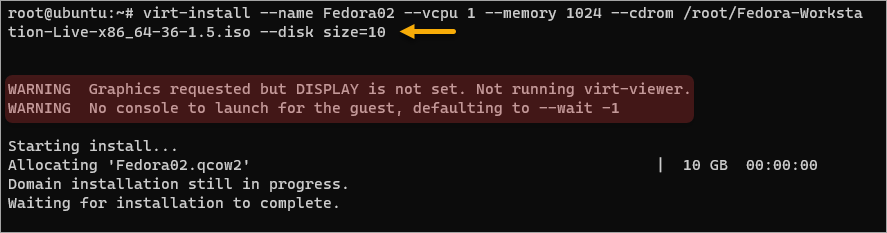
virt-install --name Fedora02 --vcpu 1 --memory 1024 --cdrom /root/Fedora-Workstation-Live-x86_64-36-1.5.iso --disk size=10 --check disk_size=off
If you run the command from the terminal in the Ubuntu host with a desktop environment, the virt-install automatically launches the view-viewer window displaying the VM console.
Running virt-install on Ubuntu with a desktop environment
If you executed the virt-install command from a remote SSH terminal or a host without a desktop environment, you’d get the below result.
Running virt-install on Ubuntu without a desktop environment
In this case, you must access the KVM guest console from another machine capable of running graphical applications using the virt-viewer client.
Managing VMs in the Command Line
Now that you have created some VM, the hardest part is over. Next is learning how to manage your VMs from the command line. The management part may vary slightly depending on whether you are using the virt-manager GUI tool or virsh CLI.
Listing VMs
You first need to know how to list the existing VMs on your system. To do so, run the below command.
virsh list --all
As you can see below, there are currently two VMs. The list also shows each VM’s state.

Shutting Down VMs
The next thing you would want to do is to shut down a VM when you no longer need them running.
To gracefully shut down a VM, run the virsh shutdown command followed by the VM name. For example, run the below command to shut down the Fedora02 VM.
virsh shutdown Fedora02

The guest operating system running inside the VM can be unresponsive, and you can not even restart it from the virsh CLI. In such cases, run the virsh destroy command to stop the VM forcefully.
virsh destroy Fedora02

Starting a VM
When you need to start the VM again, run the virsh start command followed by the VM name. The below example will start up Fedora02.
virsh start Fedora02

Deleting a VM
When you no longer need a VM, you can delete it to free up resources on your system.
-
First, stop the VM instance. You cannot delete a VM that is running.
virsh destroy Fedora02
-
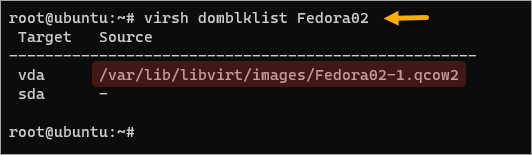
Get the VM’s associated storage. This example gets the storage list for Fedora02.
virsh domblklist Fedora02
Copy the Source value of the storage to delete.
-
Now, run the below command to delete the VM and its disk image. The virsh undefine deletes the VM, and the –storage option accepts the comma-separated list of storage to remove.
virsh undefine Fedora02 --storage /var/lib/libvirt/images/Fedora02-1.qcow2

🔚