Target use cases
FlexboxLayout is not a replacement for the existing layouts (such as LinearLayout and RelativeLayout). It offers another option to achieve a particular design more easily than other existing layouts. This page introduces some of those where using the FlexboxLayout is more beneficial.
Imagine you want to place items in a grid, but each item has different size and you want to reflow items to avoid overflowing its parent. Like the example explained in the Grid - Full-width vs Centered in the Material design guide lines.
With FlexboxLayout, you can achieve the following grid with a single layout file.
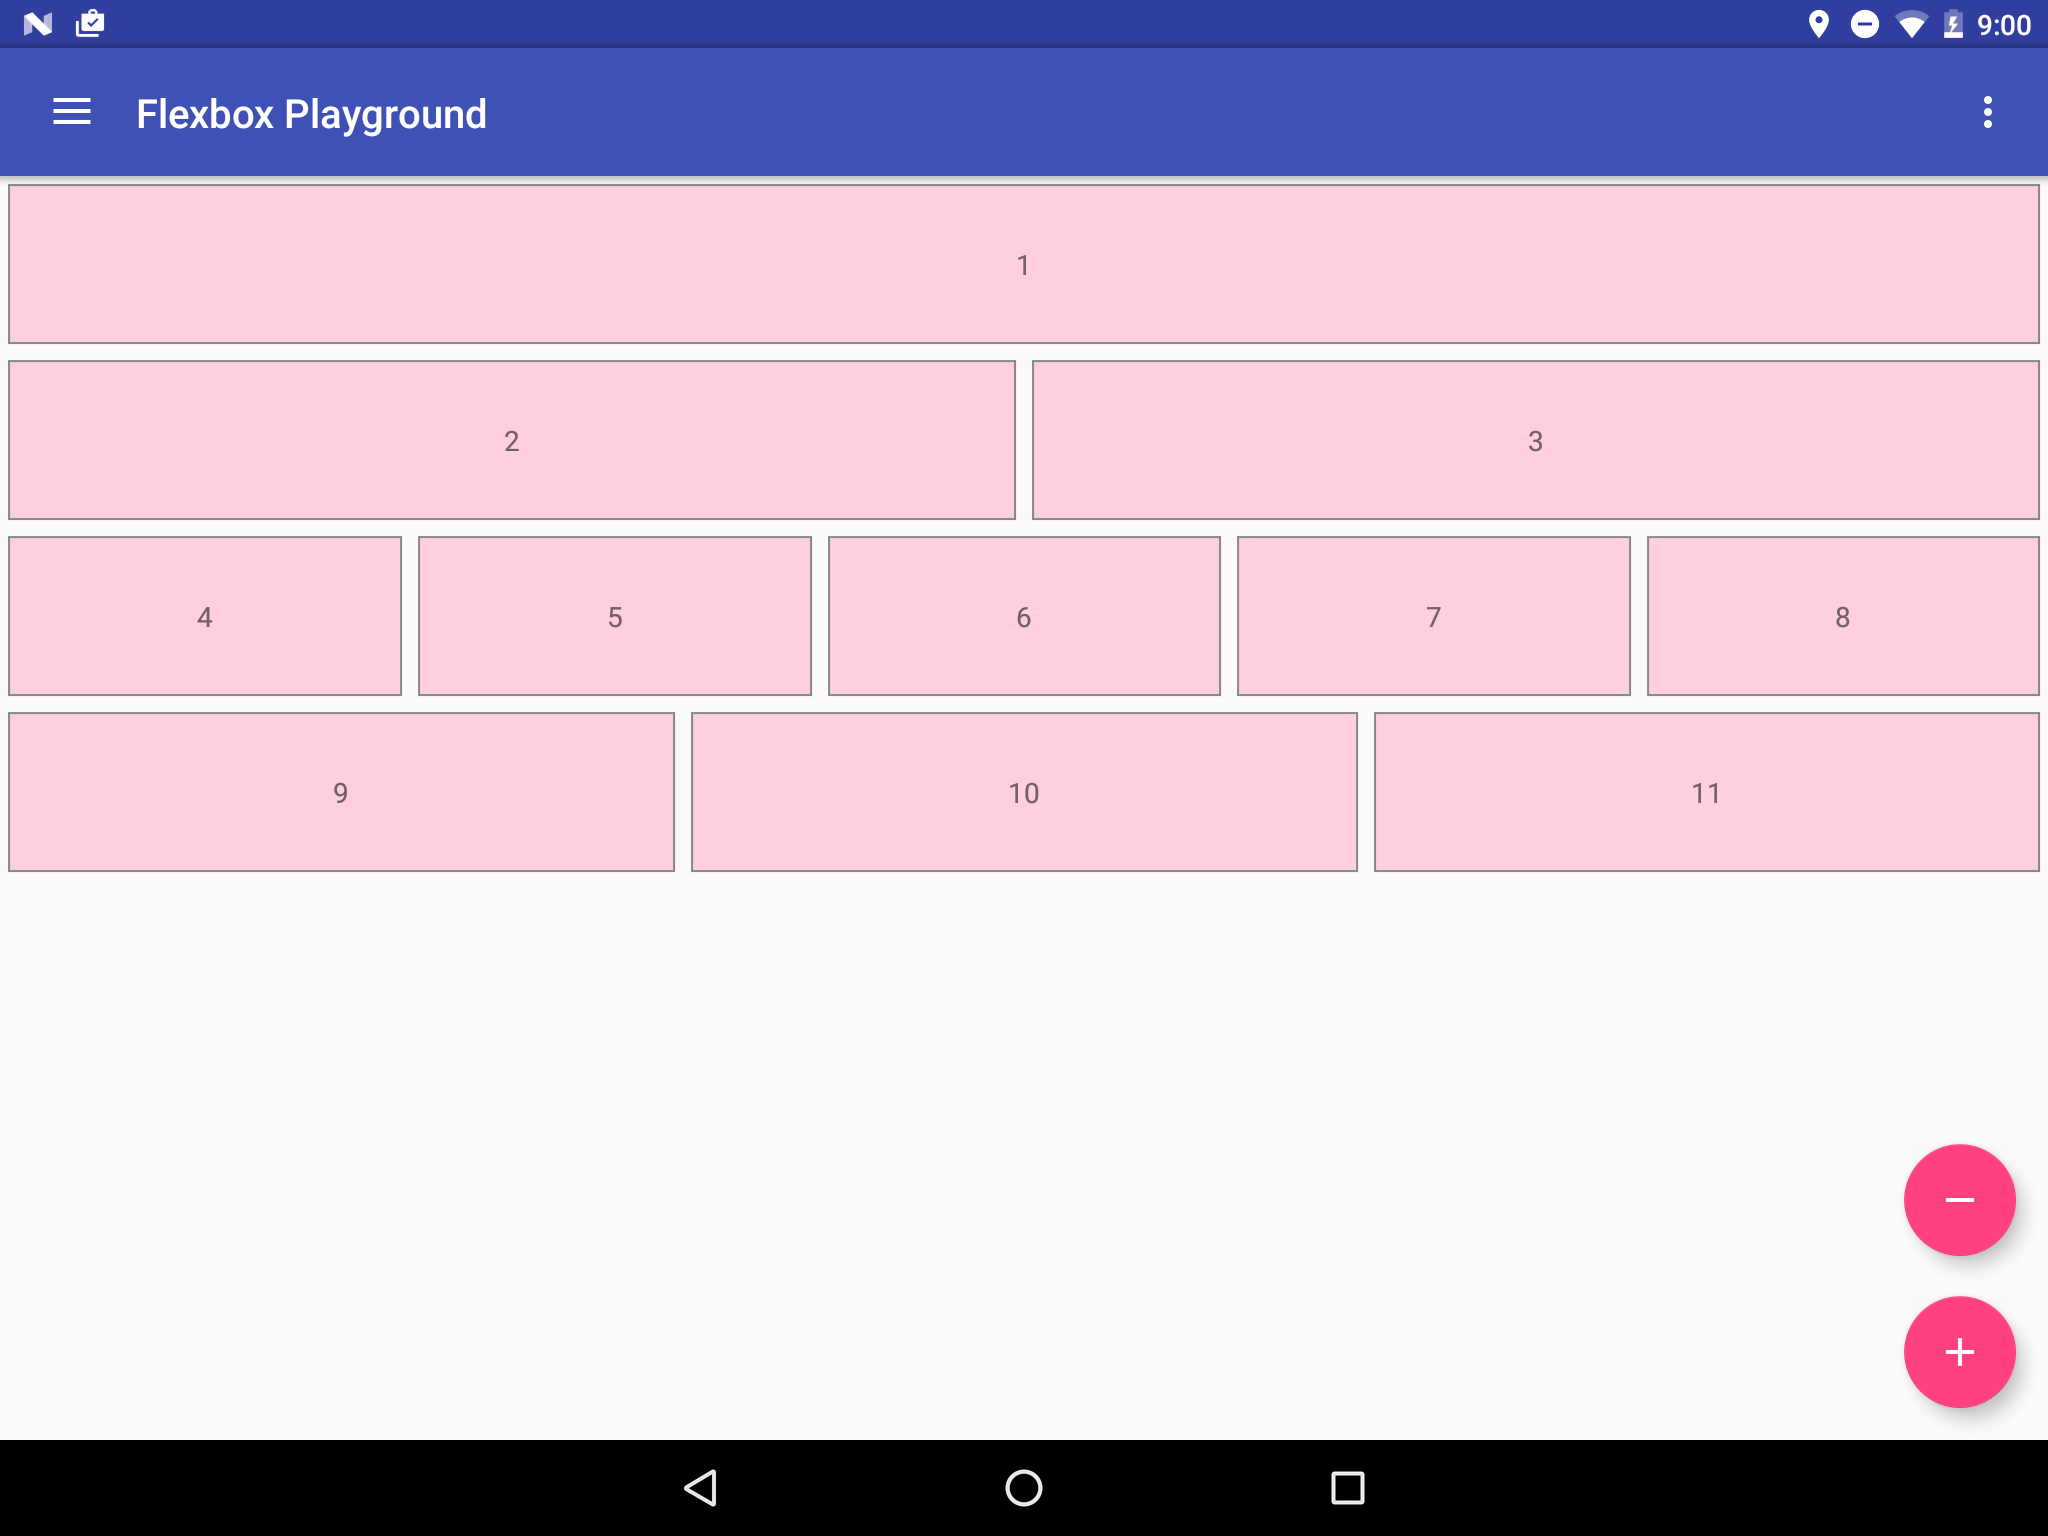
The layout file for the grid above looks like:
<com.google.android.flexbox.FlexboxLayout
    xmlns:android="http://schemas.android.com/apk/res/android"
    xmlns:app="http://schemas.android.com/apk/res-auto"
    android:layout_width="match_parent"
    android:layout_height="match_parent"
    app:flexWrap="wrap"
    app:alignItems="flex_start"
    app:alignContent="flex_start" >

    <TextView
        android:layout_width="800dp"
        android:layout_height="80dp"
        android:text="1"
        style="@style/FlexItem"
        app:layout_flexGrow="1" />

    <TextView
        android:layout_width="180dp"
        android:layout_height="80dp"
        android:text="2"
        style="@style/FlexItem"
        app:layout_flexGrow="1"
        app:layout_flexBasisPercent="45%" />

    <TextView
        android:layout_width="180dp"
        android:layout_height="80dp"
        android:text="3"
        style="@style/FlexItem"
        app:layout_flexGrow="1"
        app:layout_flexBasisPercent="45%" />

    <TextView
        android:layout_width="180dp"
        android:layout_height="80dp"
        android:text="4"
        style="@style/FlexItem"
        app:layout_flexGrow="1" />

    <TextView
        android:layout_width="180dp"
        android:layout_height="80dp"
        android:text="5"
        style="@style/FlexItem"
        app:layout_flexGrow="1" />

    <TextView
        android:layout_width="180dp"
        android:layout_height="80dp"
        android:text="6"
        style="@style/FlexItem"
        app:layout_flexGrow="1" />

    <TextView
        android:layout_width="180dp"
        android:layout_height="80dp"
        android:text="7"
        style="@style/FlexItem"
        app:layout_flexGrow="1" />

    <TextView
        android:layout_width="180dp"
        android:layout_height="80dp"
        android:text="8"
        style="@style/FlexItem"
        app:layout_flexGrow="1" />

    <TextView
        android:layout_width="180dp"
        android:layout_height="80dp"
        android:text="9"
        style="@style/FlexItem"
        app:layout_flexGrow="1" />

    <TextView
        android:layout_width="180dp"
        android:layout_height="80dp"
        android:text="10"
        style="@style/FlexItem"
        app:layout_flexGrow="1" />

    <TextView
        android:layout_width="180dp"
        android:layout_height="80dp"
        android:text="11"
        style="@style/FlexItem"
        app:layout_flexGrow="1" />
</com.google.android.flexbox.FlexboxLayout>Looking at the flexDirection attribute, you can find row is set as the flexDirection attribute (Actually it's not set, so the default value is used).
Also you can find wrap is set for the flexWrap attribute.
Thus, the direction of the main axis is determined as from left to right (in LTR languages) and the flex container is multi-line. Then, the FlexboxLayout tries to collect each TextView one by one until the first time that the next collected item would not fit into the FlexboxLayout's width.
As for the initial length of each flex item (TextView in this case) along the main axis, the dimension set to layout_width is used. (For the second and third TextViews the calculated values using the layout_flexBasisPercent attributes are used).
After all TextViews are collected, by looking at the layout_flexGrow attribute, you can find 1 is set for all TextViews.
So each item tries to expand if positive free space is given for each flex line.
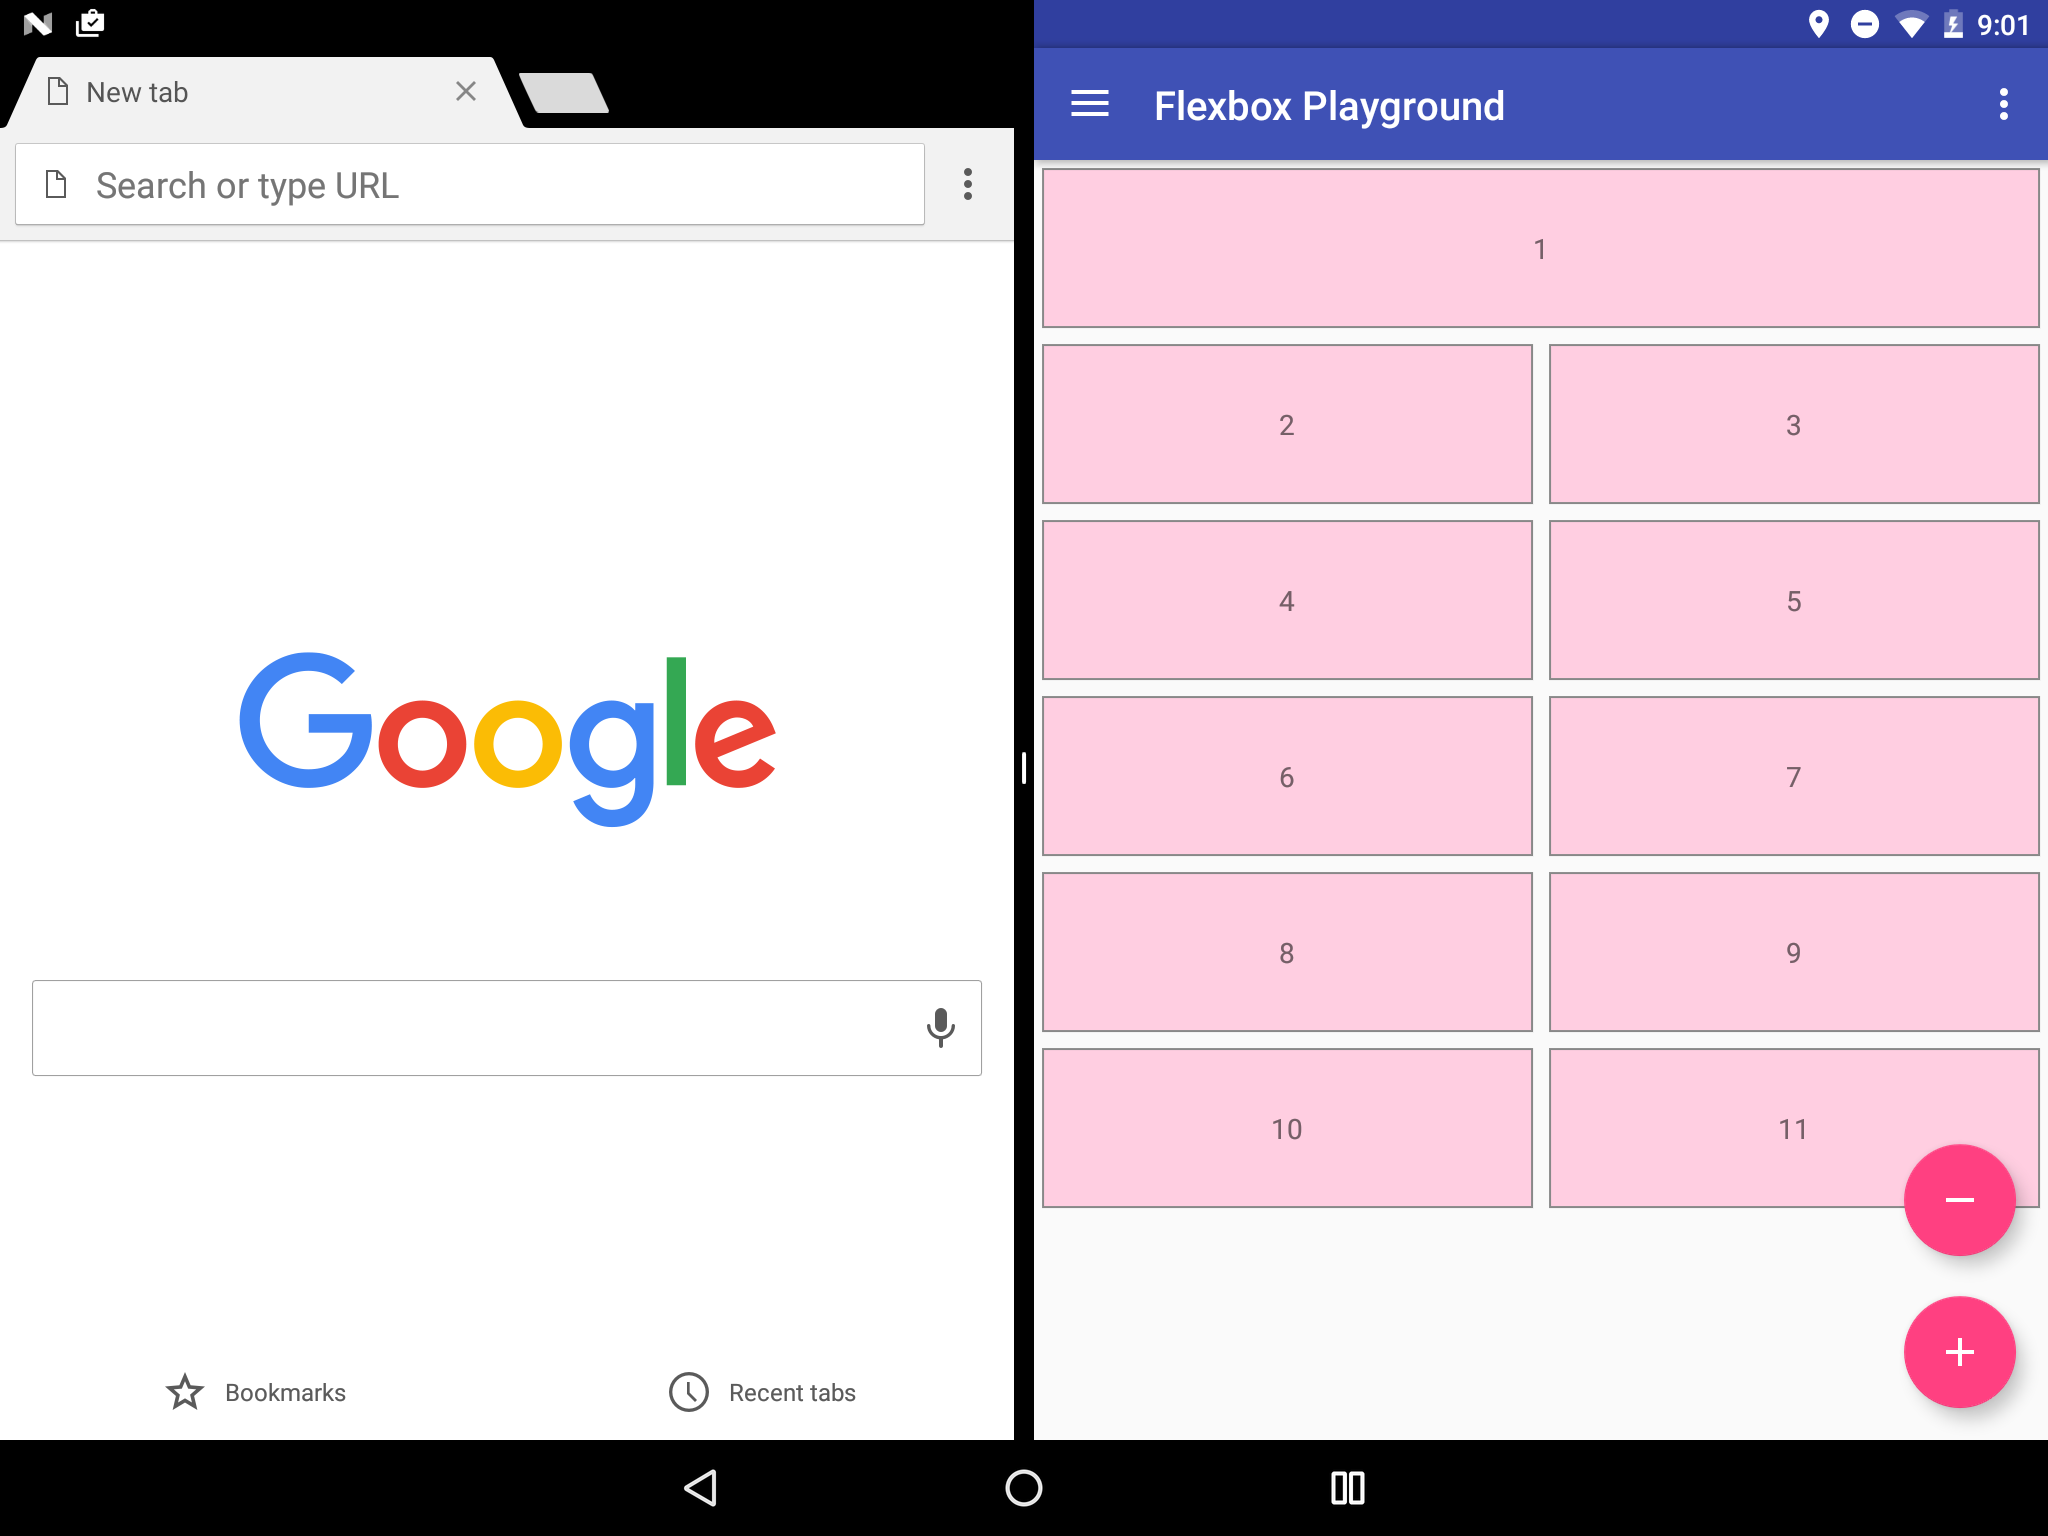
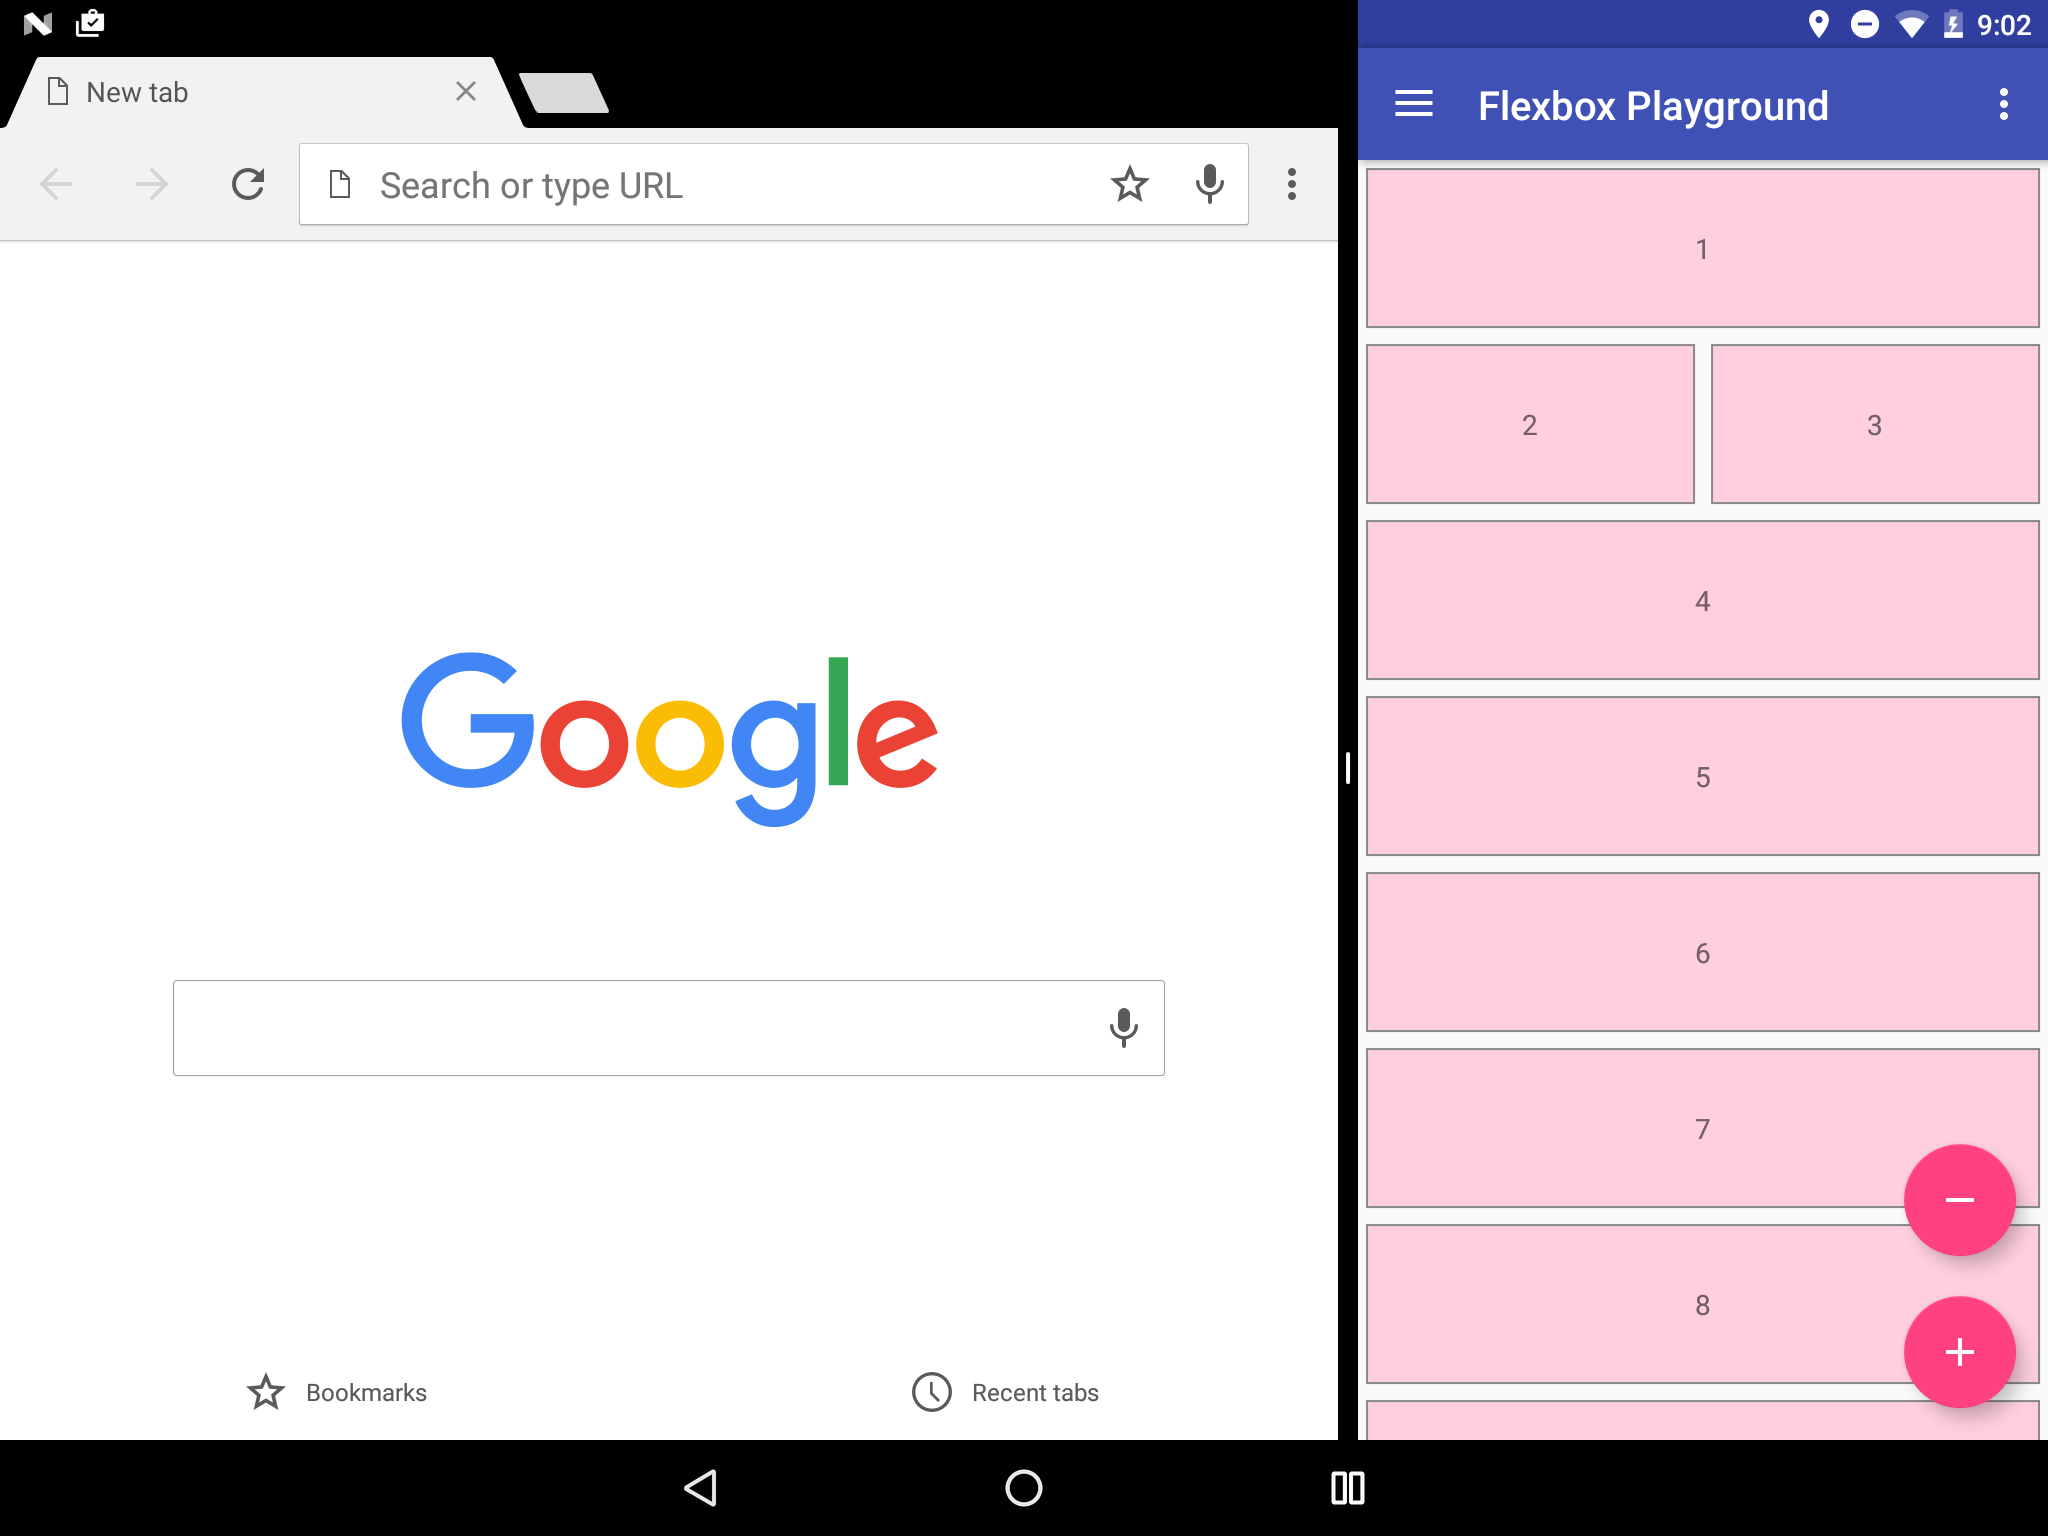
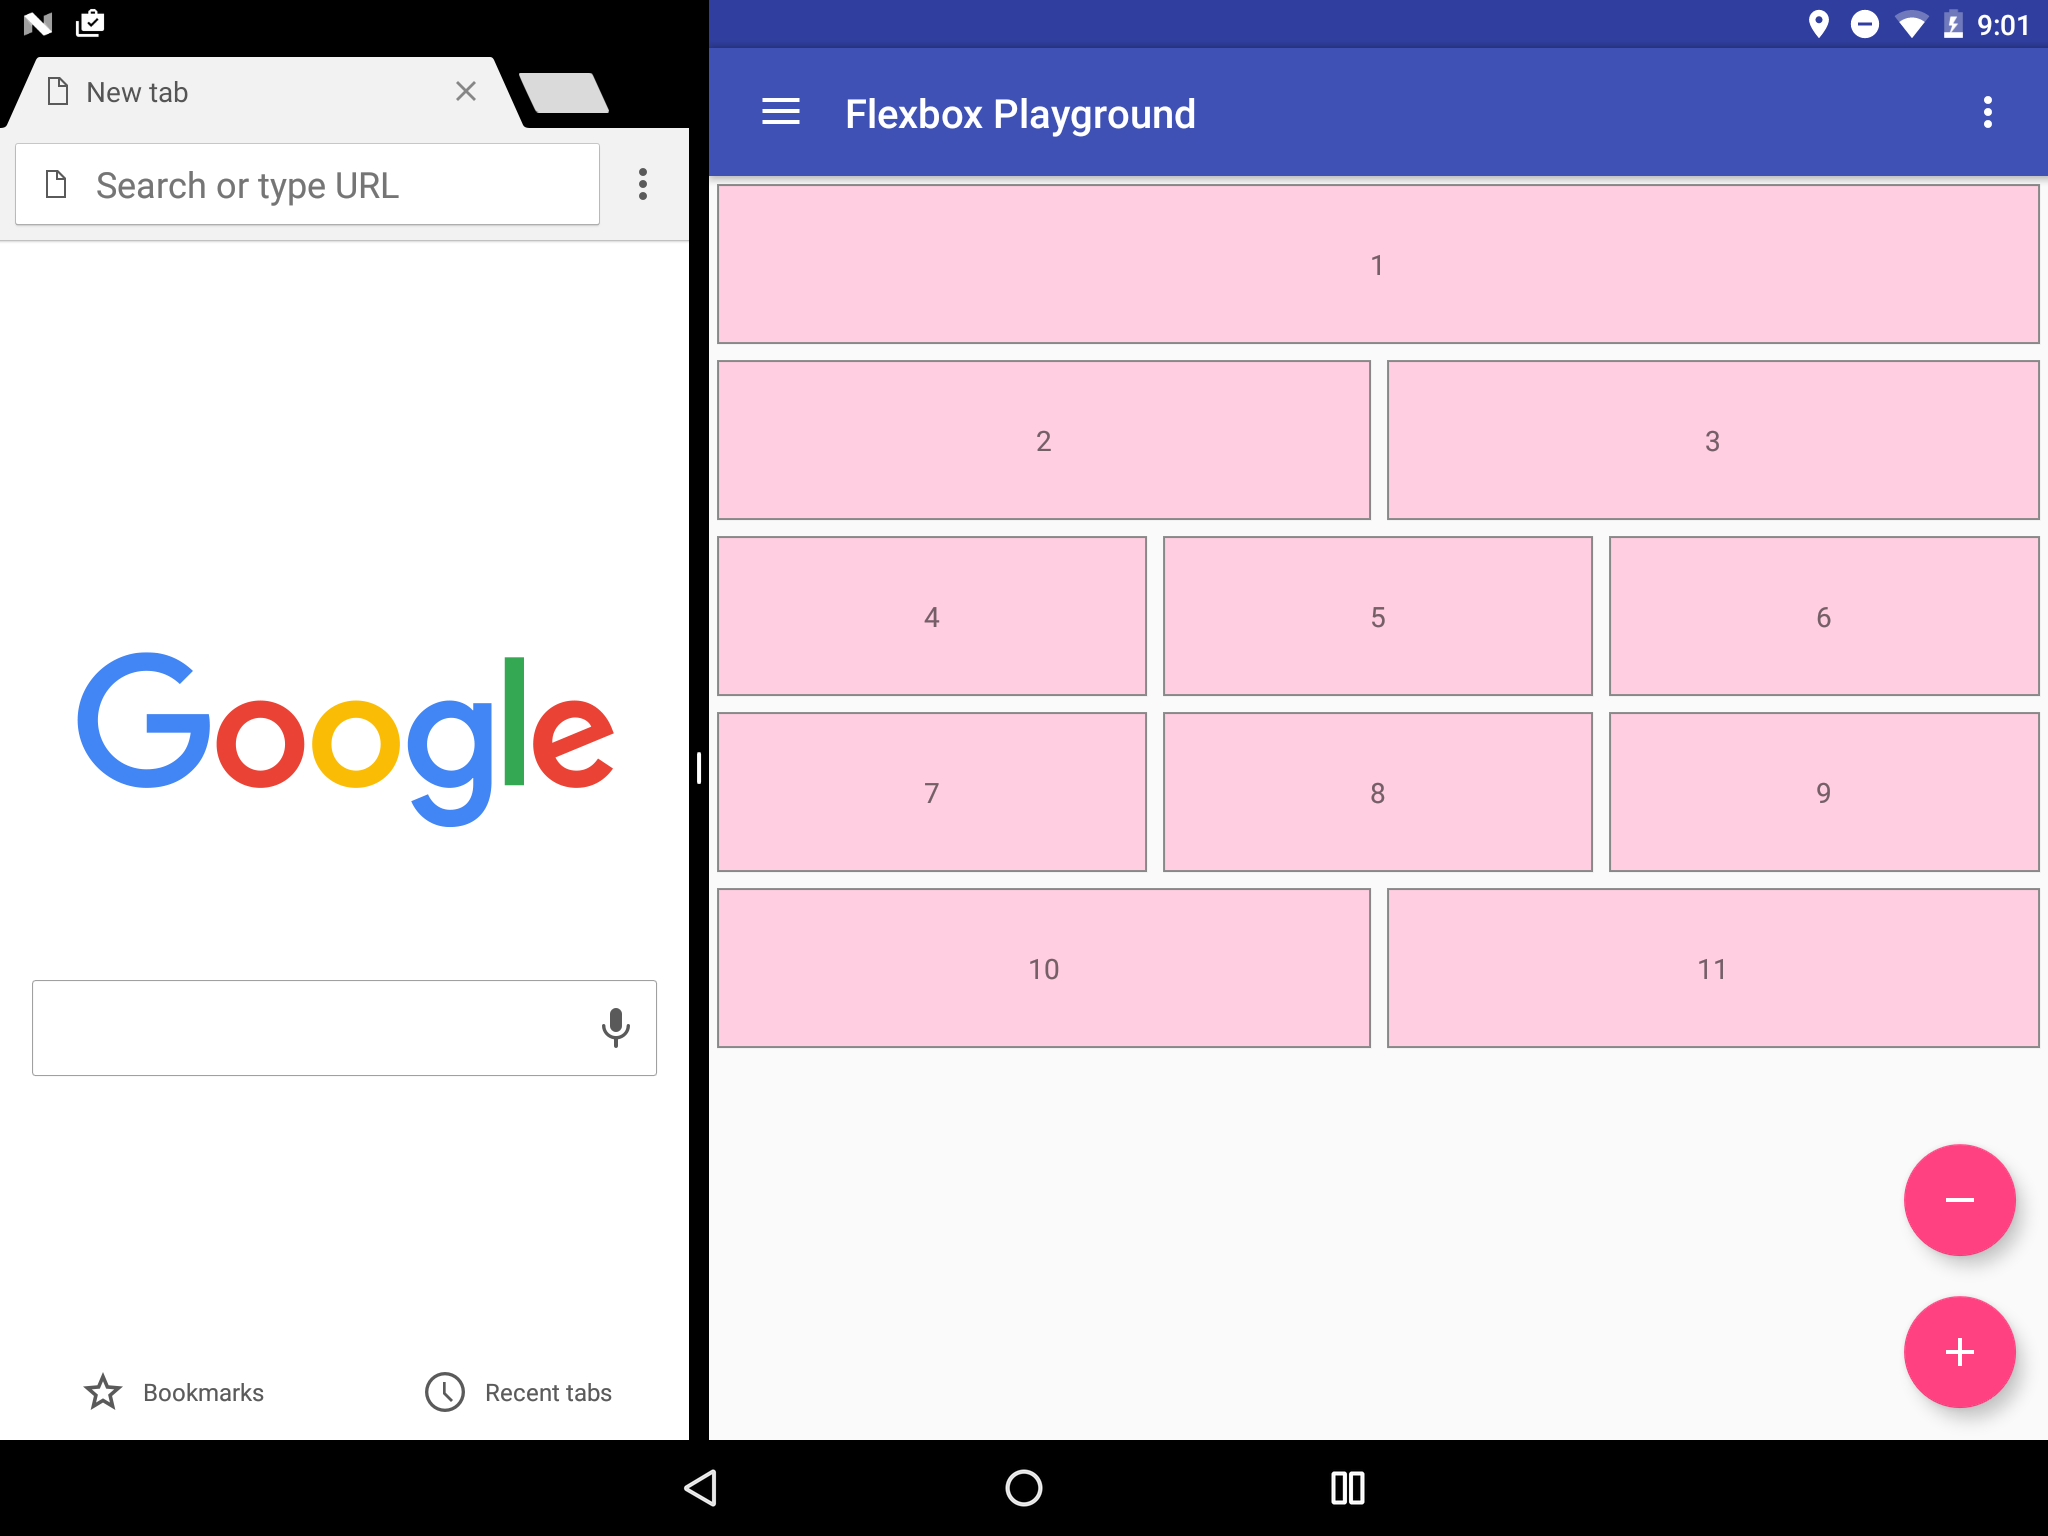
The example above uses split screens to test the FlexboxLayout under various screen width, but exactly the same behavior applies to the situation where the app runs on various devices (including phones, tablets) and orientations (portlait, landscape).
Note: Making Putting hundreds of items in the FlexboxLayout and make it scrollable (wrapped with a ScrollView) is not recommended. Because The FlexboxLayout is implemented as a subclass of the ViewGroup, thus view recycling is not considered in that case. In that situation, a new class as a subclass of the RecyclerView.LayoutManager is more effecient as in the issue #2