-
-
Notifications
You must be signed in to change notification settings - Fork 1.3k
Broadcasting With Obs
OBS Studio is free and open source software for video recording and live streaming, available on Windows, Linux and Mac.
Installing on Windows
The Windows release of OBS Studio supports Windows 8, 8.1 and 10. The installation is done via the usuall windows installer.
Installing on Linux
The Linux release is available officially for Ubuntu 18.04 and newer. FFmpeg is required.
sudo apt install ffmpeg
After installing FFmpeg, install OBS Studio using:
sudo add-apt-repository ppa:obsproject/obs-studio
sudo apt install obs-studio
You can find more information about building and installing OBS Studio on other Linux distros here.
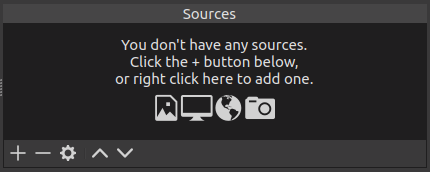
When you first start OBS Studio, a default scene will be created and there will be also no sources setup as shown here:

One scene you could create is by inserting a picture or a screencast from Mixxx.
- If you want to insert a picture, just click on the "+" and select "Image".
- If you want to insert a screencast, just click on the "+" and select "Screen Capture"
Do not forget to also insert the audio input from Mixxx by clicking on the "+" and selecting audio input.
A scene could look like this:

OBS Studio is able to stream to a lot of services, but also stream to a local rtmp server or just make a file output.
Settings -> Output
Here you can find and adjust the settings if you are recording or "streaming" to an rtmp server. Using nginx with rtmp should make it possible to setup this quite easily.
If you use docker, Tiangolo has provided an image with a ready-made solution for a server with rtmp module - tiangolo/nginx-rtmp
Settings -> Video
Here you can make basic settings about the canvas (your scene) and the fps.
Mixxx is a free and open-source DJ software.
Manual
Hardware Compatibility
Reporting Bugs
Getting Involved
Contribution Guidelines
Coding Guidelines
Using Git
Developer Guide
Creating Skins
Contributing Mappings
Mixxx Controls
MIDI Scripting
Components JS
HID Scripting
