-
-
Notifications
You must be signed in to change notification settings - Fork 1.3k
Vestax Vci 400
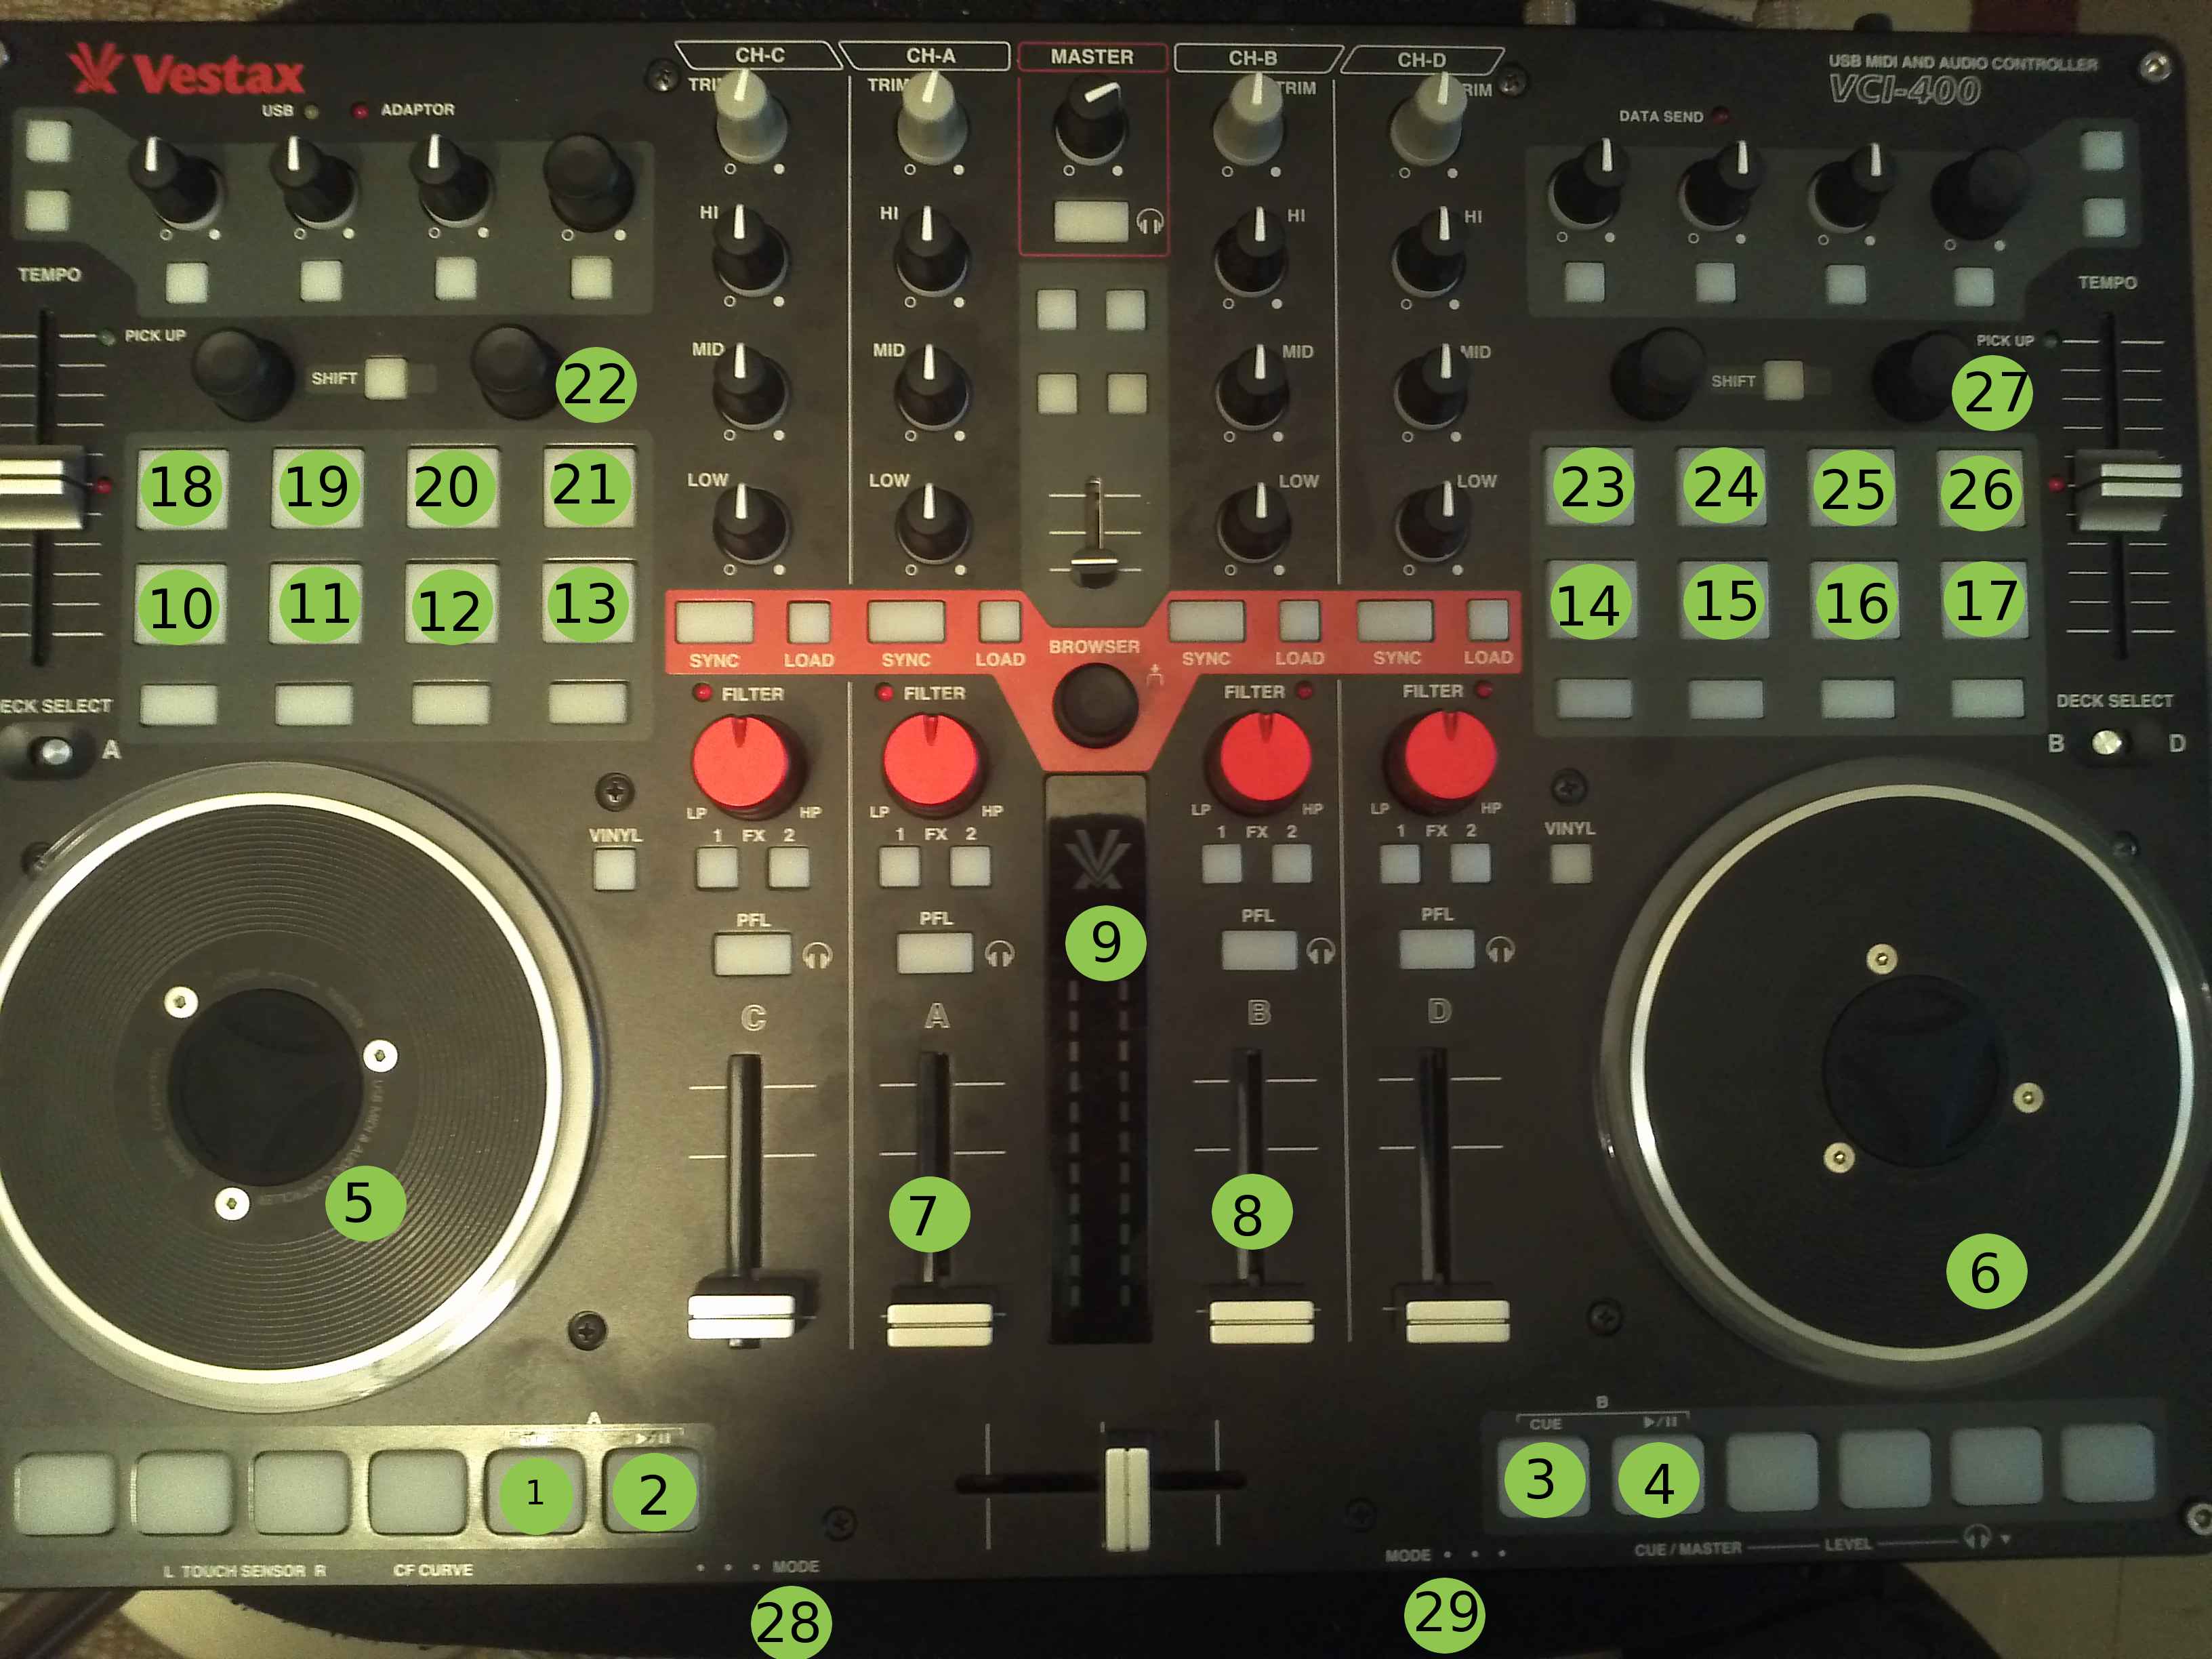
The Vestax VCI-400 is a professional midi controller. It has an integrated sound interface providing various inputs and outputs. A detailed overview of the controller can be found here.
Mixxx supports the VCI-400 from version 1.10 onwards. Please note that only version 1.11 and up support the device out of the box. For version 1.10 the mapping files can be donwloaded from here.

The VCI-400 has not been designed for a particular DJ software. Depending on the software there are buttons and knobs having different functions assigned. Vestax provides overlays for Traktor, Serato, Virtual DJ. Currenlty, the VCI-400 mapping of Mixxx is based on the Traktor overlay.
The numbers in the picture above that are surrounded by the green circles visualize the mapped controls. Please note that you must set the MODE switch (control #28 and #29) to the right position, otherwise, the CUE and PLAY buttons will not work.
The device has been mapped as follows:
- CUE button for channel A
- PLAY button for channel A
- CUE button for channel B
- PLAY button for channel B
- Jog Wheel for channel A used for scratching or pitch bend depending on the VINYL button LED)
- Jog Wheel for channel B used for scratching or pitch bend depending on the VINYL button LED)
- VOLUME fader for channel A
- Volume fader for channel B
- VU meters of the master output
- Setting or activating HOT CUE 1 on channel A. To delete the HOT CUE 1, press the button directly below.
- Setting or activating HOT CUE 2 on channel A. To delete the HOT CUE 2, press the button directly below.
- Setting or activating HOT CUE 3 on channel A. To delete the HOT CUE 3, press the button directly below.
- Setting or activating HOT CUE 4 on channel A. To delete the HOT CUE 4, press the button directly below.
- Setting or activating HOT CUE 1 on channel B. To delete the HOT CUE 1, press the button directly below.
- Setting or activating HOT CUE 2 on channel B. To delete the HOT CUE 2, press the button directly below.
- Setting or activating HOT CUE 3 on channel B. To delete the HOT CUE 3, press the button directly below.
- Setting or activating HOT CUE 4 on channel B. To delete the HOT CUE 4, press the button directly below.
Mixxx is a free and open-source DJ software.
Manual
Hardware Compatibility
Reporting Bugs
Getting Involved
Contribution Guidelines
Coding Guidelines
Using Git
Developer Guide
Creating Skins
Contributing Mappings
Mixxx Controls
MIDI Scripting
Components JS
HID Scripting
