This document contains a few guides for solving common problems, and describes some more specific use-cases.
First, checkout the branch locally. If it's a GitHub PR, you can use
gh to do this:
$ gh pr checkout {PR_ID}Now, run a symmetric diff against the base branch:
:DiffviewOpen origin/HEAD...HEAD --imply-localThe symmetric difference rev range (triple dot) will here compare the changes on
the current branch (the PR branch) against its merge-base in origin/HEAD. This
is different from comparing directly against origin/HEAD if the branches have
diverged, and is usually what you want when comparing changes in a PR. For more
info see the section on "SPECIFYING REVISIONS" in man git-rev-parse(1).
The --imply-local flag option will here make diffview.nvim show the working
tree versions1 of the changed files on the right side of the diff. This means
that if you have tools such as LSP set up, it will work for all the diff buffers
on the right side, giving you access to LSP features - such as diagnostics and
references - that can be useful while reviewing changes.
If you want the plugin to always use this option, you can add it to your default args:
default_args = {
  DiffviewOpen = { "--imply-local" },
}
From the file panel you can press L to open the commit log for all the
changes. This lets you check the full commit messages for all the commits
involved.

NOTE: If Git complains
fatal: Not a valid object name origin/HEADthen it likely means that your local origin remote doesn't have a default branch configured. You can have Git automatically query your remote and detect its default branch like this:git remote set-head -a origin
If you're reviewing a big PR composed of many commits, you might prefer to
review the changes introduced in each of those commits individually. To do
this, you can use :DiffviewFileHistory:
:DiffviewFileHistory --range=origin/HEAD...HEAD --right-only --no-mergesHere we are again using a symmetric difference range. However, symdiff ranges
have different behavior between git-diff and git-log. Whereas in git-diff
it compares against the merge-base, here it will select only the commits that
are reachable from either origin/HEAD or HEAD, but not from both (in
other words, it's actually performing a symmetric difference here).
We then use the cherry-pick option --right-only to limit the commits to only
those on the right side of the symmetric difference. Finally --no-merges
filters out merge commits. We are left with a list of all the non-merge commits
from the PR branch.

The latest Git stash is always stored in the reference refs/stash. We can
find all the stashes by traversing the reflog for this reference. This can be
achieved with the flag option --walk-reflogs (or it's short form -g). The
following command will list all stashes in the file history panel:
:DiffviewFileHistory -g --range=stashCreating commits from within nvim is a solved problem, and as such diffview.nvim does not reinvent the wheel here. Here are a few different ways in which you can create a new commit from within the editor:
Diffview.nvim is not, and does not try to be a complete git wrapper. As such, there are a number of features offered by such plugins that won't ever be implemented here, because they are deemed out-of-scope. It's therefore recommended to use some form of a Git wrapper plugin in order to get a more complete integration of Git's features into your editor. Here are a few options:
Example creating some vim-fugitive mappings for committing staged changes
from the file panel:
keymaps = {
  file_panel = {
    {
      "n", "cc",
      "<Cmd>Git commit <bar> wincmd J<CR>",
      { desc = "Commit staged changes" },
    },
    {
      "n", "ca",
      "<Cmd>Git commit --amend <bar> wincmd J<CR>",
      { desc = "Amend the last commit" },
    },
    {
      "n", "c<space>",
      ":Git commit ",
      { desc = "Populate command line with \":Git commit \"" },
    },
  },
}
Use neovim-remote
neovim-remote is a more complete version of the builtin :h clientserver.
Notably it implements all the :h clientserver-missing functionality. Hopefully
this functionality will be implemented in core at some point in the future. But
until then this separate application is needed to get the --{...}-wait
variants of the remote options.
With the remote installed you can simply configure your $GIT_EDITOR
environment variable from within the editor such that when the Git editor is
invoked, it will open in a new split inside the current editor session. This
avoids the problem of spawning nested nvim instances every time an $EDITOR is
invoked. Put this somewhere in your init.lua:
if vim.fn.executable("nvr") == 1 then
  local nvr = "nvr --servername " .. vim.v.servername .. " "
  vim.env.GIT_EDITOR = nvr .. "-cc split +'setl bh=delete' --remote-wait"
  vim.env.EDITOR = nvr .. "-l --remote" -- (Optional)
  vim.env.VISUAL = nvr .. "-l --remote" -- (Optional)
end
Example creating some mappings for committing staged changes from the file
panel, that will trigger nvr:
keymaps = {
  file_panel = {
    {
      "n", "cc",
      [[<Cmd>call jobstart(["git", "commit"]) | au BufWinEnter * ++once wincmd J<CR>]],
      { desc = "Commit staged changes" },
    },
    {
      "n", "ca",
      [[<Cmd>call jobstart(["git", "commit", "--amend"]) | au BufWinEnter * ++once wincmd J<CR>]],
      { desc = "Amend the last commit" },
    },
  },
}The :h :terminal command allows you to run interactive terminal jobs. However,
unlike the previously discussed neovim-remote solution
this will spawn nested instances of nvim.
Example creating some :terminal mappings for committing staged changes from
the file panel:
keymaps = {
  file_panel = {
    {
      "n", "cc",
      "<Cmd>sp <bar> wincmd J <bar> term git commit<CR>",
      { desc = "Commit staged changes" },
    },
    {
      "n", "ca",
      "<Cmd>sp <bar> wincmd J <bar> term git commit -amend<CR>",
      { desc = "Amend the last commit" },
    },
  },
}This example shows how to use the Neovim builtin vim.ui.input() to create a
simple input prompt, and create a new commit with the user's given message.
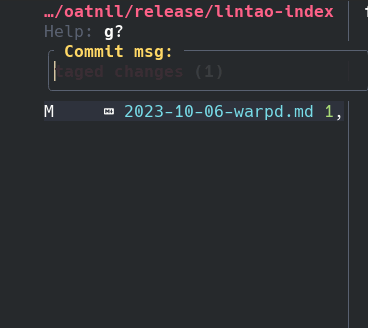
For Neovim ≥ v0.10:
keymaps = {
  file_panel = {
    {
      "n", "cc",
      function()
        vim.ui.input({ prompt = "Commit message: " }, function(msg)
          if not msg then return end
          local results = vim.system({ "git", "commit", "-m", msg }, { text = true }):wait()

          if results.code ~= 0 then
            vim.notify(
              "Commit failed with the message: \n"
                .. vim.trim(results.stdout .. "\n" .. results.stderr),
              vim.log.levels.ERROR,
              { title = "Commit" }
            )
          else
            vim.notify(results.stdout, vim.log.levels.INFO, { title = "Commit" })
          end
        end)
      end,
    },
  },
}
For Neovim ≤ v0.10, use this function in place of vim.system()
--- @class system.Results
--- @field code integer
--- @field stdout string
--- @field stderr string

--- @param cmd string|string[]
--- @return system.Results
local function system(cmd)
  local results = {}

  local function callback(_, data, event)
    if event == "exit" then results.code = data
    elseif event == "stdout" or event == "stderr" then
      results[event] = table.concat(data, "\n")
    end
  end

  vim.fn.jobwait({
    vim.fn.jobstart(cmd, {
      on_exit = callback,
      on_stdout = callback,
      on_stderr = callback,
      stdout_buffered = true,
      stderr_buffered = true,
    })
  })

  return results
endIf you only ever write simple commit messages you could make use of :h !cmd:
:!git commit -m 'some commit message'Footnotes
-
The files as they currently exist on disk. ↩