MMYOLO 中默认的训练图片均为彩色三通道数据,如果希望采用单通道数据集进行训练和测试,预计需要修改的地方包括:
- 所有的图片处理 pipeline 都要支持单通道运算
- 模型的骨干网络的第一个卷积层输入通道需要从 3 改成 1
- 如果希望加载 COCO 预训练权重,则需要处理第一个卷积层权重尺寸不匹配问题
下面以 cat 数据集为例,描述整个修改过程,如果你使用的是自定义灰度图像数据集,你可以跳过数据集预处理这一步。
自定义数据集的处理训练可参照自定义数据集 标注+训练+测试+部署 全流程。
cat 是一个三通道彩色图片数据集,为了方便演示,你可以运行下面的代码和命令,将数据集图片替换为单通道图片,方便后续验证。
1. 下载 cat 数据集进行解压
python tools/misc/download_dataset.py --dataset-name cat --save-dir ./data/cat --unzip --delete2. 将数据集转换为灰度图
import argparse
import imghdr
import os
from typing import List
import cv2

def parse_args():
    parser = argparse.ArgumentParser(description='data_path')
    parser.add_argument('path', type=str, help='Original dataset path')
    return parser.parse_args()

def main():
    args = parse_args()

    path = args.path + '/images/'
    save_path = path
    file_list: List[str] = os.listdir(path)
    # Grayscale conversion of each imager
    for file in file_list:
        if imghdr.what(path + '/' + file) != 'jpeg':
            continue
        img = cv2.imread(path + '/' + file)
        img = cv2.cvtColor(img, cv2.COLOR_BGR2GRAY)
        cv2.imwrite(save_path + '/' + file, img)

if __name__ == '__main__':
    main()
将上述脚本命名为 cvt_single_channel.py, 运行命令为:
python cvt_single_channel.py data/cat目前 MMYOLO 的一些图像处理函数例如颜色空间变换还不兼容单通道图片,如果直接采用单通道数据训练需要修改部分 pipeline,工作量较大。为了解决不兼容问题,推荐的做法是将单通道图片作为采用三通道图片方式读取将其加载为三通道数据,但是在输入到网络前将其转换为单通道格式。这种做法会稍微增加一些运算负担,但是用户基本不需要修改代码即可使用。
以 projects/misc/custom_dataset/yolov5_s-v61_syncbn_fast_1xb32-100e_cat.py为 base 配置,将其复制到 configs/yolov5 目录下,在同级配置路径下新增 yolov5_s-v61_syncbn_fast_1xb32-100e_cat_single_channel.py 文件。 我们可以 mmyolo/models/data_preprocessors/data_preprocessor.py 文件中继承 YOLOv5DetDataPreprocessor 并命名新类为 YOLOv5SCDetDataPreprocessor, 在其中将图片转成单通道,添加依赖库并在mmyolo/models/data_preprocessors/__init__.py中注册新类。 YOLOv5SCDetDataPreprocessor 示例代码为:
@MODELS.register_module()
class YOLOv5SCDetDataPreprocessor(YOLOv5DetDataPreprocessor):
    """Rewrite collate_fn to get faster training speed.

    Note: It must be used together with `mmyolo.datasets.utils.yolov5_collate`
    """

    def forward(self, data: dict, training: bool = False) -> dict:
        """Perform normalization, padding, bgr2rgb conversion and convert to single channel image based on ``DetDataPreprocessor``.

        Args:
            data (dict): Data sampled from dataloader.
            training (bool): Whether to enable training time augmentation.

        Returns:
            dict: Data in the same format as the model input.
        """
        if not training:
            return super().forward(data, training)

        data = self.cast_data(data)
        inputs, data_samples = data['inputs'], data['data_samples']
        assert isinstance(data['data_samples'], dict)

        # TODO: Supports multi-scale training
        if self._channel_conversion and inputs.shape[1] == 3:
            inputs = inputs[:, [2, 1, 0], ...]

        if self._enable_normalize:
            inputs = (inputs - self.mean) / self.std

        if self.batch_augments is not None:
            for batch_aug in self.batch_augments:
                inputs, data_samples = batch_aug(inputs, data_samples)

        img_metas = [{'batch_input_shape': inputs.shape[2:]}] * len(inputs)
        data_samples = {
            'bboxes_labels': data_samples['bboxes_labels'],
            'img_metas': img_metas
        }

        # Convert to single channel image
        inputs = inputs.mean(dim=1, keepdim=True)

        return {'inputs': inputs, 'data_samples': data_samples}
此时 yolov5_s-v61_syncbn_fast_1xb32-100e_cat_single_channel.py配置文件内容为如下所示:
_base_ = 'yolov5_s-v61_syncbn_fast_1xb32-100e_cat.py'

_base_.model.data_preprocessor.type = 'YOLOv5SCDetDataPreprocessor'直接使用原三通道的预训练模型,理论上会导致精度有所降低(未实验验证)。可采用的解决思路:将输入层 3 通道每个通道的权重调整为原 3 通道权重的平均值, 或将输入层每个通道的权重调整为原3通道某一通道权重,也可以对输入层权重不做修改直接训练,具体效果根据实际情况有所不同。这里采用将输入层 3 个通道权重调整为预训练 3 通道权重平均值的方式。
import torch

def main():
    # 加载权重文件
    state_dict = torch.load(
        'checkpoints/yolov5_s-v61_syncbn_fast_8xb16-300e_coco_20220918_084700-86e02187.pth'
    )

    # 修改输入层权重
    weights = state_dict['state_dict']['backbone.stem.conv.weight']
    avg_weight = weights.mean(dim=1, keepdim=True)
    state_dict['state_dict']['backbone.stem.conv.weight'] = avg_weight

    # 保存修改后的权重到新文件
    torch.save(
        state_dict,
        'checkpoints/yolov5_s-v61_syncbn_fast_8xb16-300e_coco_20220918_084700-86e02187_single_channel.pth'
    )

if __name__ == '__main__':
    main()
此时 yolov5_s-v61_syncbn_fast_1xb32-100e_cat_single_channel.py配置文件内容为如下所示:
_base_ = 'yolov5_s-v61_syncbn_fast_1xb32-100e_cat.py'

_base_.model.data_preprocessor.type = 'YOLOv5SCDetDataPreprocessor'

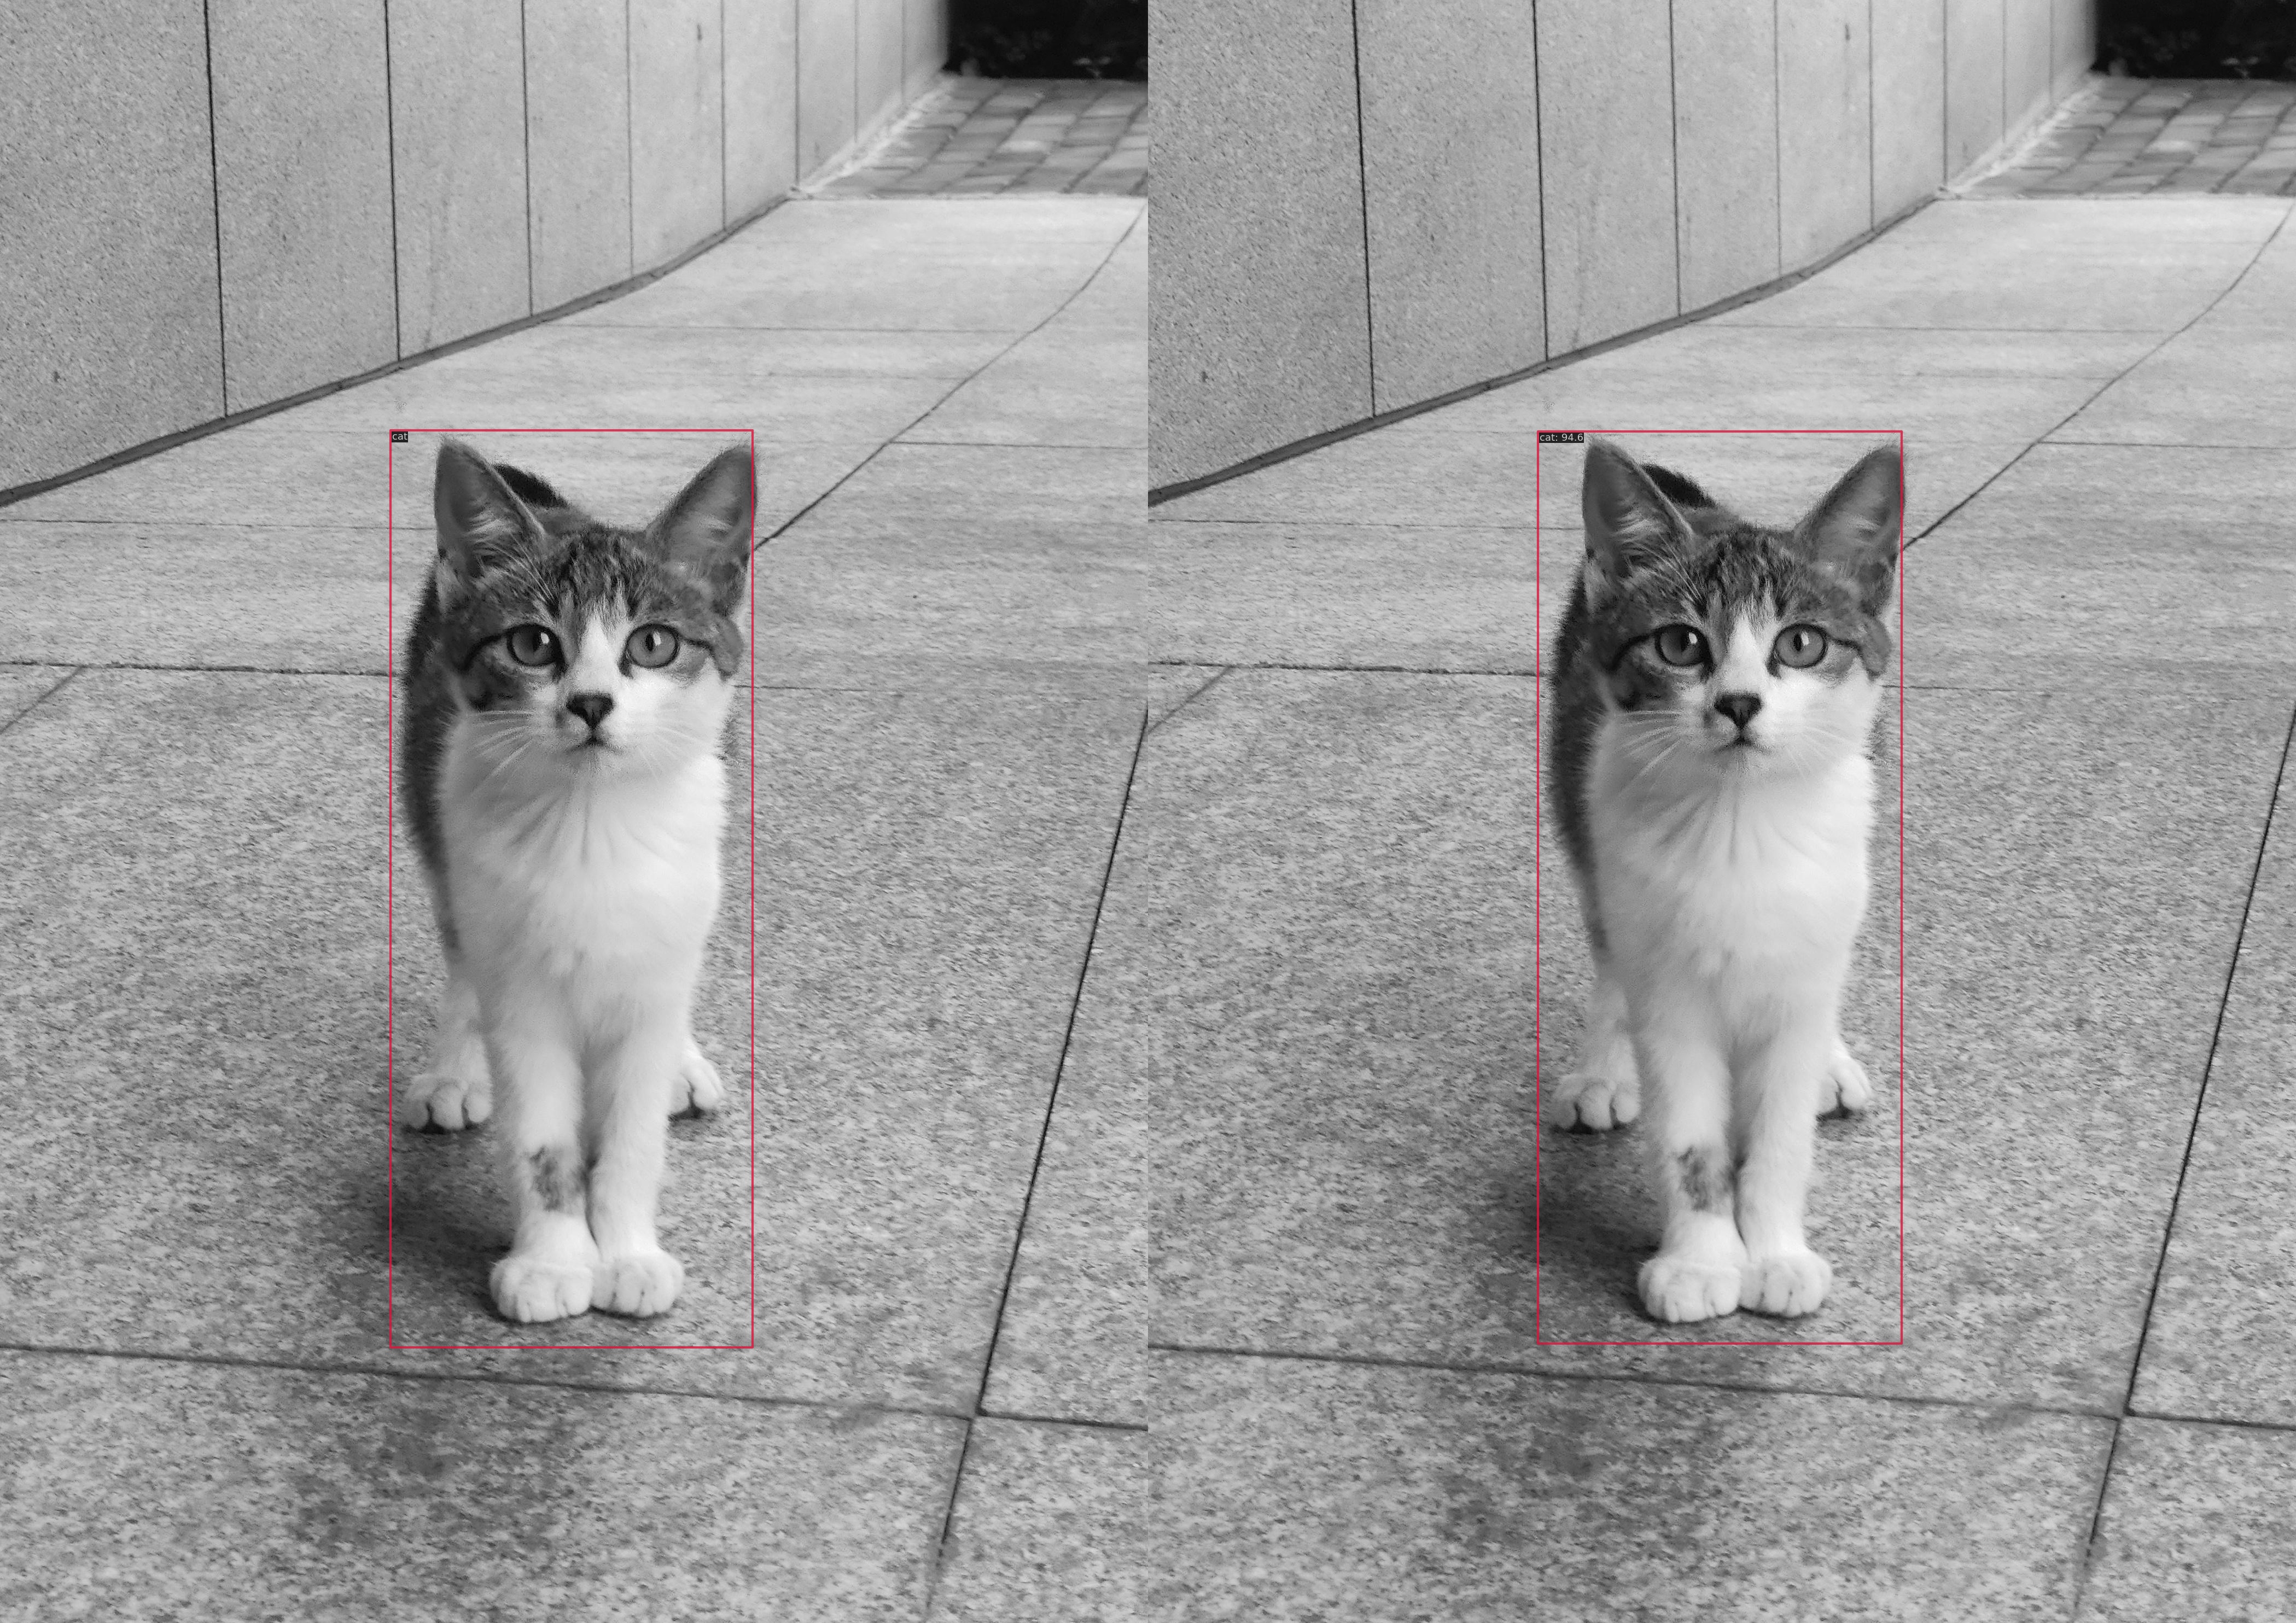
load_from = './checkpoints/yolov5_s-v61_syncbn_fast_8xb16-300e_coco_20220918_084700-86e02187_single_channel.pth'左图是实际标签,右图是目标检测结果。
 Average Precision  (AP) @[ IoU=0.50:0.95 | area=   all | maxDets=100 ] = 0.958
 Average Precision  (AP) @[ IoU=0.50      | area=   all | maxDets=100 ] = 1.000
 Average Precision  (AP) @[ IoU=0.75      | area=   all | maxDets=100 ] = 1.000
 Average Precision  (AP) @[ IoU=0.50:0.95 | area= small | maxDets=100 ] = -1.000
 Average Precision  (AP) @[ IoU=0.50:0.95 | area=medium | maxDets=100 ] = -1.000
 Average Precision  (AP) @[ IoU=0.50:0.95 | area= large | maxDets=100 ] = 0.958
 Average Recall     (AR) @[ IoU=0.50:0.95 | area=   all | maxDets=  1 ] = 0.881
 Average Recall     (AR) @[ IoU=0.50:0.95 | area=   all | maxDets= 10 ] = 0.969
 Average Recall     (AR) @[ IoU=0.50:0.95 | area=   all | maxDets=100 ] = 0.969
 Average Recall     (AR) @[ IoU=0.50:0.95 | area= small | maxDets=100 ] = -1.000
 Average Recall     (AR) @[ IoU=0.50:0.95 | area=medium | maxDets=100 ] = -1.000
 Average Recall     (AR) @[ IoU=0.50:0.95 | area= large | maxDets=100 ] = 0.969
bbox_mAP_copypaste: 0.958 1.000 1.000 -1.000 -1.000 0.958
Epoch(val) [100][116/116] coco/bbox_mAP: 0.9580 coco/bbox_mAP_50: 1.0000 coco/bbox_mAP_75: 1.0000 coco/bbox_mAP_s: -1.0000 coco/bbox_mAP_m: -1.0000 coco/bbox_mAP_l: 0.9580TODO
