A helper tool for deploying CrowdStrike OS Poilcies to GCP Zones. This tool automates many of the manual steps required to create & deploy OS Policies to GCP VMs.
The tool does the following:
- Downloads the N-1 version of the CrowdStrike Falcon Sensor
- Uploads the CrowdStrike Falcon Sensors to the GCP Storage Bucket of your choice
- Generates a OS Policy template for your environment
- Creates a OS Policy Assignment in the GCP Zones of your choice
The CrowdStrike OS Policy currently supports the following operating systems:
| Operating System | Architecture |
|---|---|
| Red Hat Enterprise Linux 7 | x86_64 |
| Red Hat Enterprise Linux 8 | x86_64 |
| Red Hat Enterprise Linux 9 | x86_64 |
| CentOS 7 | x86_64 |
| CentOS 8 | x86_64 |
| SUSE Linux Enterprise Server 12 | x86_64 |
| SUSE Linux Enterprise Server 15 | x86_64 |
| Ubuntu 16.04 | x86_64 |
| Ubuntu 18.04 | x86_64 |
| Ubuntu 20.04 | x86_64 |
| Ubuntu 22.04 | x86_64 |
| Debian 9 | x86_64 |
| Debian 10 | x86_64 |
| Debian 11 | x86_64 |
| Debian 12 | x86_64 |
| All Windows Versions supported by the CrowdStrike Sensor | x86_64 |
Note: For supported Windows versions, check the CrowdStrike documentation.
- CrowdStrike API Keys with the
Sensor Downloadscope - gcloud cli installed
- Project with VM Manager setup
- GCP permissions to create OS Policy Assignments and upload files to the target GCP Storage Bucket
OS Policy is a feature of GCP VM Manager. In order to use OS Policies to deploy the CrowdStrike Falcon Sensor, you must setup VM Manager. See the GCP VM Manager documentation for more information about VM Manager and how to set it up.
-
In the CrowdStrike console, navigate to Support and resources > API Clients & Keys. Click Add new API Client.
-
Add the following api scopes:
Scope Permission Description Sensor Download READ Allows the tool to download the sensor and grab your CID from the CrowdStrike API. -
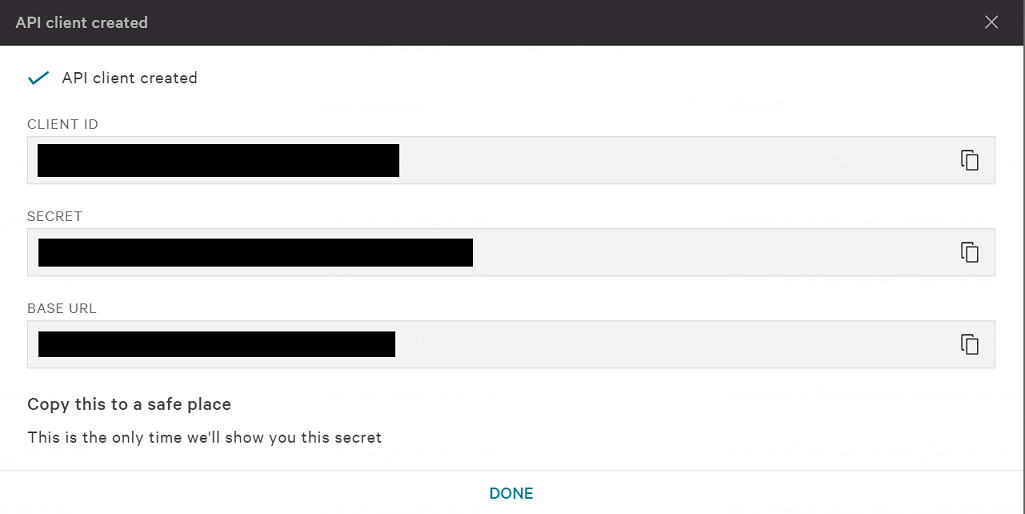
Click Add to create the API client. The next screen will display the API CLIENT ID, SECRET, and BASE URL. You will need all three for the next step.
Important
This page is only shown once. Make sure you copy CLIENT ID, SECRET, and BASE URL to a secure location.
- Use
BASE_URLto infer theFALCON_CLOUDvalue.BASE URL FALCON_CLOUD https://api.crowdstrike.comus-1https://api.us-2.crowdstrike.comus-2https://api.eu-1.crowdstrike.comeu-1https://api.laggar.gcw.crowdstrike.comus-gov-1
Download release binaries that match your platform
-
Authenticate with the gcloud CLI.
gcloud auth application-default login
Note: There are other ways to authenticate with GCP like using a service account. Use whichever method is best for your environment. The
cs-policytool will find the credentials and use them.
-
Set the project to the project you want to deploy the OS Policies to.
gcloud config set project cs-policy -
OPTIONAL: Export the CrowdStrike API keys as environment variables. Alternatively you can provide the keys as command line arguments. See
cs-policy create --helpfor more information.export FALCON_CLIENT_ID=******** export FALCON_CLIENT_SECRET=******** export FALCON_CLOUD=********
Important
FALCON_CLOUD supports the following values autodiscover, us-1, us-2, eu-1, us-gov-1. If not provided, the tool will default to autodiscover.
-
Run the tool.
cs-policy create --bucket=example-bucket --zones=us-central1-a,us-central1-b --linux-install-params='--tags="Washington/DC_USA,Production" --aph=proxy.example.com --app=8080' --windows-install-params='GROUPING_TAGS="Washington/DC_USA,Production" APP_PROXYNAME=proxy.example.com APP_PROXYPORT=8080'
Use the
--helpflag to see all available options and more examples.cs-policy --help

