Lets collect, clean, predict and deploy your data science pipeline on IBM Cloud. As we all know a data science pipeline consists of various steps, which certainly starts with collecting your data from different data sources, then we come to understanding the data making sure that we are able to get meaning out of it and we clean it by managing missing values and normalizing it and then we train and deploy our machine learning model which is followed by getting feedback from the models result and re-evaluating it.
We will use various IBM Services which will aid us to complete our data science pipeline
-
IBM Watson Studio: Analyze data using RStudio, Jupyter and Machine Learning Flow in a configured, collaborative environment that includes IBM value-adds, such as managed Spark.
-
IBM Cloud Object Storage: An IBM Cloud service that provides an unstructured cloud data store to build and deliver cost effective apps and services with high reliability and fast speed to market. This code pattern uses Cloud Object Storage.
-
IBM Data Refinery: A part of the Watson Data Platform integrated environment and is a self-service data preparation client for data scientists, data engineers, and business analysts. It can transform large amounts of raw data into consumable, quality information that’s ready for analytics. IBM Data Refinery makes it easy to explore, prepare, and deliver data.
-
SPSS Modeler: With SPSS Modeler flows in Watson Studio, you can quickly develop predictive models using business expertise and deploy them into business operations to improve decision making. Designed around the long-established SPSS Modeler client software and the industry-standard CRISP-DM model it uses, the flows interface in supports the entire data mining process, from data to better business results.
- IBM Cloud account: An account must exist to use the platform, please create one or login into your existing account by clicking here
- Watson Studio service instance: A service instance must exist to be able to use Data Refinery & SPSS Modeler.
On April 15, 1912, during her maiden voyage, the widely considered “unsinkable” RMS Titanic sank after colliding with an iceberg. Unfortunately, there weren’t enough lifeboats for everyone onboard, resulting in the death of 1502 out of 2224 passengers and crew.
While there was some element of luck involved in surviving, it seems some groups of people were more likely to survive than others.
The columns involved are the following:
| Variable | Definition | Key |
|---|---|---|
| survival | Survival | 0 = No, 1 = Yes |
| pclass | Ticket class | 1 = 1st, 2 = 2nd, 3 = 3rd |
| sex | Sex | |
| Age | Age in years | |
| sibsp | # of siblings / spouses aboard the Titanic | |
| parch | # of parents / children aboard the Titanic | |
| ticket | Ticket number | |
| fare | Passenger fare | |
| cabin | Cabin number | |
| embarked | Port of Embarkation | C = Cherbourg, Q = Queenstown, S = Southampton |
-
If you do not have an IBM Cloud account please create one or login into your existing account by clicking here
-
Please make sure that you have cloned/downloaded this repository
1. Create a Watson Studio service
- Once logged in, search for Watson Studio and create a lite instance


2. Create an empty project
Once your Watson Studio service is created, head over to creating a new project
- Access the serivce and click either Create a project or New project.
- Select Create an empty project.
- Give the project a name.
- Choose an existing Object Storage service instance or create a new one.
- Click Create.

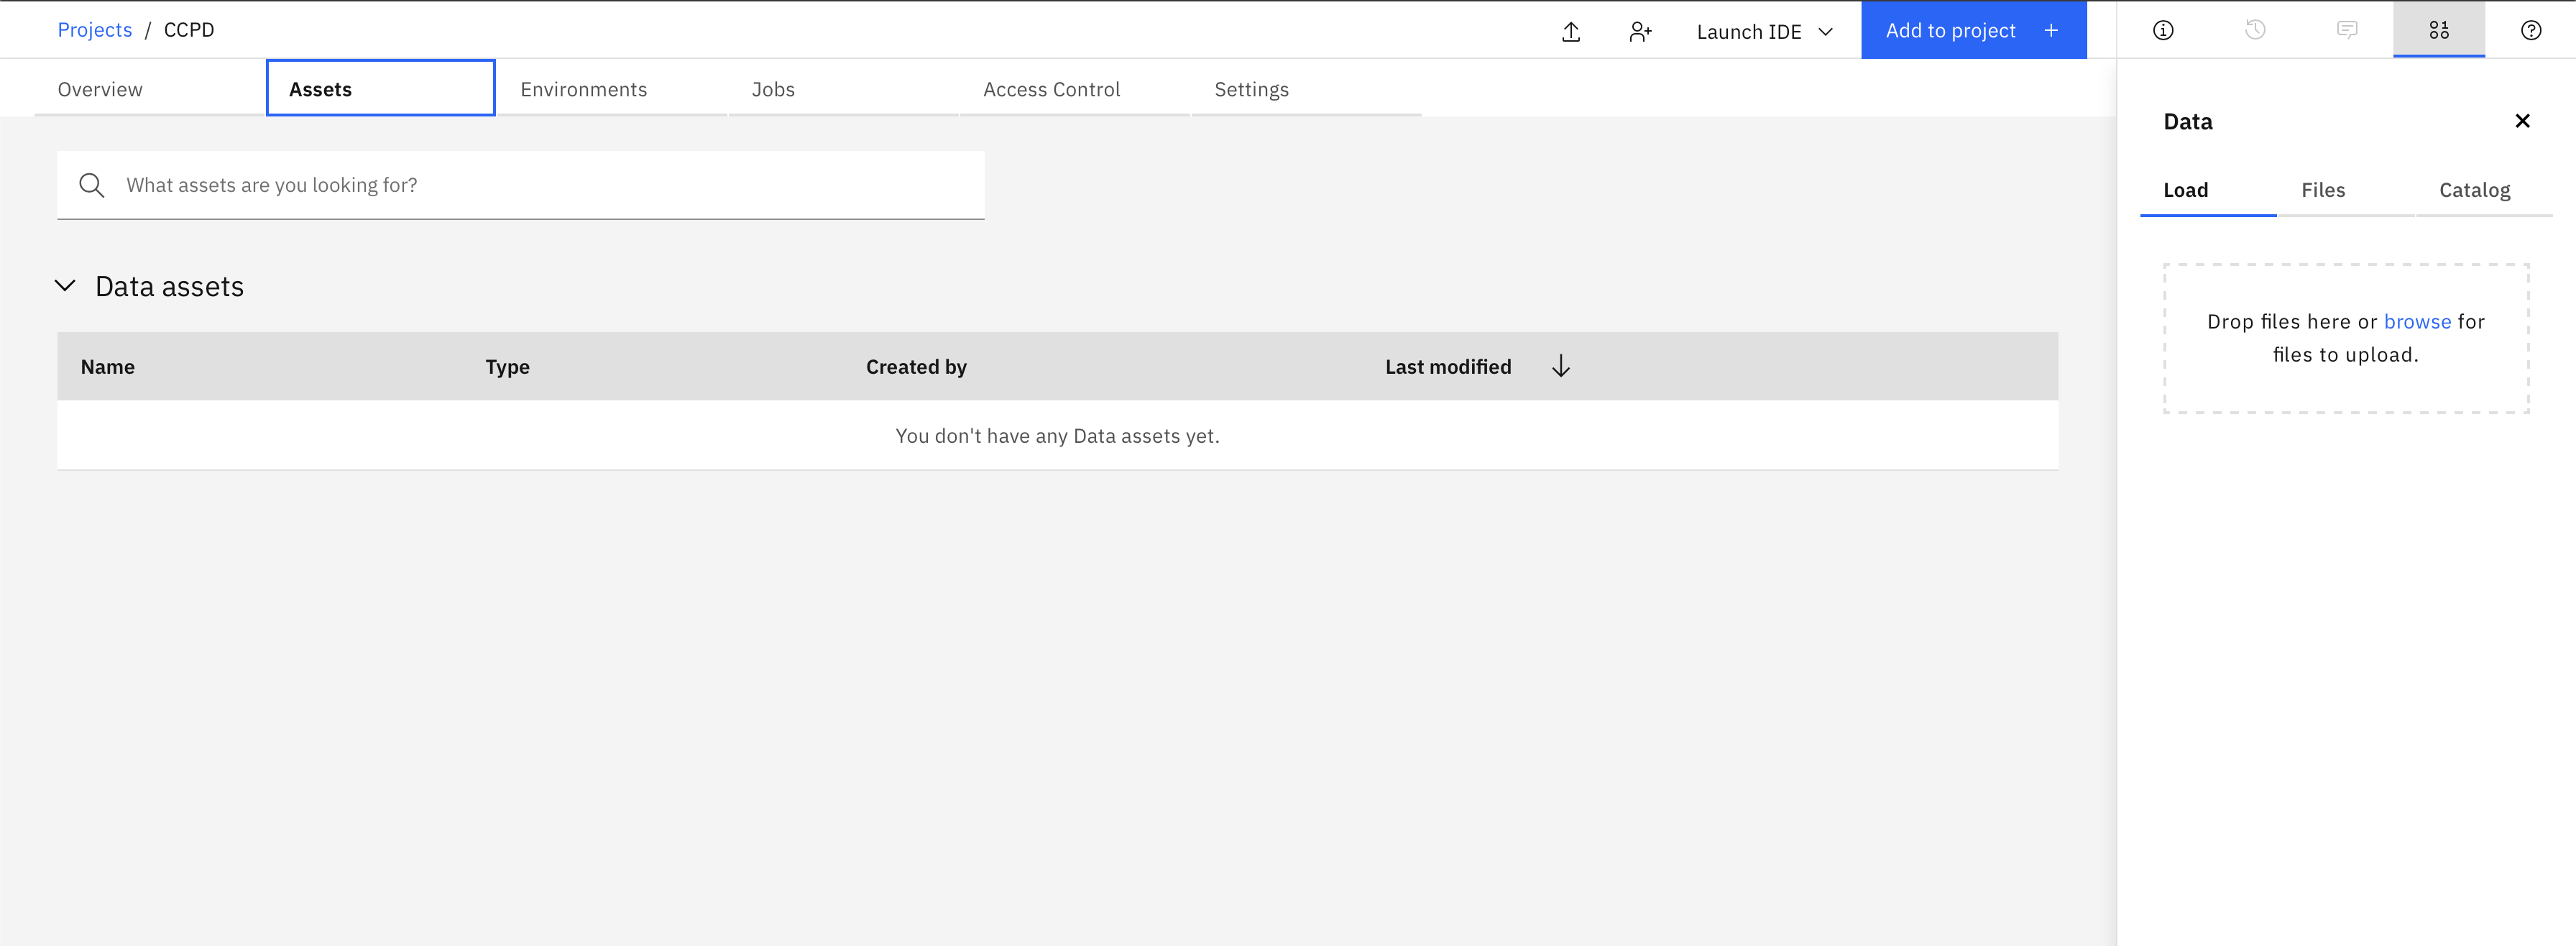
3. Add your data
- Once in your project, click on the Assets tab
- On the pane to the left, either drag and drop your data set or click browse and locate your dataset and add it to the project
4. Create a Data Refinery flow
- Once the data set is added to the project
- Click on
Add to projecton the top right - Select
Data Refinery Flow - Select the
titanic.csvfrom theData Assetssection and clickAdd


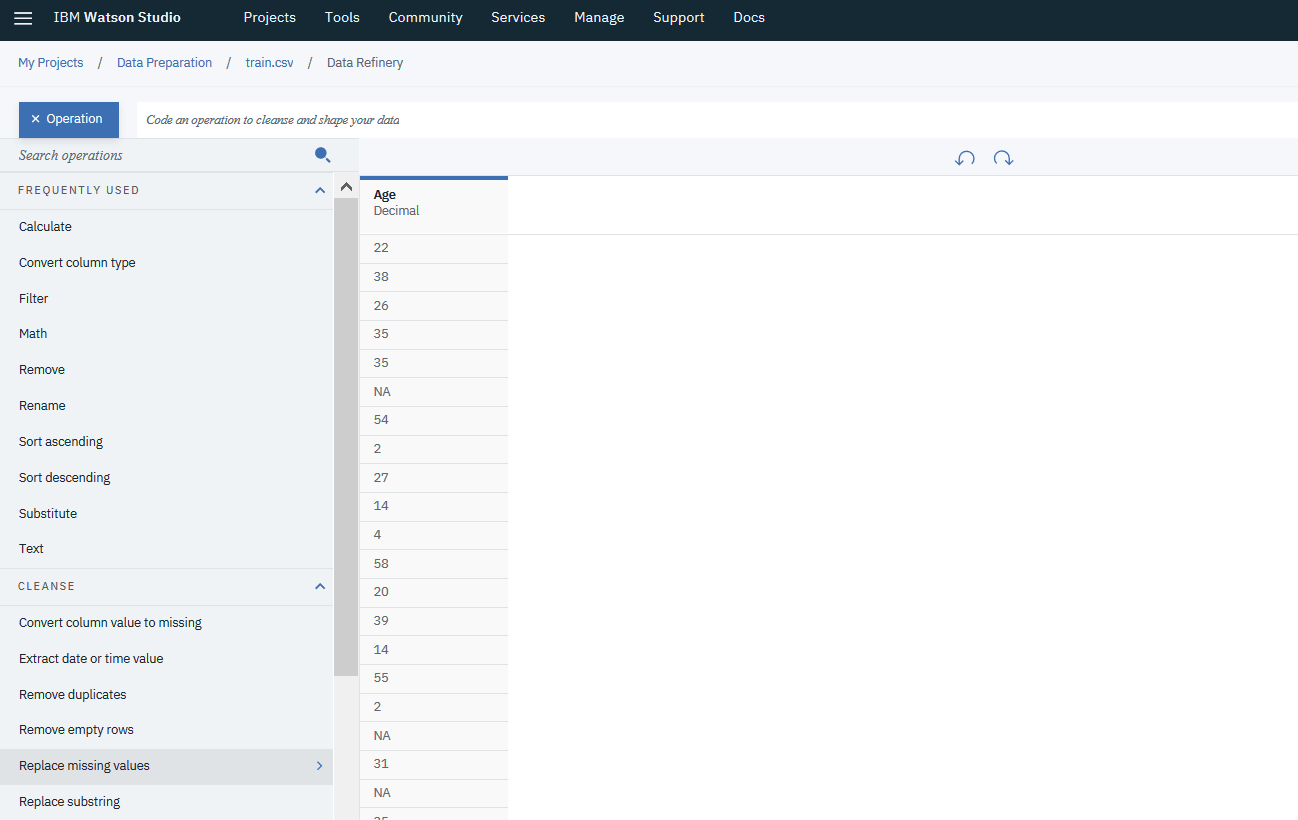
The column types are already converted for you, but as you see we have a lot of missing data and unnormalized data which we need to fix (you can select the profile tab to see the profiling on the data)
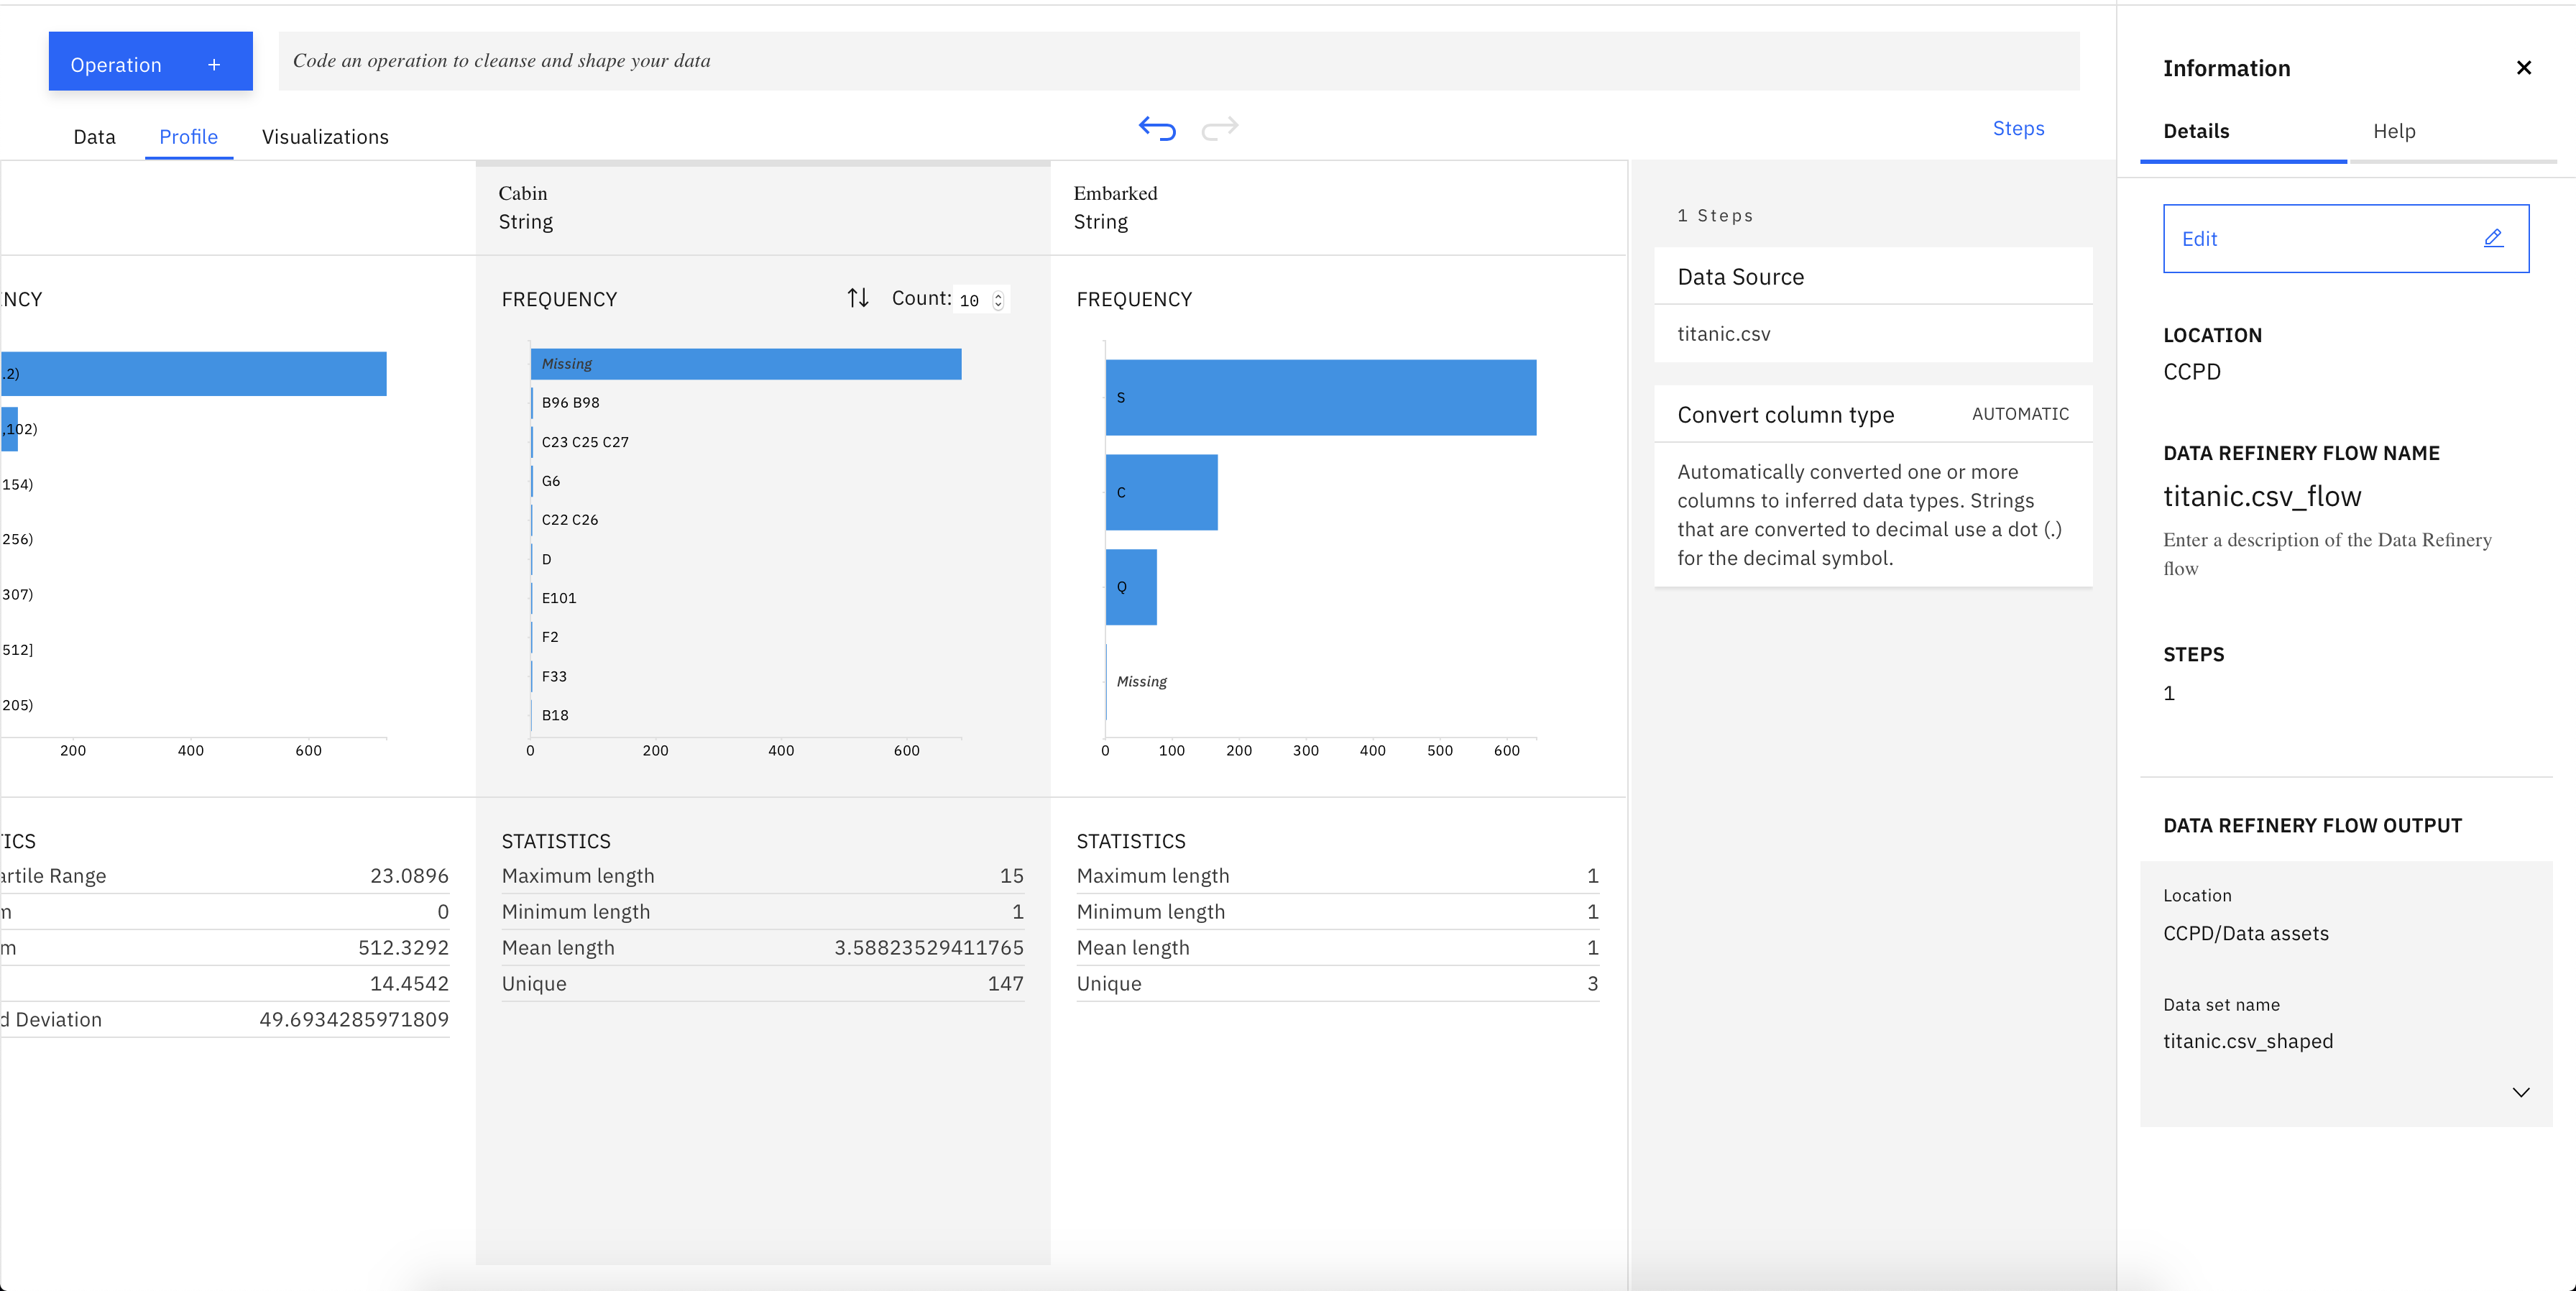
The columns that have missing values in Titanic dataset are Age, Cabin and Embarked. The methods to fulfill the missing values are different for each attribute depending on the purpose of the attribute.
Fill the missing values in Embarked attribute, we only fill it with 'S' knwong that the passengers actually embarked at Southampton.
-
Select Embarked column, and click on Operations
-
Select Conditional Replace under the Organize Category
-
Add one conditions in Embarked column, if value empty replace it with S. (Since only 2 missing values)
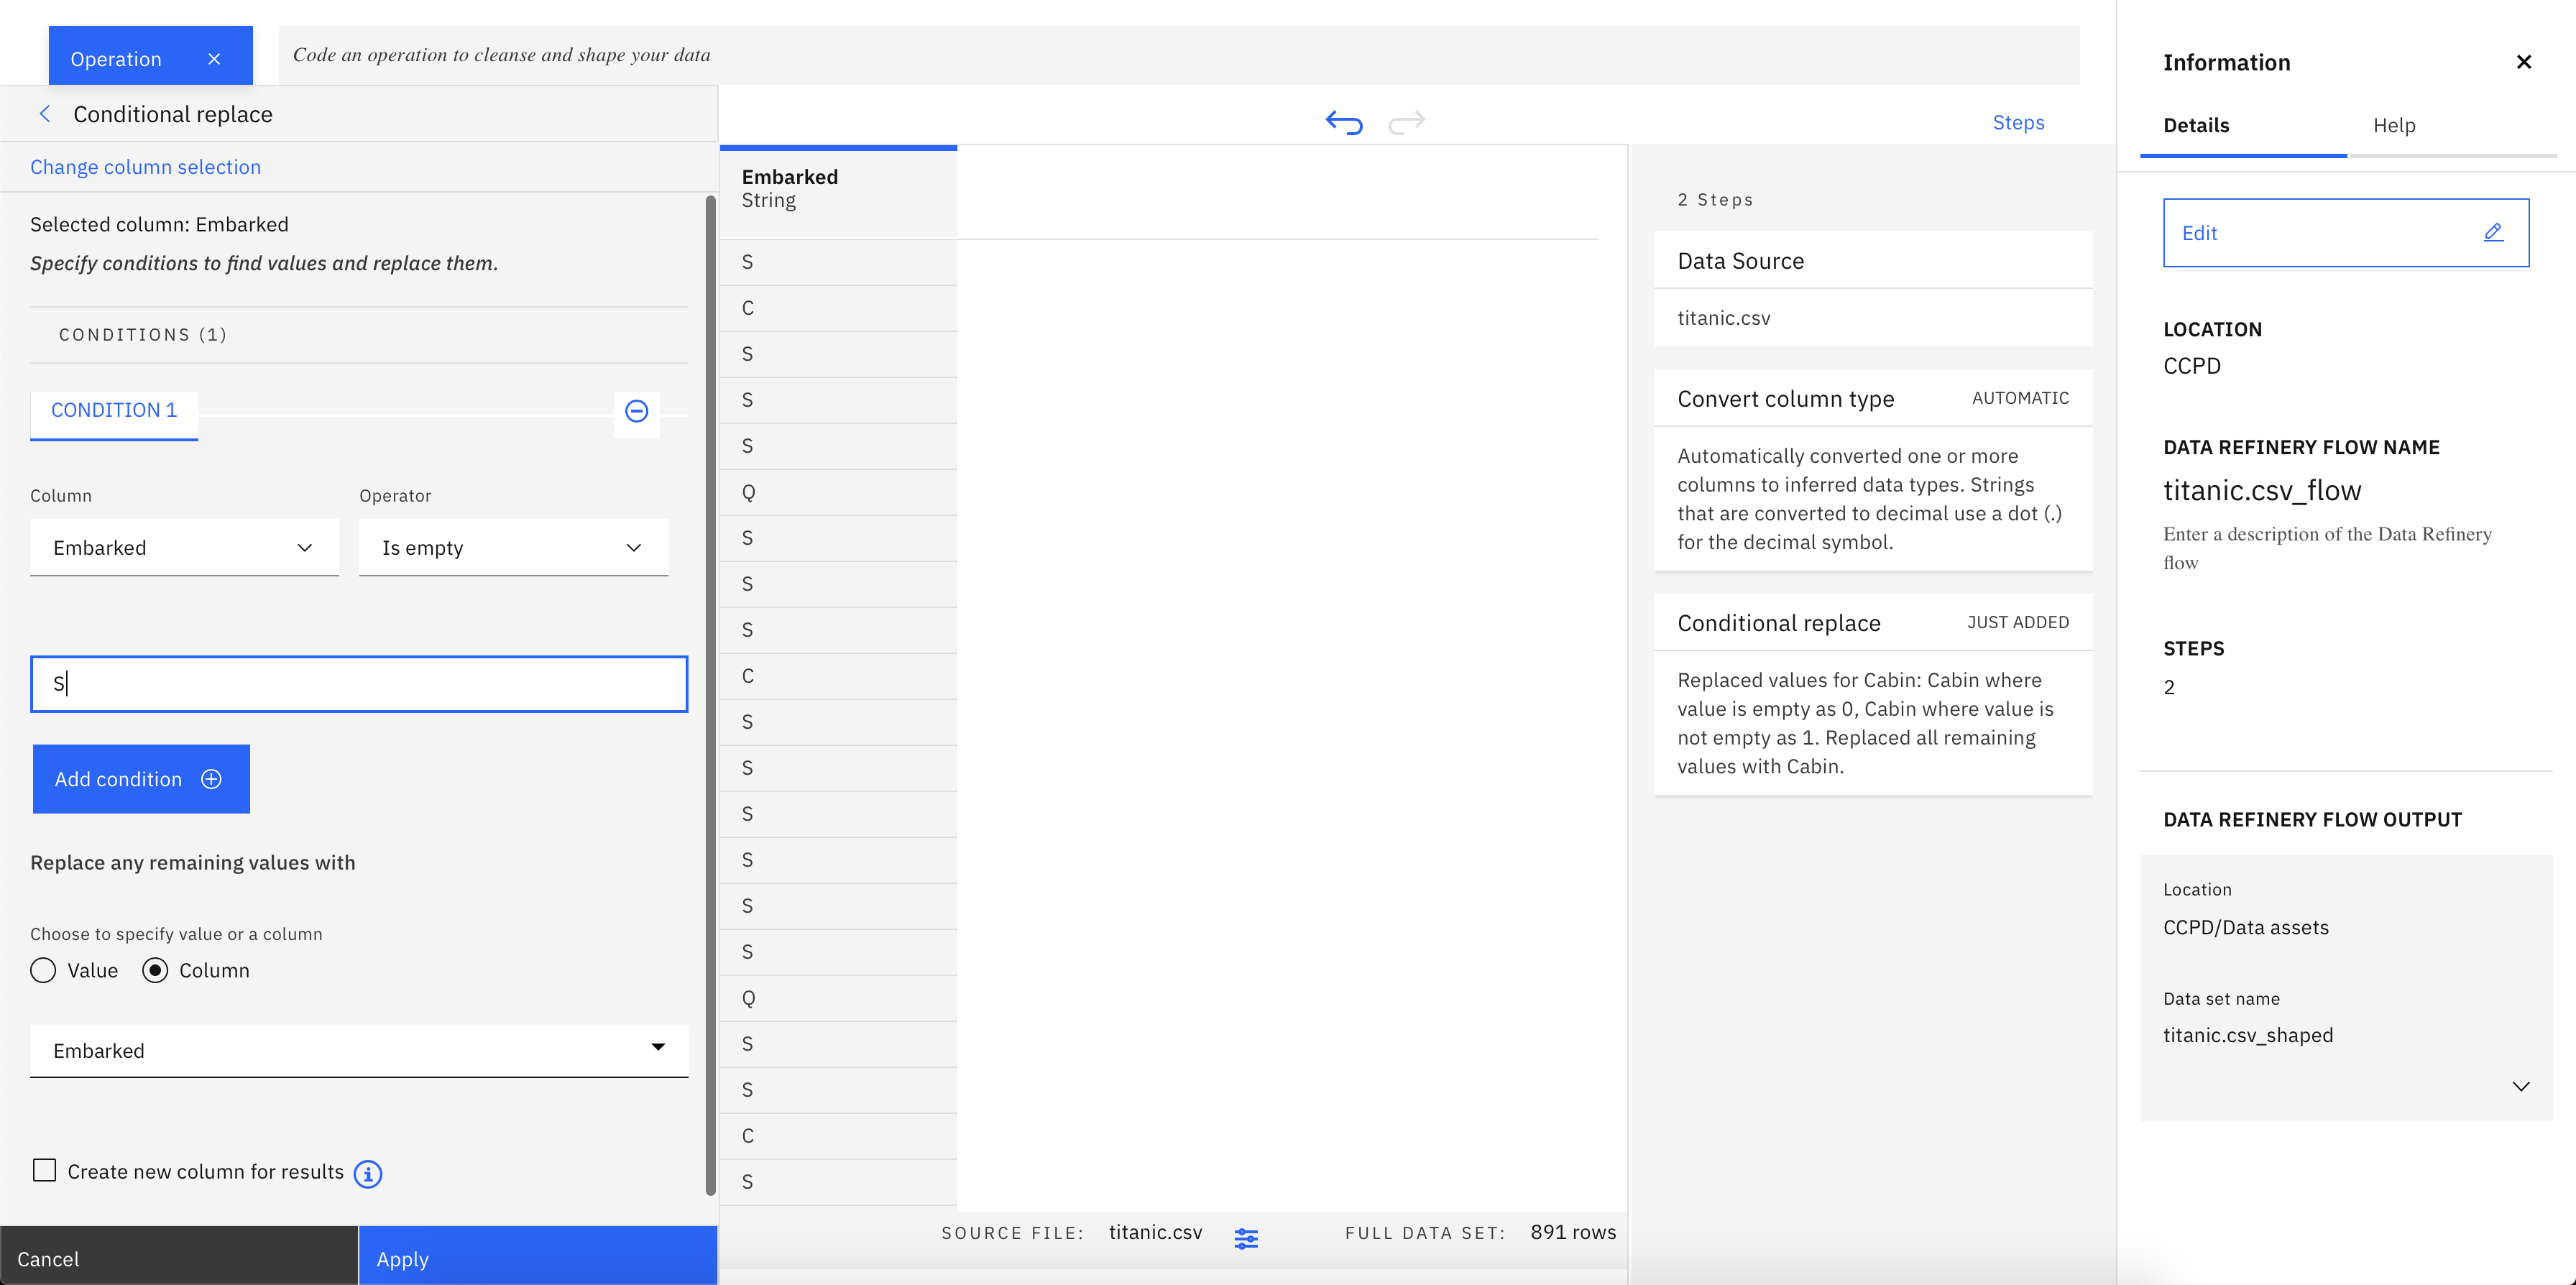
- Click
Apply
For Cabin attribute, since tracing the actual cabin for each passenger is impossible. Handling this attribute by creating additional column that has 1 for a passenger who's cabin exists and 0 if it does not exist. Relating to the accident, known passenger's cabin indicate that they survived. To do that follow the below steps:
- Select the Cabin column, and click on Operations
- Select Conditional Replace under the Organize Category
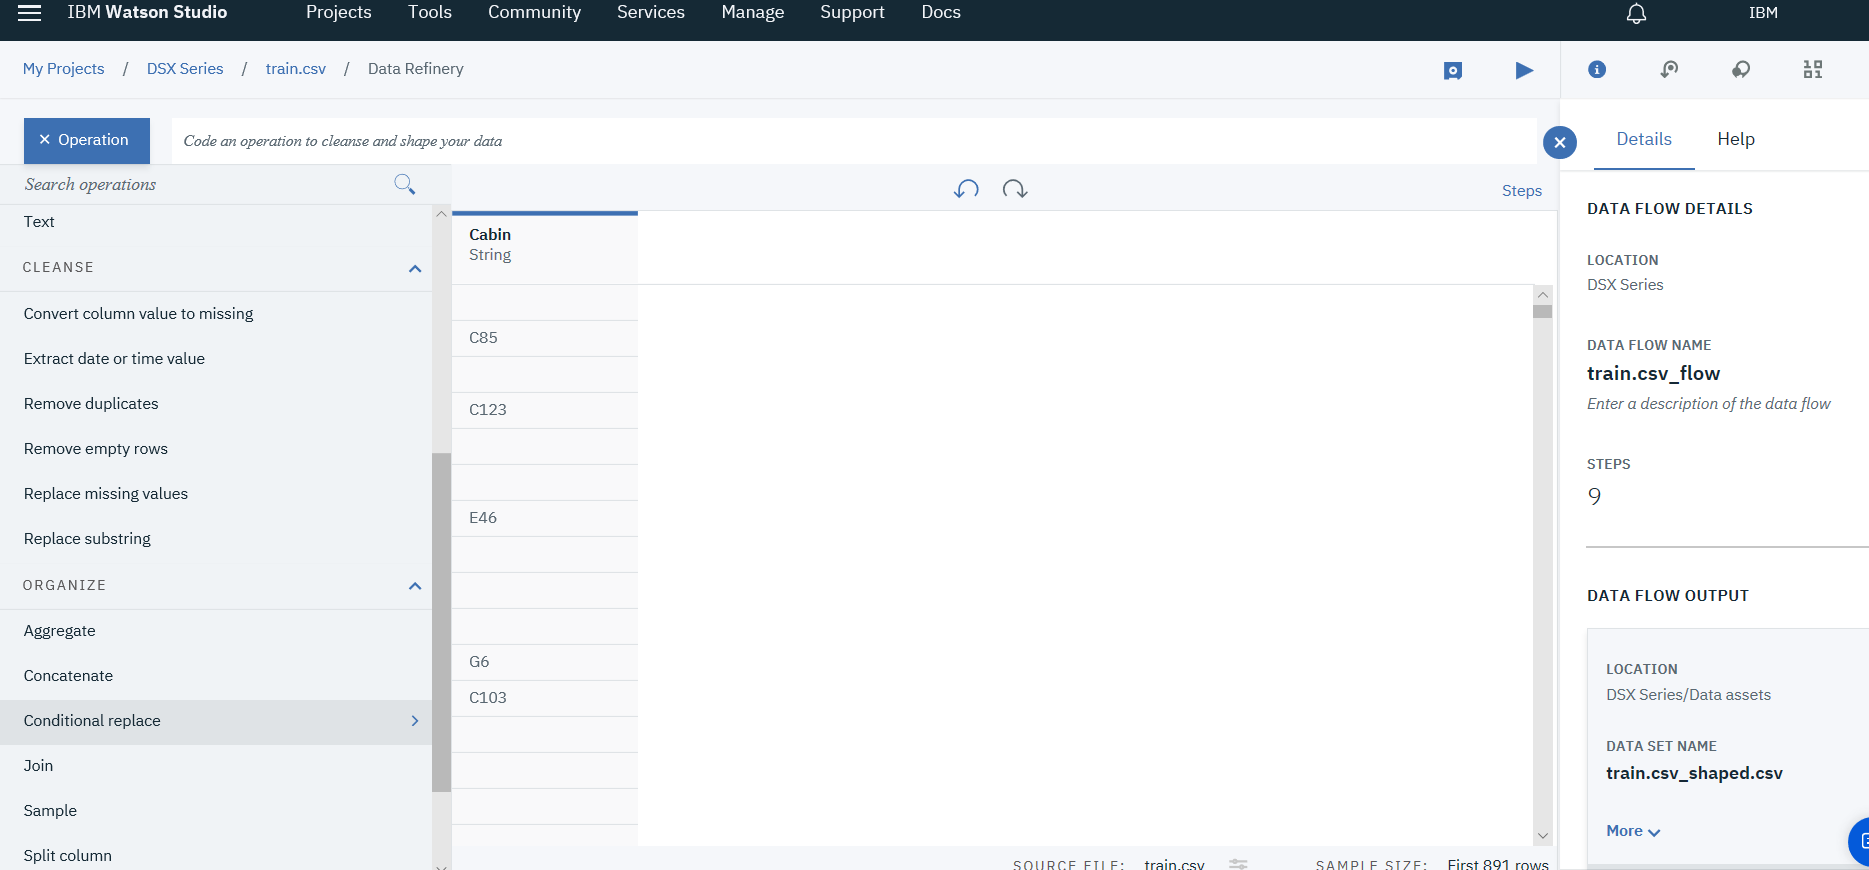
- Add two conditions in Cabin's column, if value empty replace it with 0, if not empty replace with 1.

- Choose Cabin column, in the option of Replace put 1
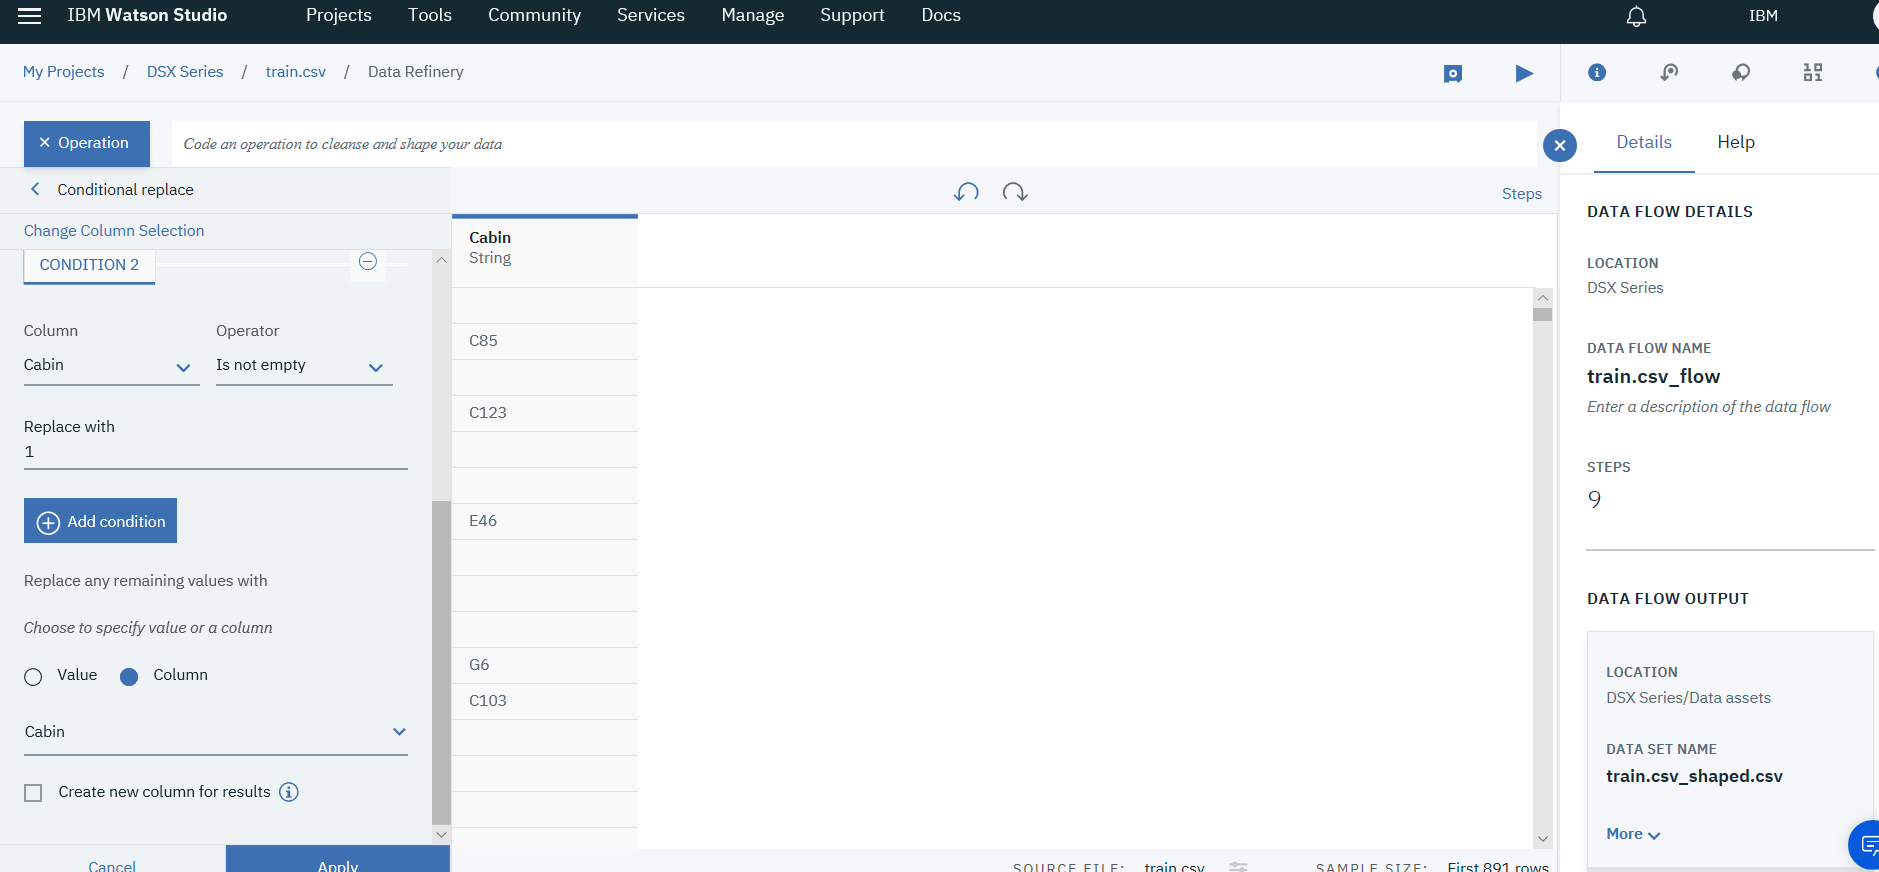
- Click
Apply
Note: Make sure you change the data type of the Cabin to Integer
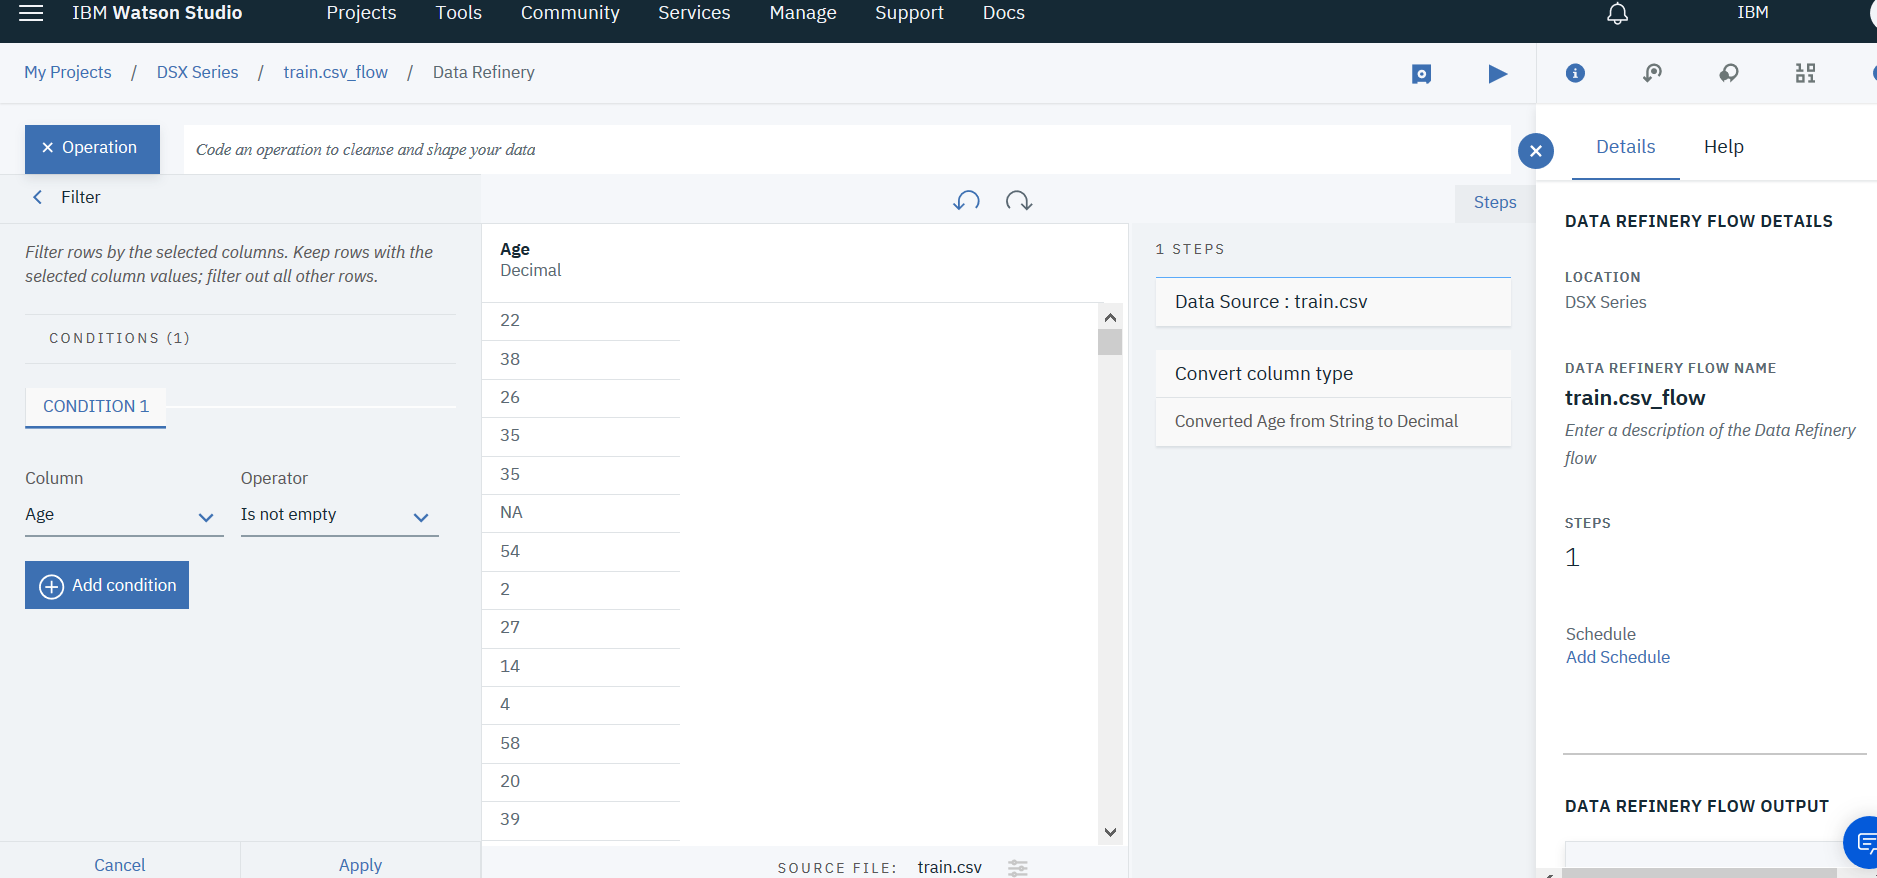
For age attribute, calculate the mean of the column values and placing it in the null values. To replace missing values by the mean of the column, do the following:
- From the Operations menu choose Filter condition.

- Select column Age and Is not empty under operator for the Filteration condition.
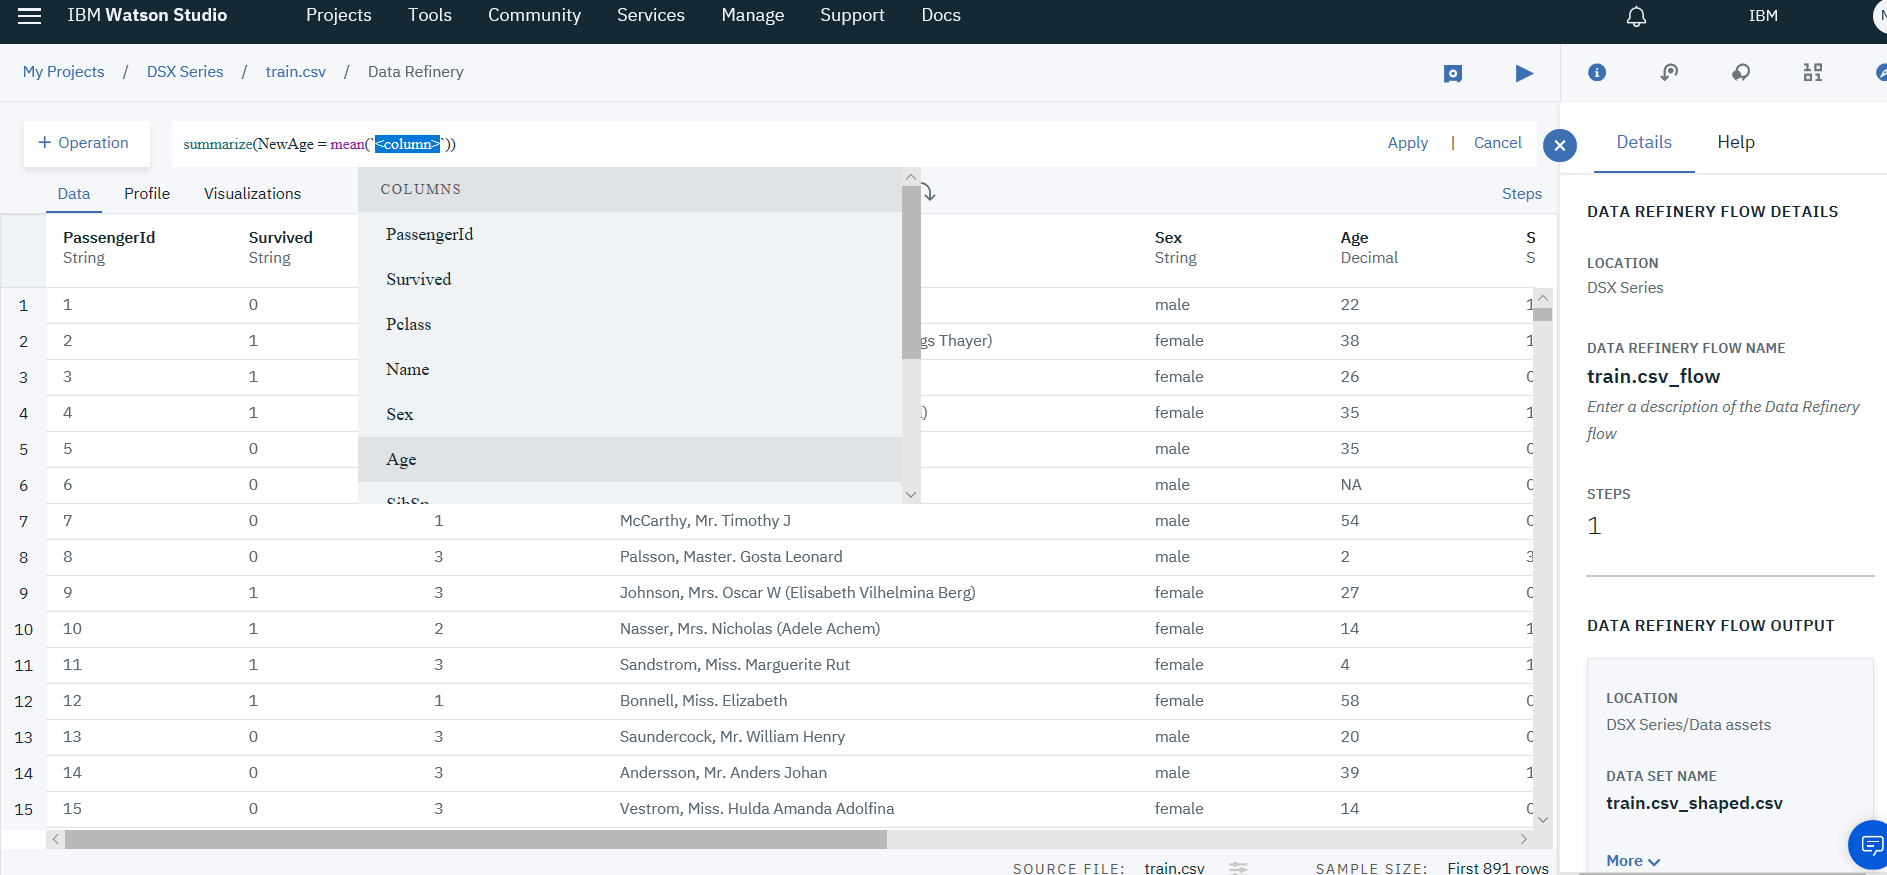
- From the Operation Bar, select Summarize operator.

- Fill in the operation command the required variables like this Summarize(newVarName=operator(column))
summarize(NewAge = mean(`Age`))

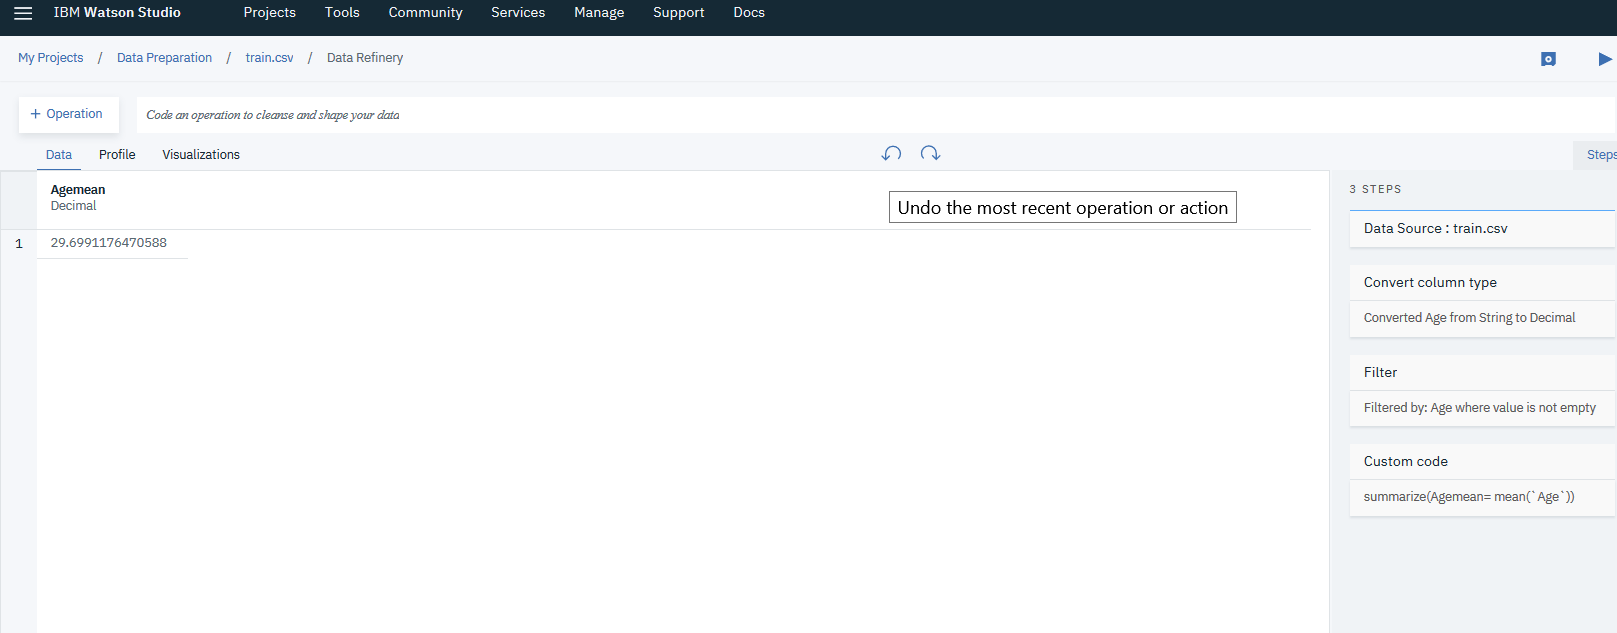
- Copy the geneated value to use after, and undo last two action from the backward arrow above. Since the filteration and the new summerized value is now useless.
- Select Age column again, from the Action menu choose Replace missing values
- Insert the mean value to be replaced with and press Apply button.

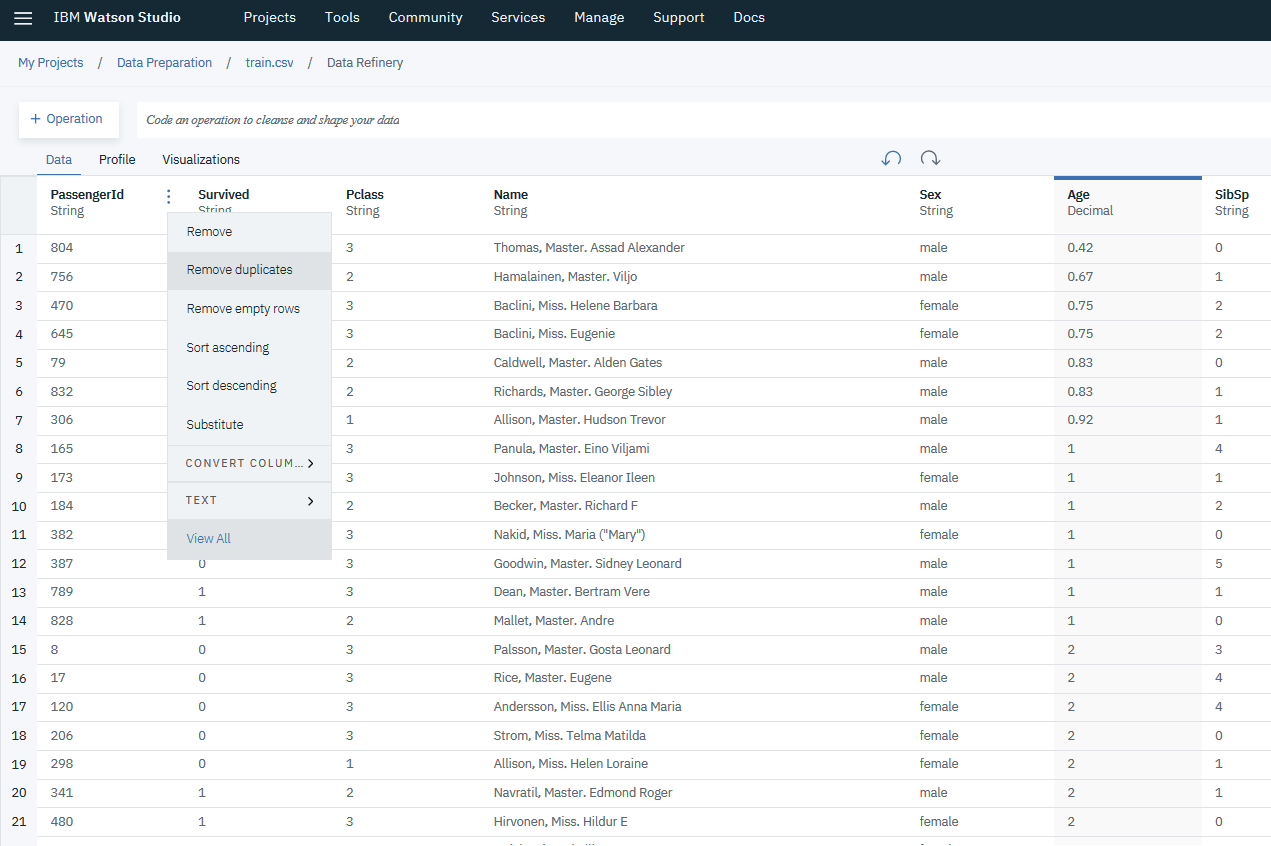
- Titanic data set does not have sensitive information that should be unique except for the passenger ID. Simply select the Action menu in
PassengerIdcolumn and choose Remove duplicates.
5. Saving and running your refinery flow
- Once completed with all the above steps click on
Editon the right pane
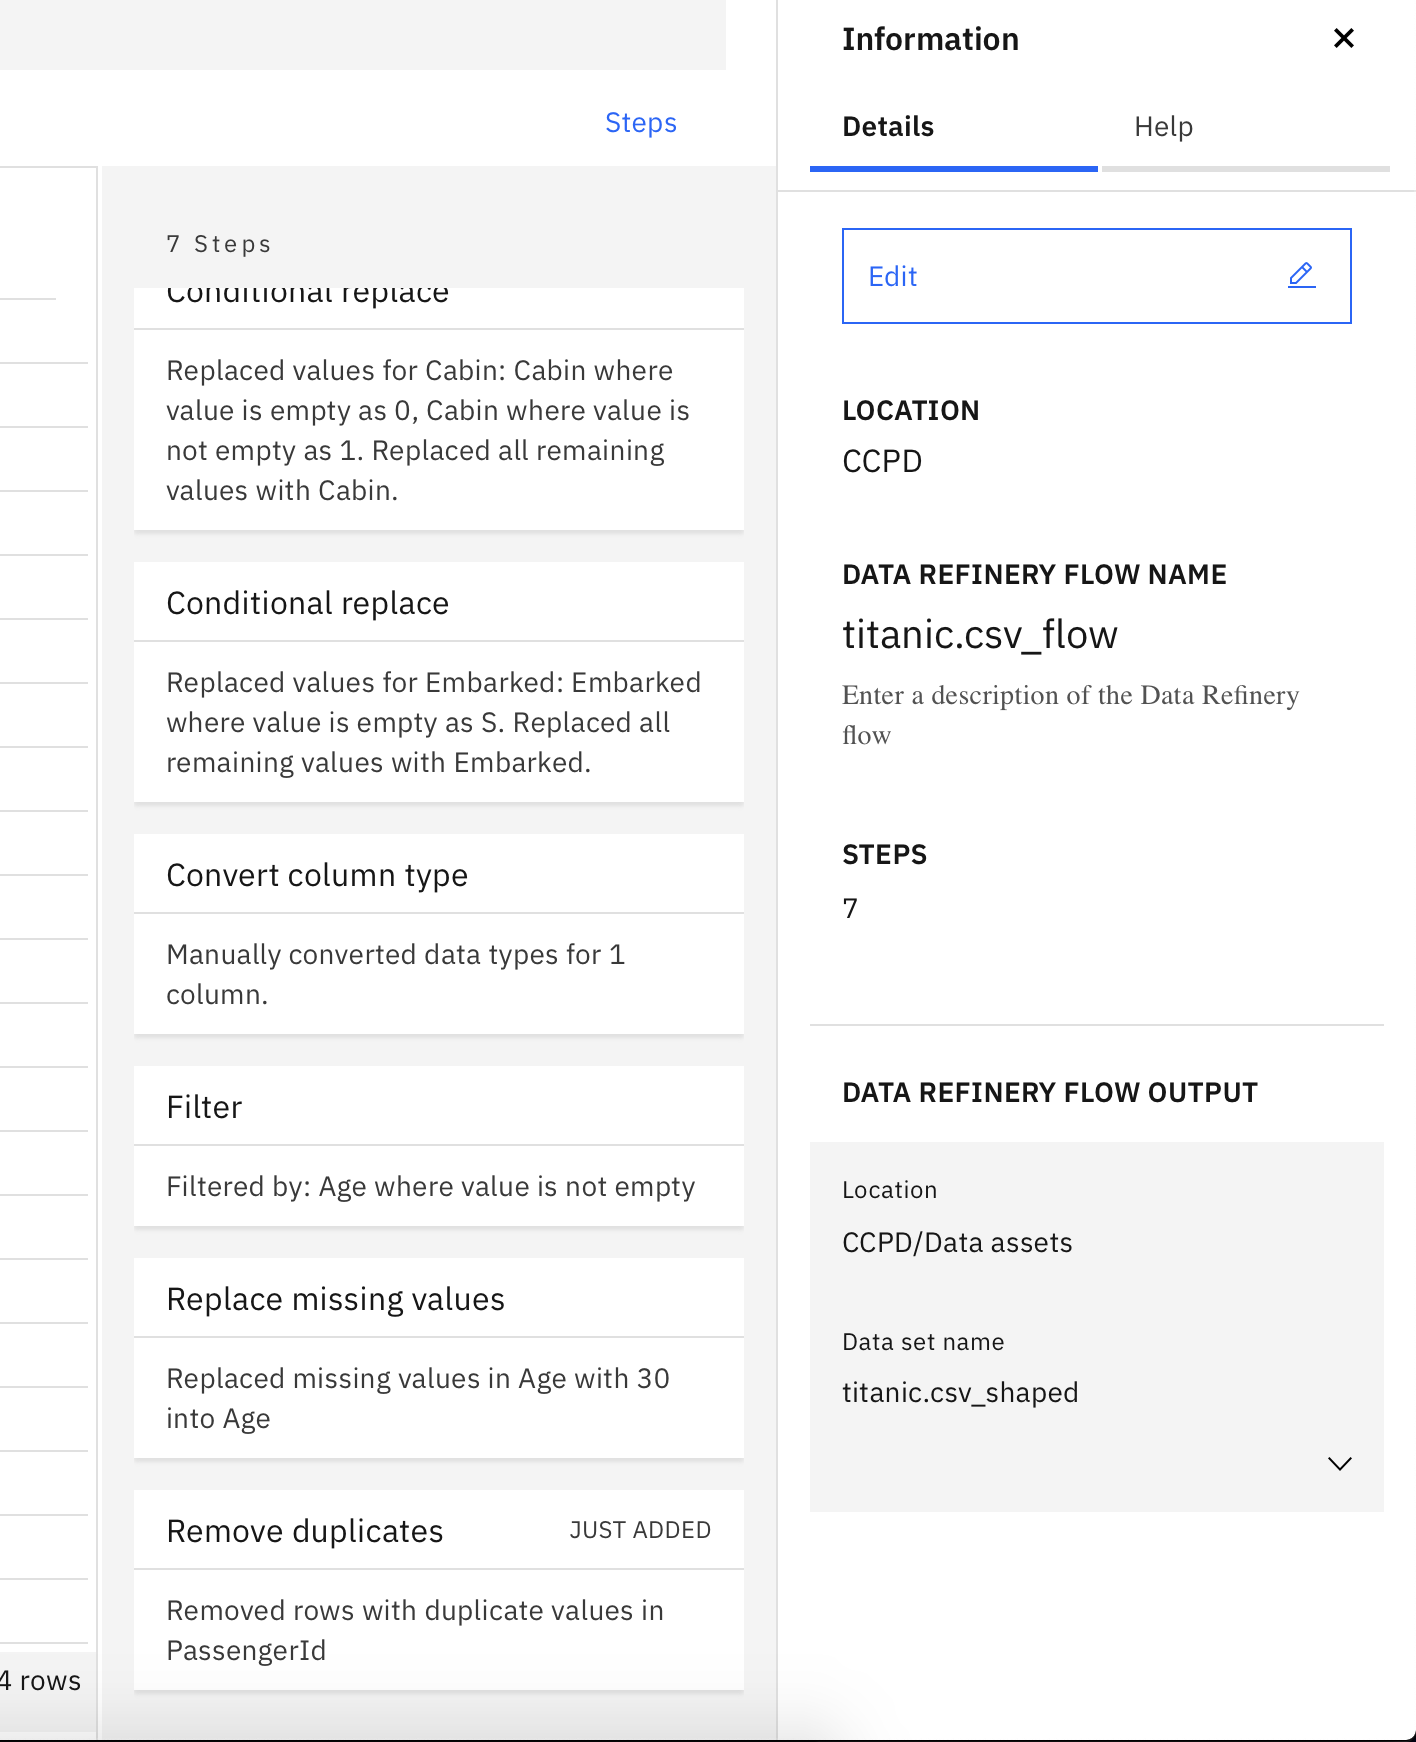
- Click on
Edit Outputand rename the output astitanic_shaped.csv
6. Running your flow
- Once completed editing the output, on your top right select
Jobs

- Select
Save and Create a Job - Give the Job a name and click
Nextto run the cleaning job

Now you will see titanic_shaped.csv in your project assets
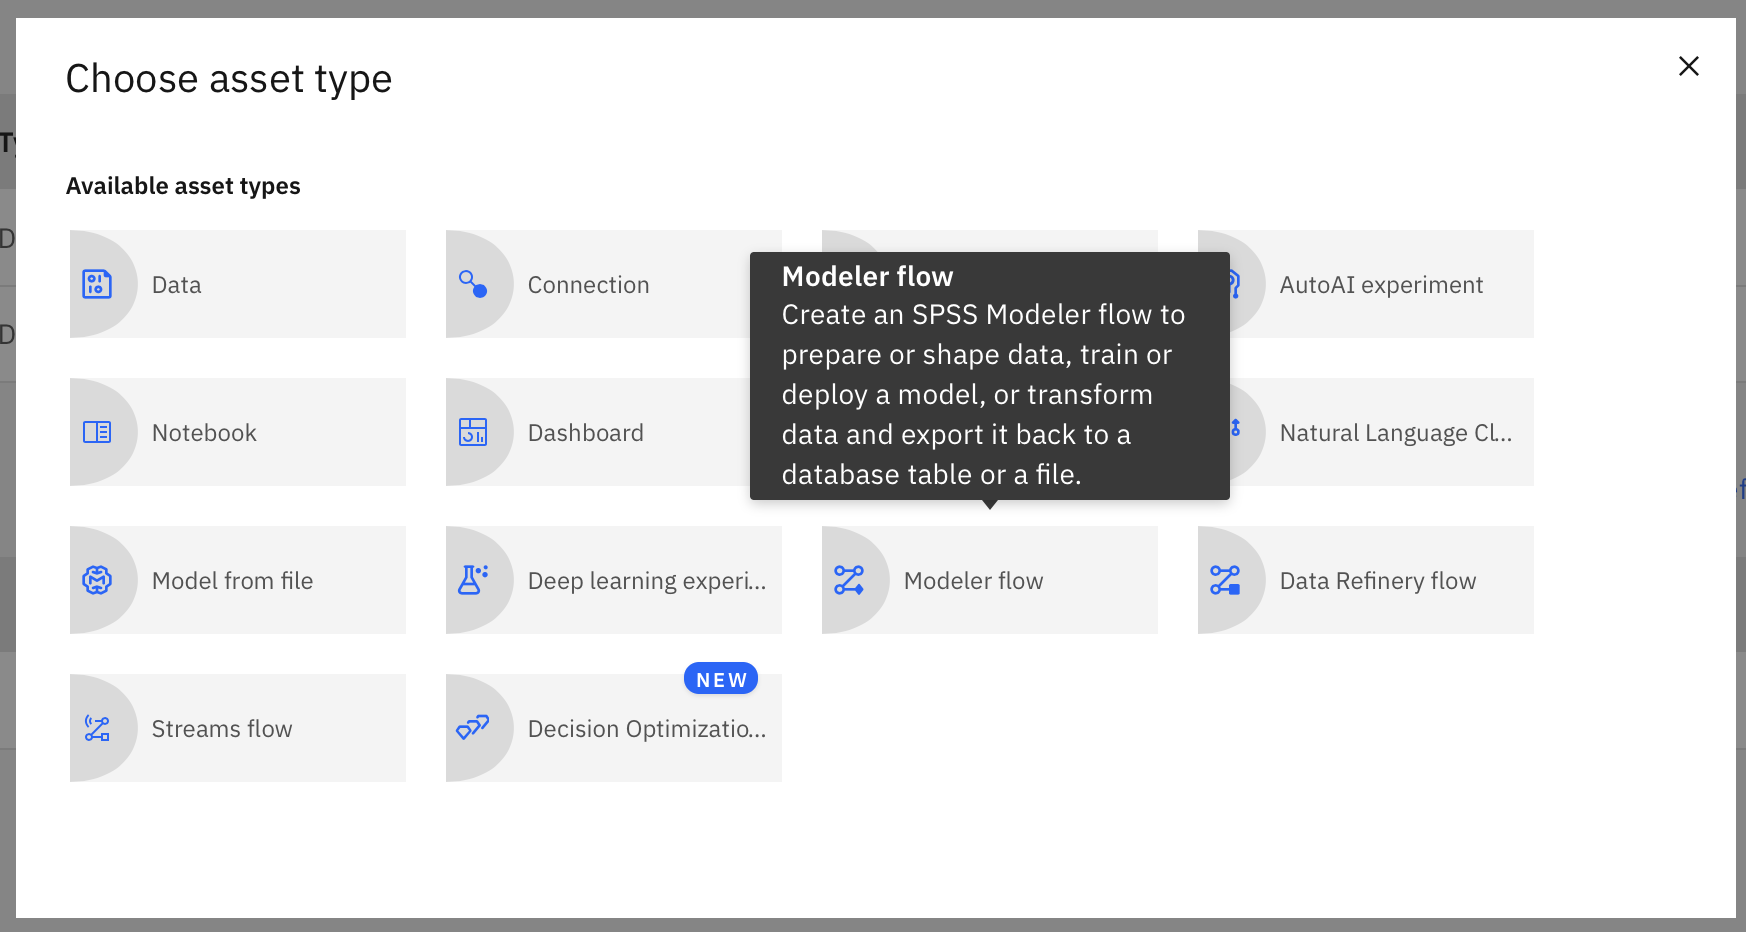
1. Create a Modeler flow
- Click on
Add to projecton the top right - Select
Modeler flow
- Once launched you will see the following screen

- All the nodes can be put on canvas from the left side menu, first we have to load the data on canvas

2. Adding Data Set
- Import --> (drag and drop or double click) Data Asset --> it will be visible on canvas, now double click the node again:
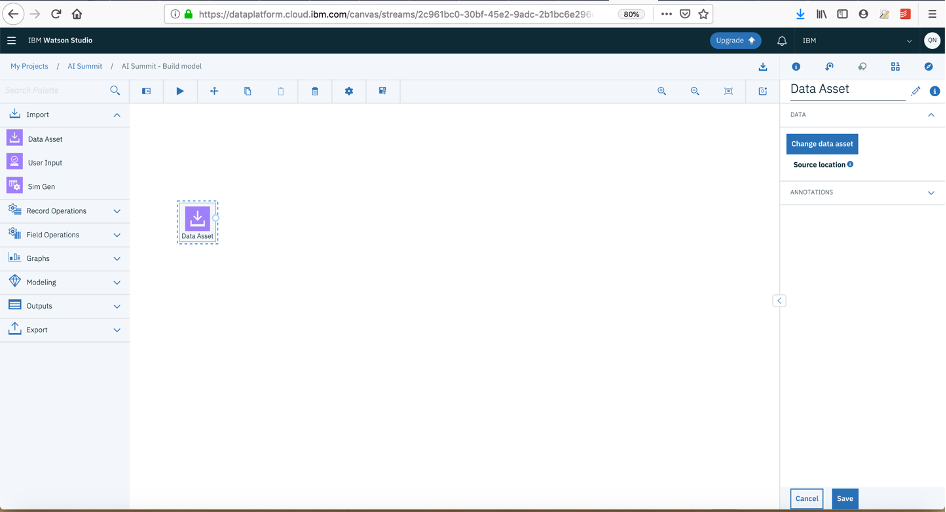
- Click on “Change Data Asset”
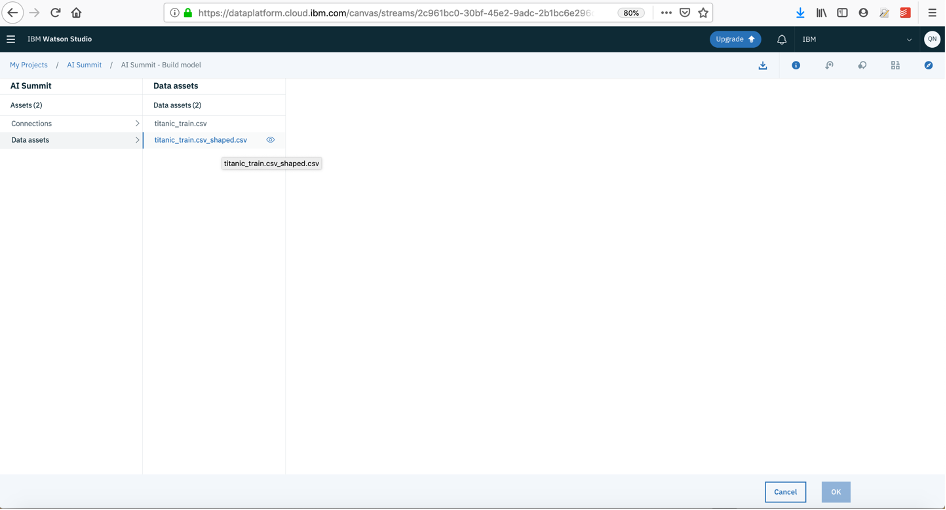
- Data Assets --> titanic_shaped.csv --> click ok --> click save, your data is now uploaded
3. Adding Field Opertions
- From left menu, go to “Field operations”
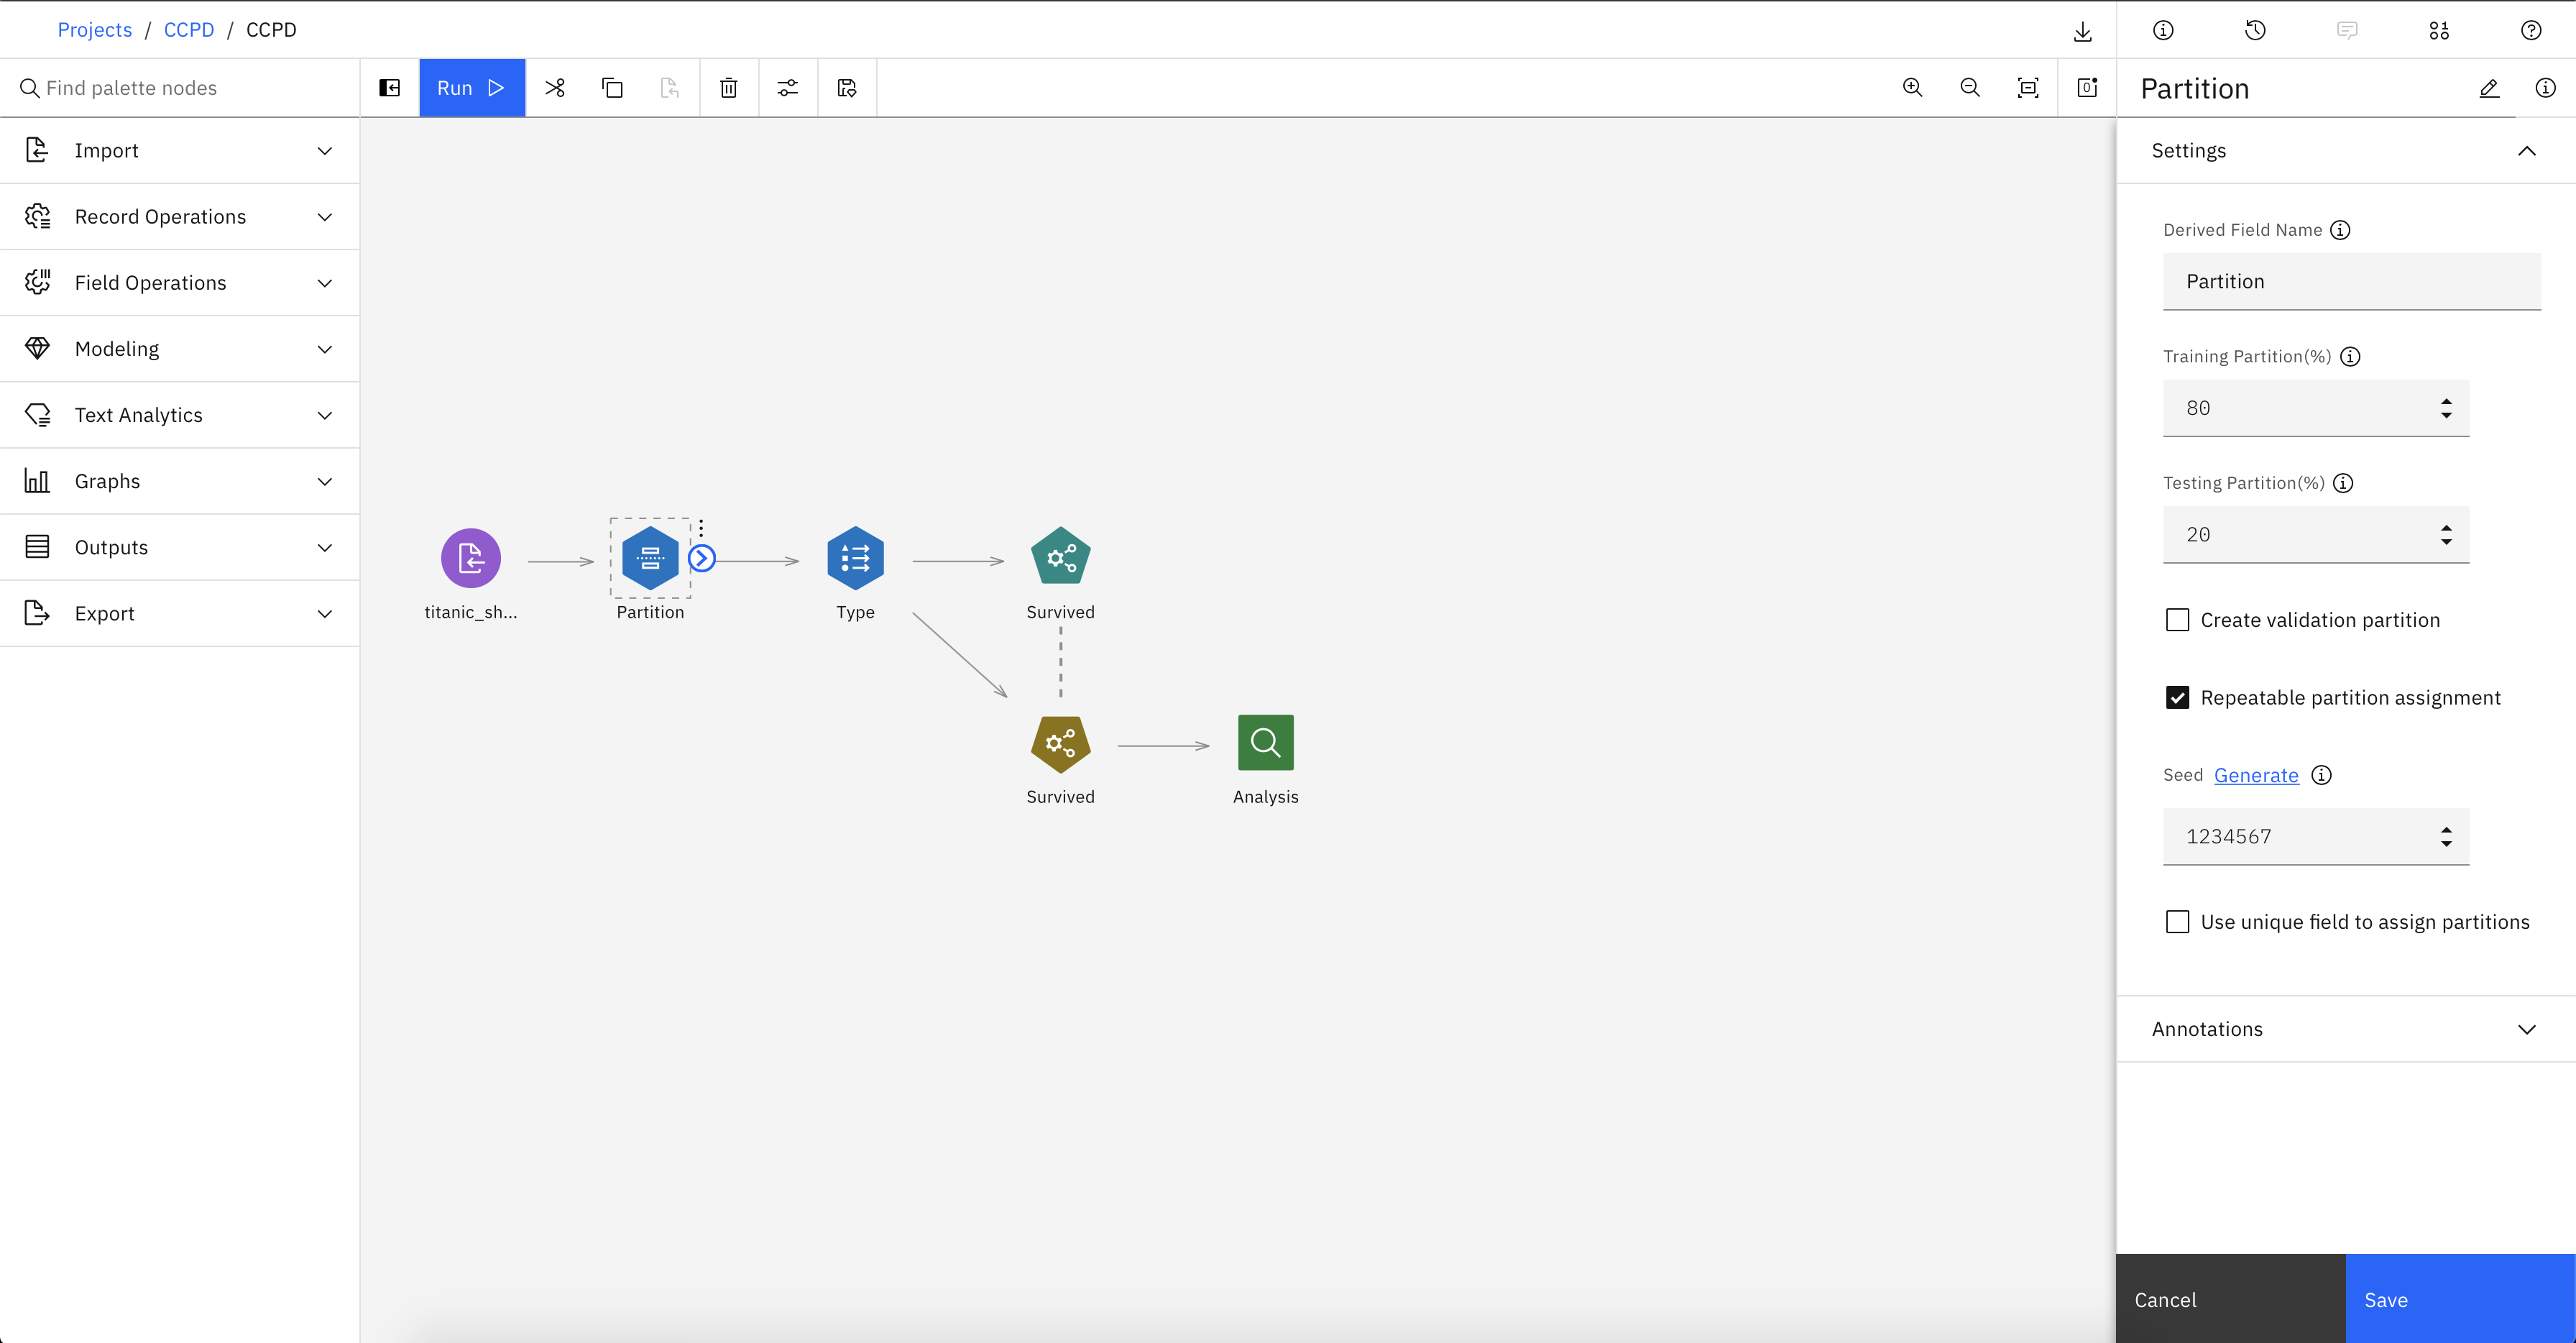
- Double click “Partition”, double click “Type” The nodes will be auto connected on canvas:

- Now we have to configure both nodes, double click on Partition to choose how much you want to partition for test and train and save:
- Change the training partition to 80, and the testing partition to 20
- Click
Save
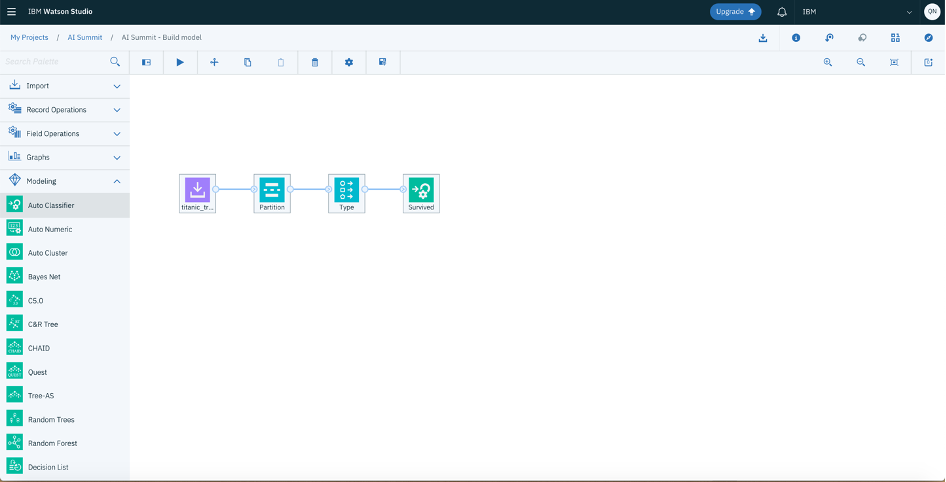
- Double click on Type node to set data types and target value:
- Set the data type of survived to "Nominal"

- We have to predict who will/can survive, so “survived” is the target value here.
- Now it’s time to add the modeling node, from left side menu choose “Modeling”. You can choose from around 40 algorithms here, if you don’t have any in mind and want to do a classification task, you can auto classify.
- Double click on “AutoClassifier” it will automatically connect to the type node:
- We already set the input and target column in “Type” so we don’t have to configure anything in “survived”node. Click on the play button on top and wait.
After loading your canvas will look like this, with an additional node:

- Hover on the newly generated node, 3 dots will appear on the top right corner of node, click on that and choose “View model”
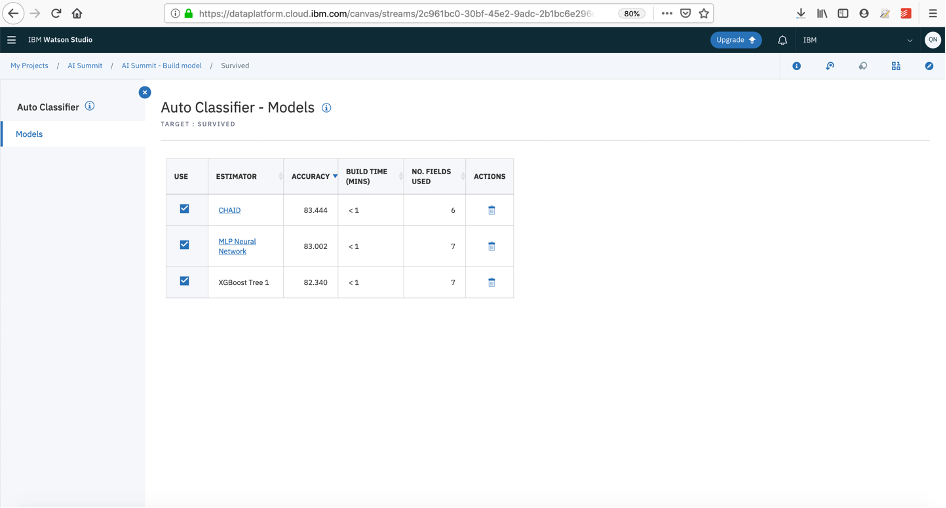
- You can see the models and their accuracies.
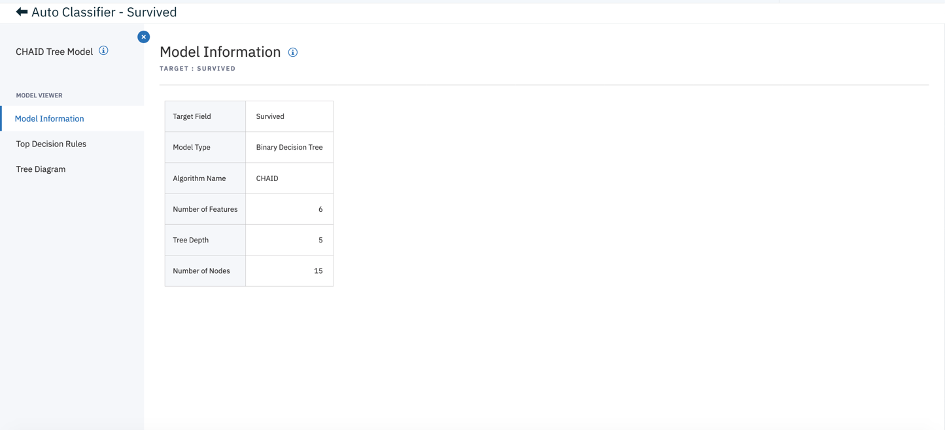
- If you want more details, you can click on an algorithm, clicking on CHAID:
- Now go back, hover on the node again and choose “Preview”

-
You can see the predictions made for each row in the “$XS-Survived” column, along with the confidence score of each prediction in the “$XSC-Survived” column.
-
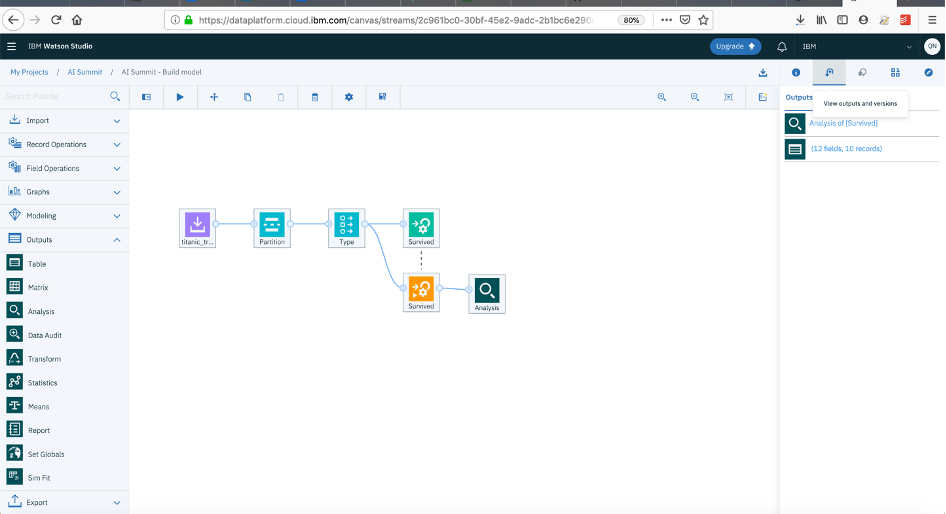
Now navigate to the left side menu again and from “Outputs” choose “Analysis” node and double click.

-
Run the SPSS flow again.
-
On the right side in the “outputs” tab you will see the output of analysis
- Open the
Analysis of [Survived]and you will be redirected to the confusion matrix of the model

- Go back and Hover again to Analysis node and click on 3 dots --> Save branch as a model

- You will see this prompt, keep the
Branch terminal nodeas Analysis, and give your model a name and click onSave

- You will now be able to see the model in your
Assetstab in the project

4. Deploy Machine Learning Model
- Create a Watson Machine Learning Service Lite instance on IBM Cloud and go back to your project (make sure it is in the same region as your Watson Studio instance)


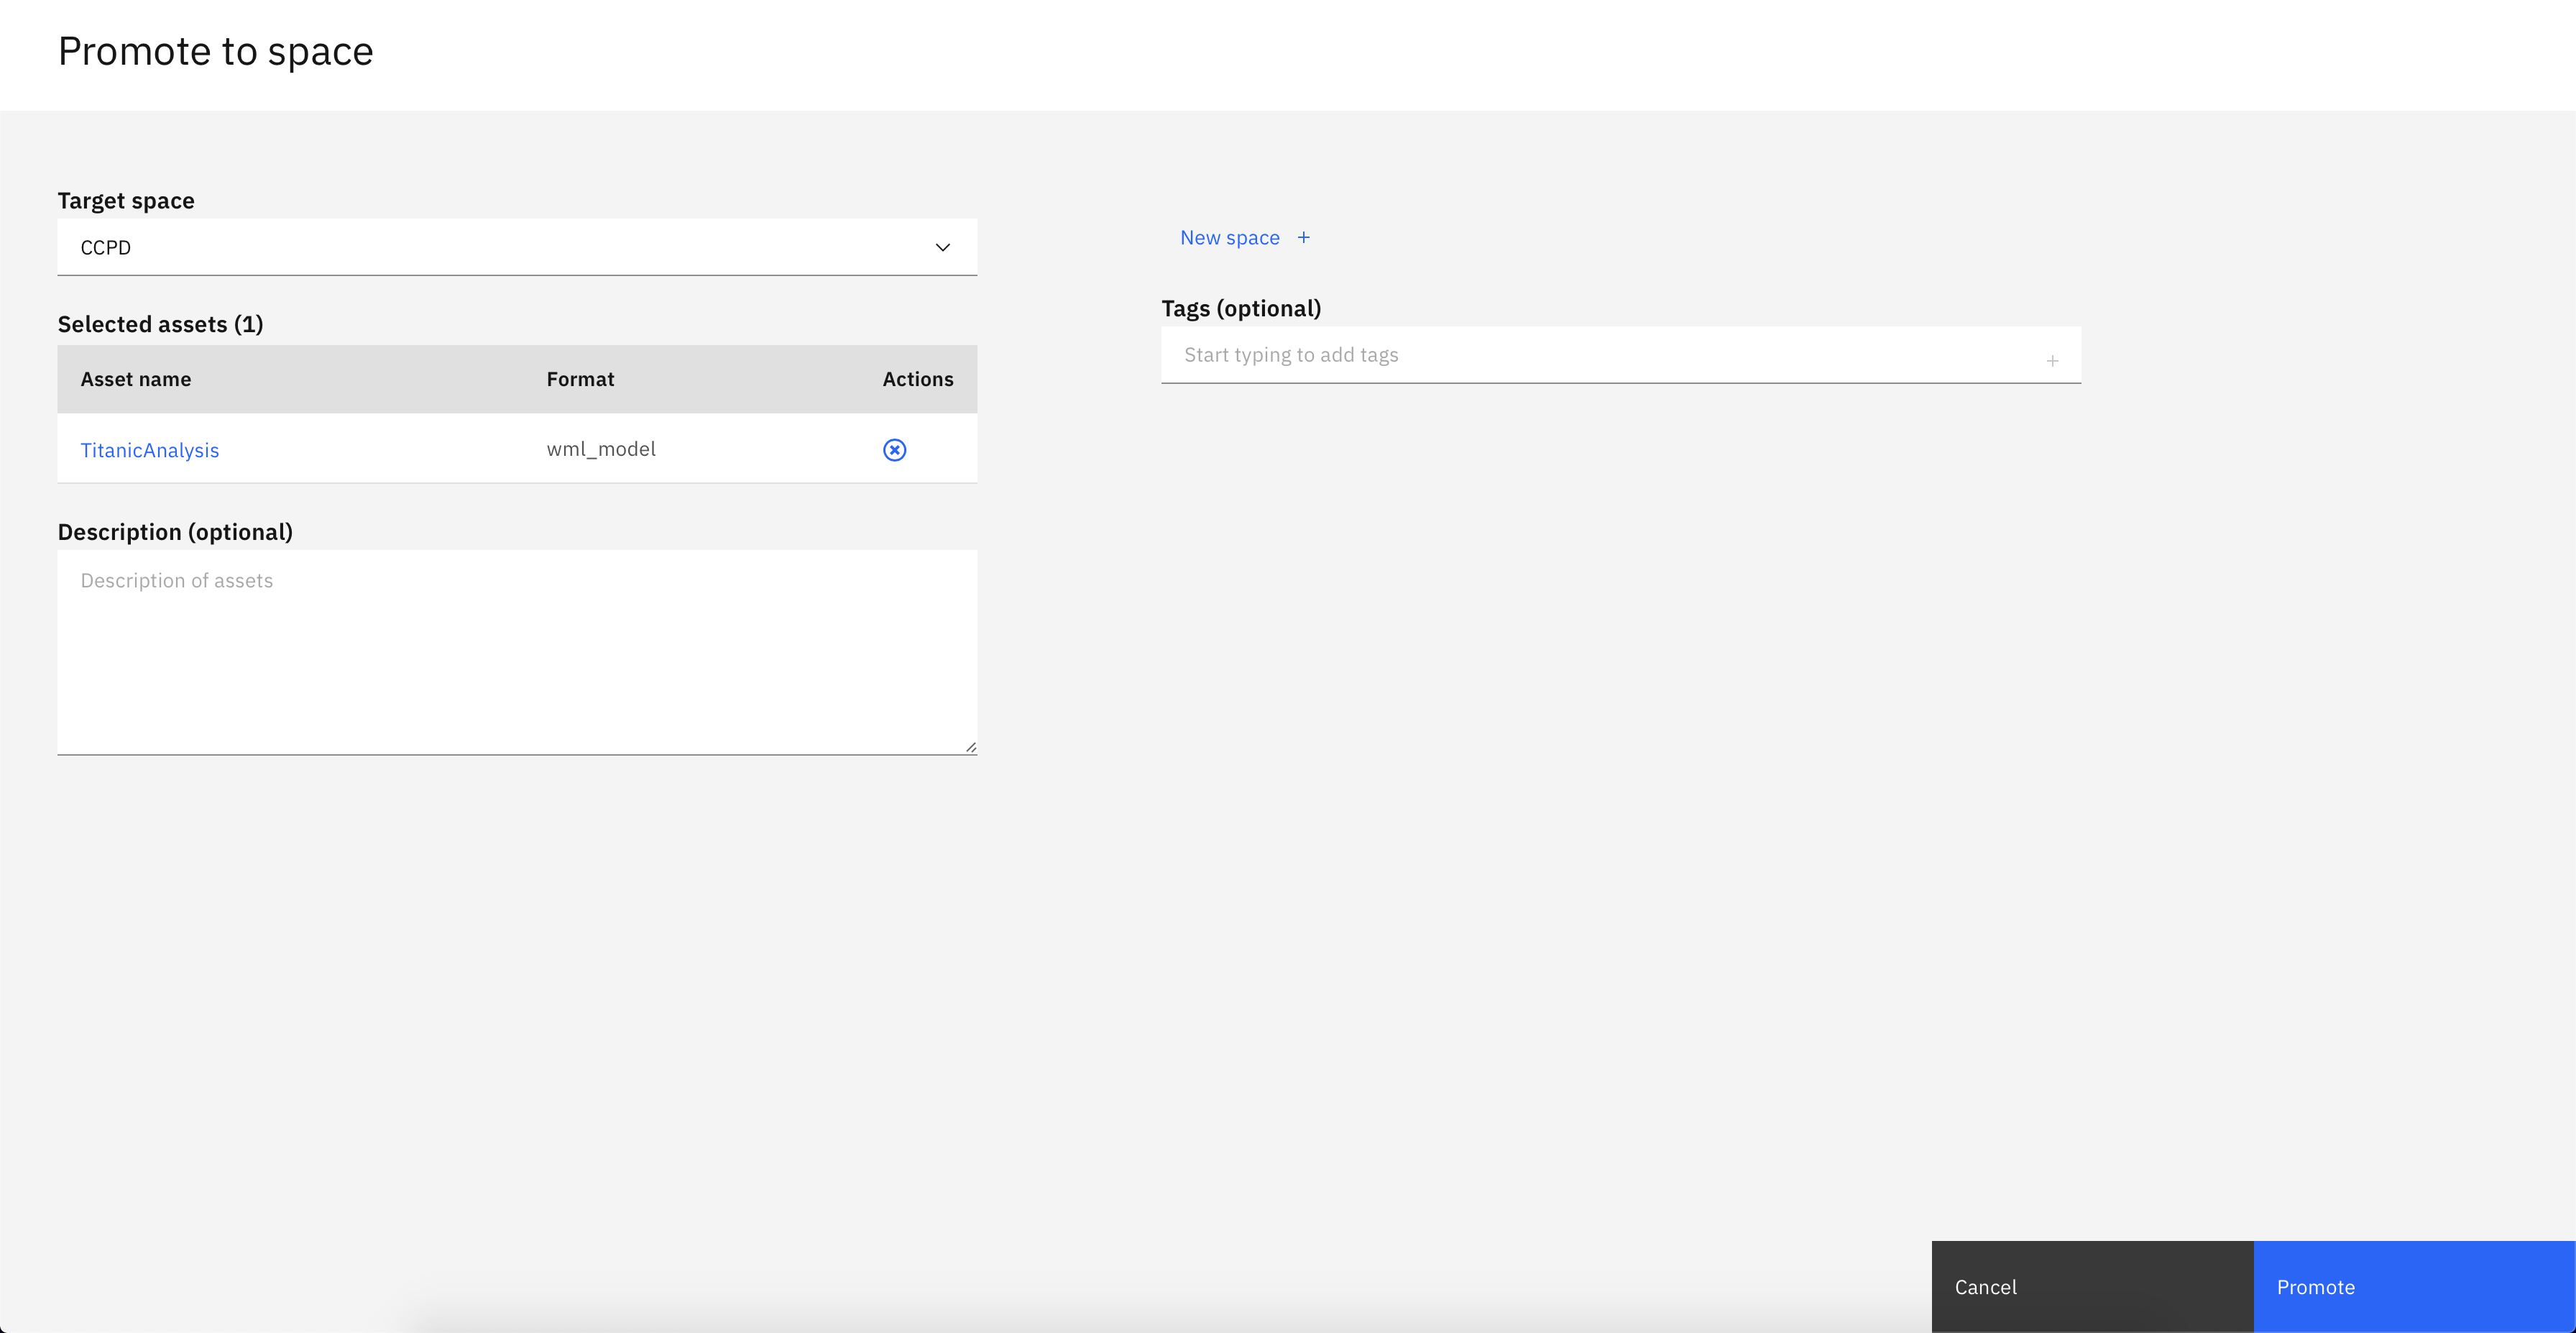
- Once the machine learning service is created, select your model in the
Assetstab in the project and selectPromote to Deployment Space

- Select
New Spacw +
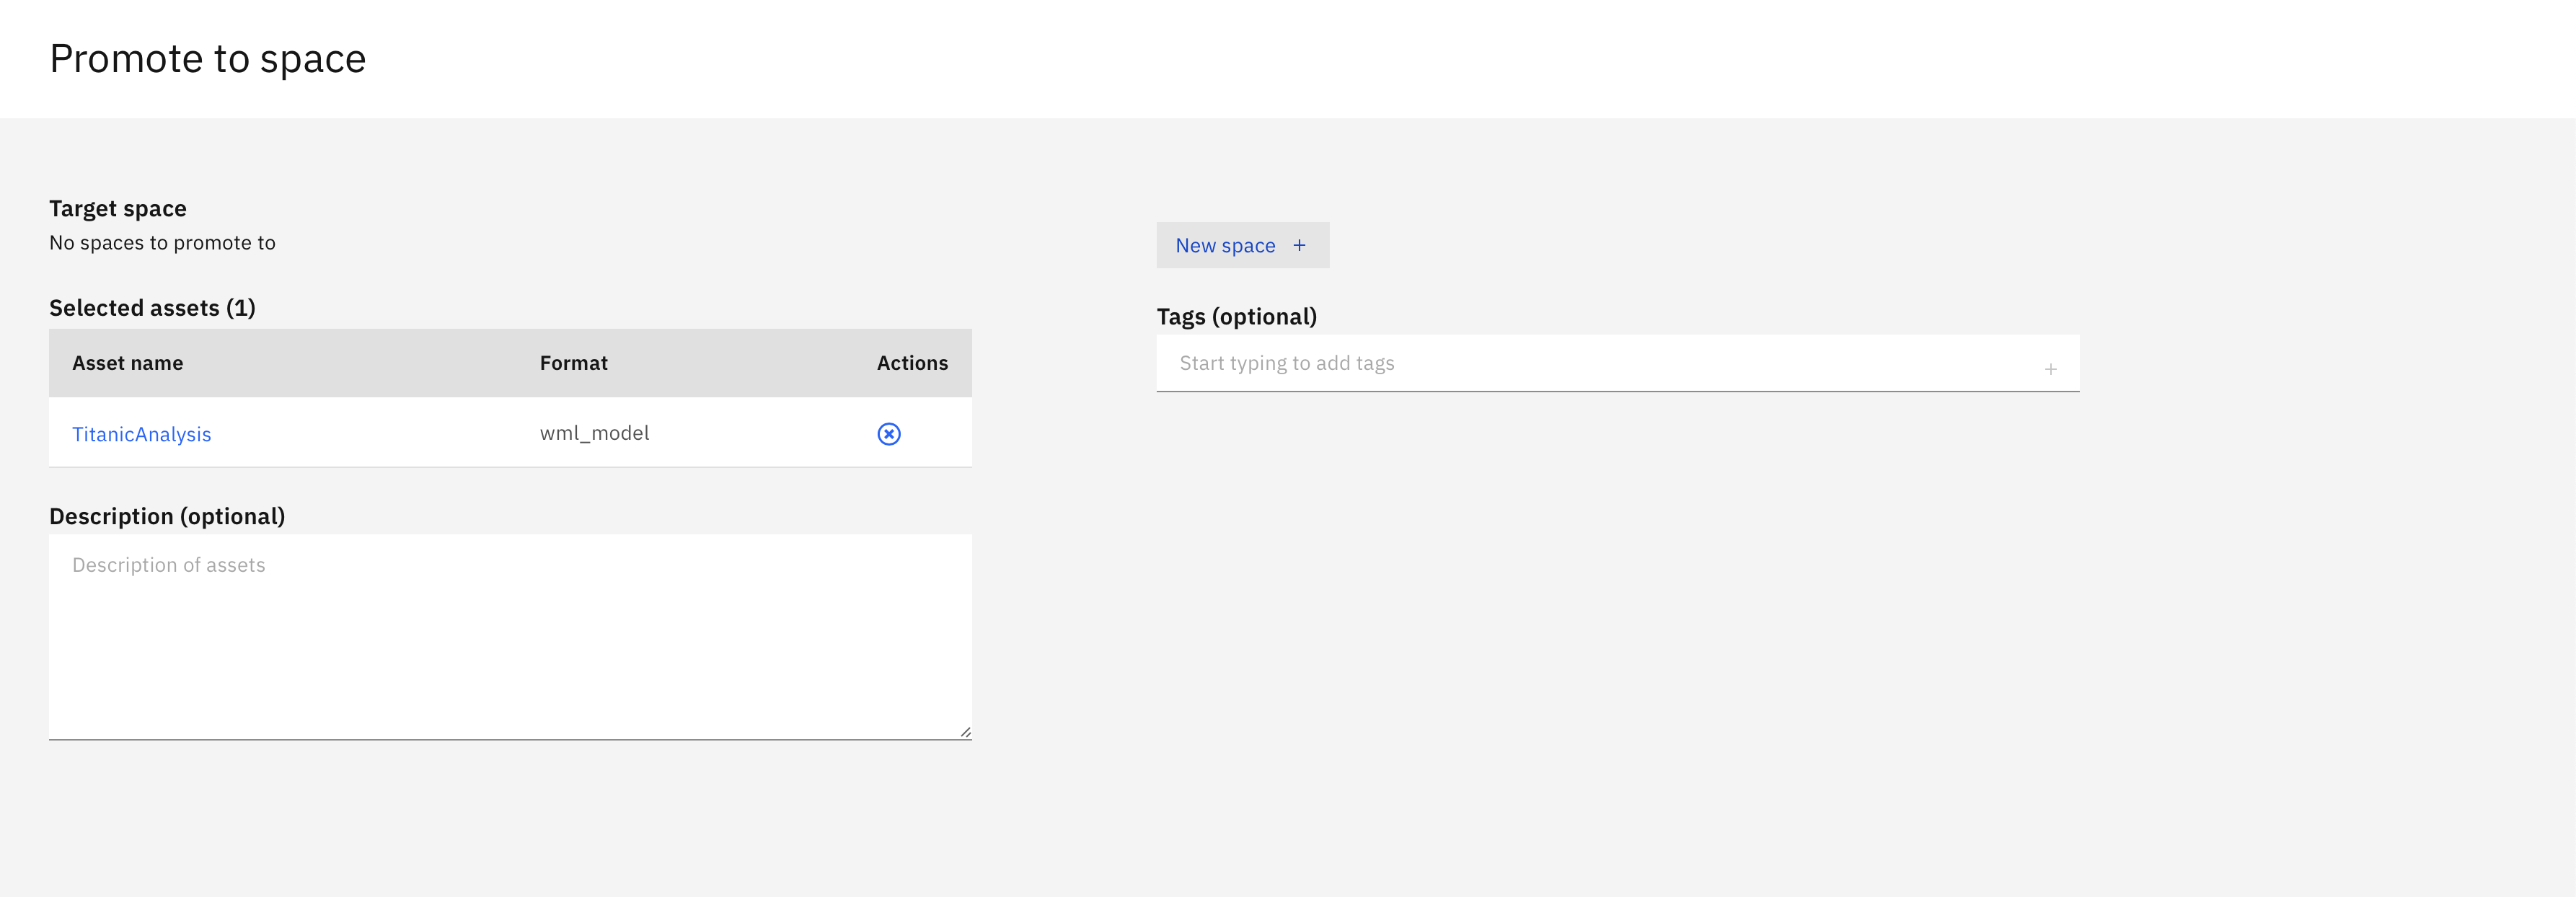
- Create a new Deployment Space and select your machine learning service and cloud object storage and click
create

- Once the deployment space is created, select it and click
Promote
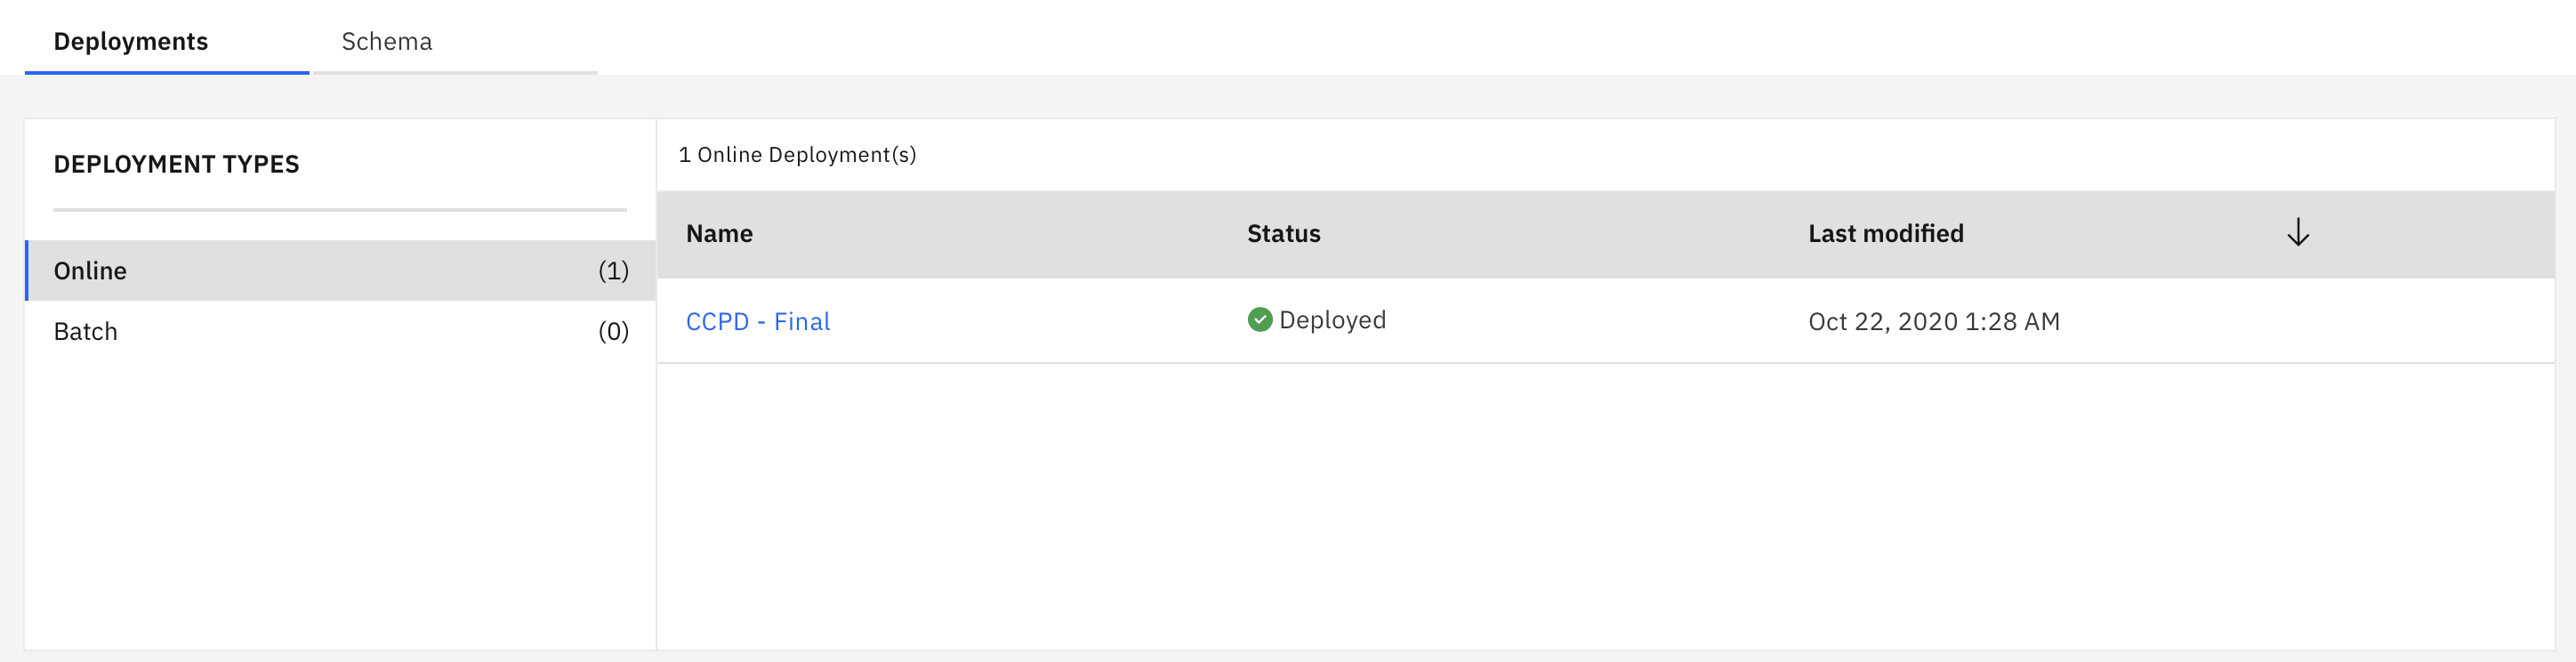
- Click on the hamburger menu and select
Deployment spacesyou should see your created deployment space there; access the deployment space

- Select the model and click on create deployment

- You will be prompted with the following; Select
Onlineand give your deployment a name and clickCreate

- Wait for the status to be set to
Deployed
- Access the deployment and go to the
Testtab

- Access the data set
titanic_shaped.csvand pick a set of values to test your model and clickPredict

As you can see that there was a 92% of chance which was predicted that Frolicher, Miss. Hedwig Margaritha has survived the Titanic sinking. The model is giving us results in terms of the Survived field on how likely is a person to survive.
Link to slides: http://fawazsiddiqi.github.io/DataLifecycle/#/
Sign up for IBM Cloud here