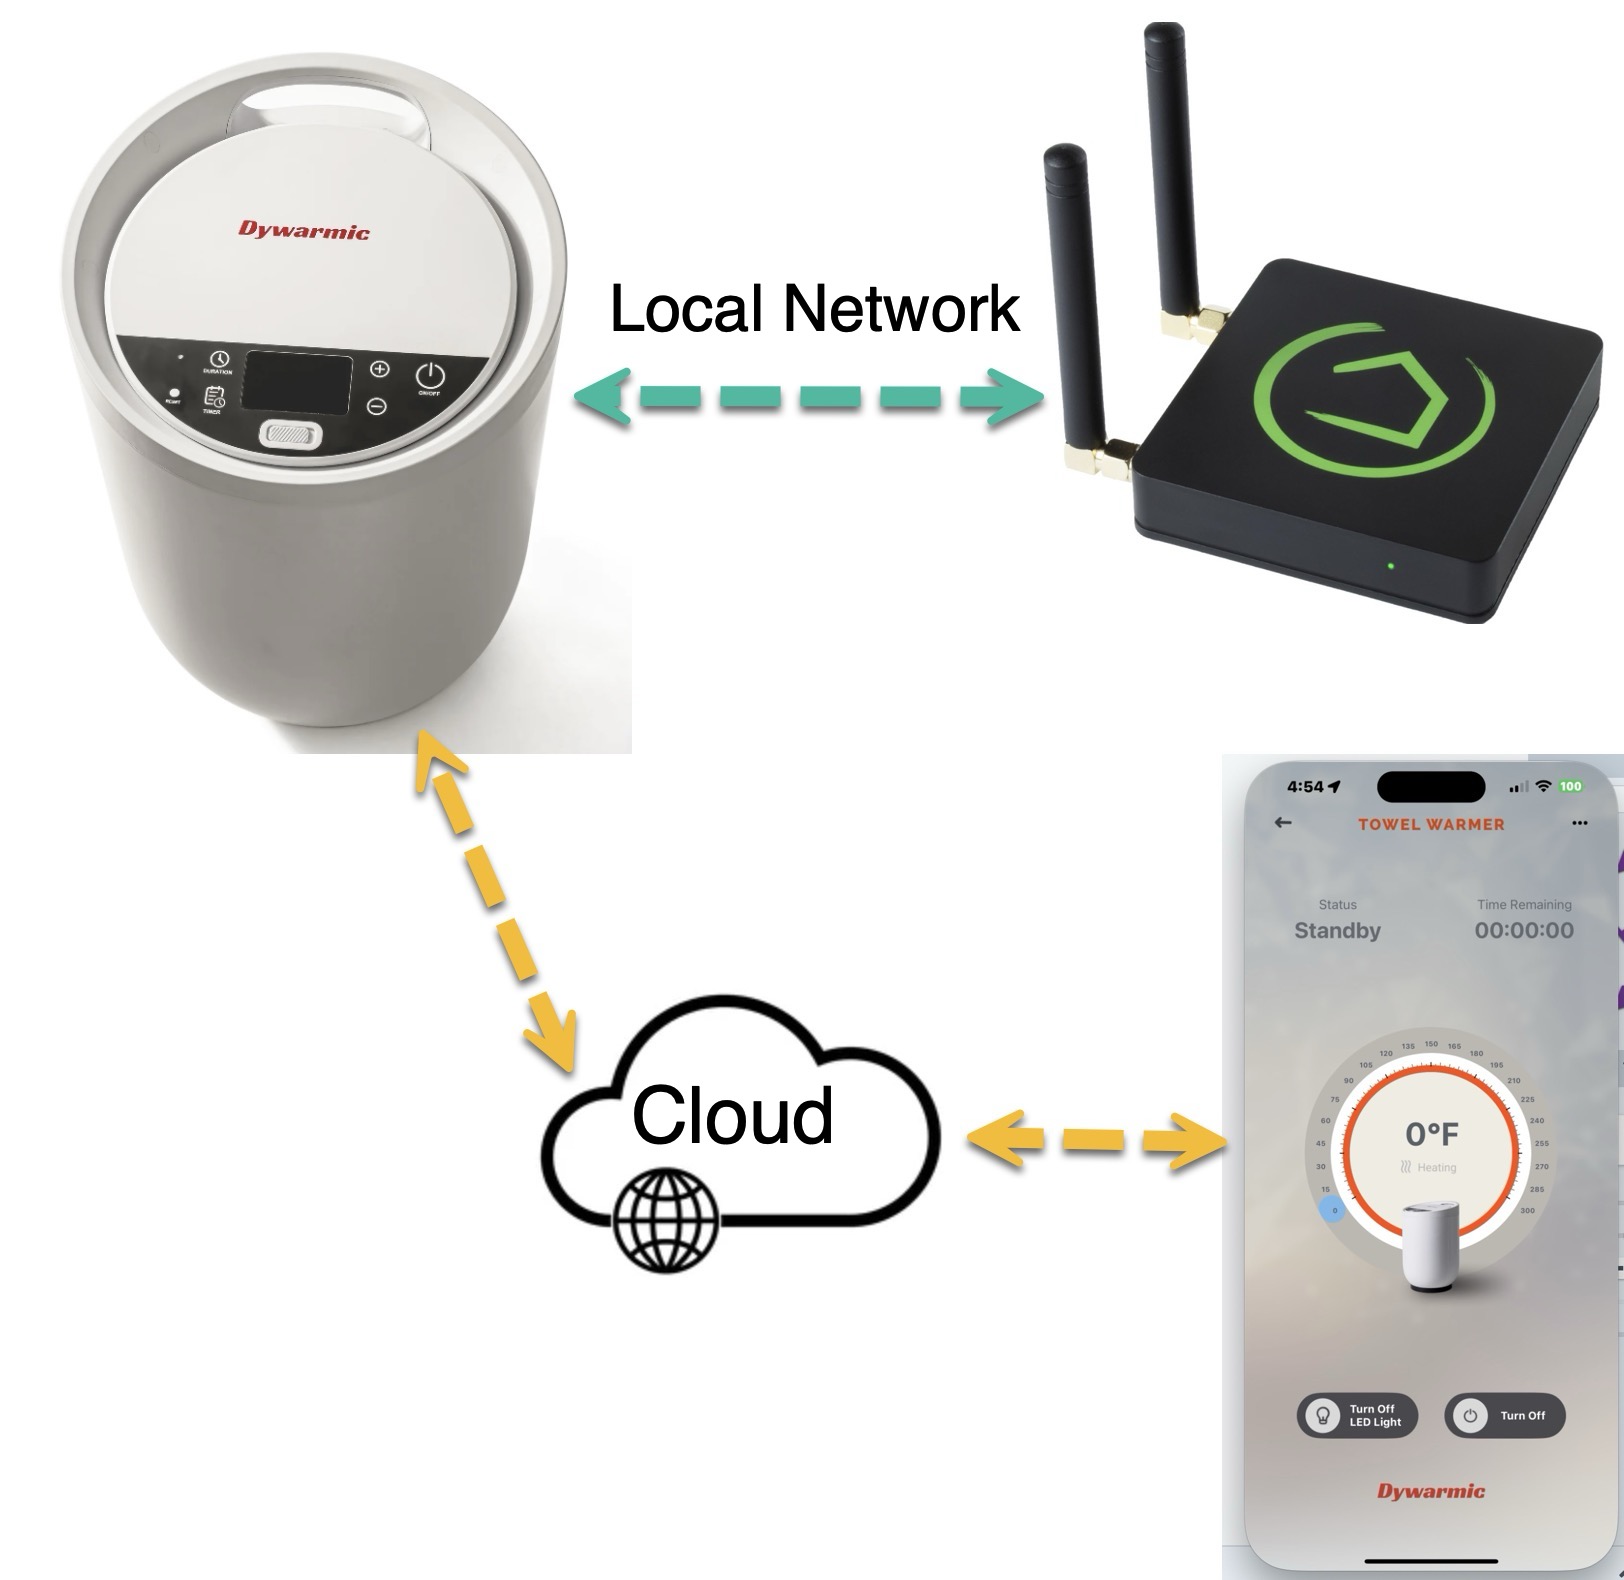
This Hubitat integration provides local network control and the status of the Dywarmic towel warmer (tuya category: mjj).
| Feature | Description |
|---|---|
| Hubitat local direct device API access | Local WiFi connectivity which eliminates cloud dependency |
| Switch | * Turn On * Turn Off |
| Set/Change Countdown Duration Timer | * Set/Cancel warming duration in intervals of 20-minute increments |
| Set Countdown Duration Timer Default | * Set countdown duration timer default value when towel warmer is switched on |
| Reduce hub events | * Reduce frequent 'current temperature' events by only creating an event to the hub every ± delta N° units. * Ignore nonessential towel warmer events. |
| Device API Debugging | * Custom Data To Device * Send Custom JSON Object |
| Set Features | * Child Lock * Eco * Light |
| Refresh | Updates device states |
- Hubitat Elevation Hub
- Dywarmic Smart Towel Warmer
- WiFi connected to a static IP address
- Integrated into the Smart Life app
- Knowledge of configuring a Hubitat virtual device
- Use of Hubitat Package Manager (HPM) to install/update this custom application.
- tuya Developer Account
- Knowledge of and access to a computer with Python Language
- Add the Dywarmic Towel Warmer application using Hubitat Package Manager by selecting 'Install' and searching for 'Dywarmic Towel Warmer' or by tags 'Bathroom', 'Temperature', or 'Pools & Spas.'
- Allow HPM to automatically launch the Dywarmic Towel Warmer app, which will create a virtual child device (Dywarmic Towel Warmer device driver) that you can name, i.e., 'Towel Warmer.'
- Verify this new device has been created in your devices view
- Read tuya IoT Platform Configuration documentation
- Driver username and password: The username and password of the Tuya Smart or Smart Life app that you used to link devices on the Tuya IoT Platform.
- Driver accessId and accessKey are your cloud project's Access ID and Access Secret, respectively. Go to the Tuya IoT Platform and select your cloud project. Click Project Overview and find the Access ID and Access Secret.
- Determine the local key for your towel warmer.
-
This integration utilizes the Tuya API protocol, which connects directly to the device on the local network (i.e., not via the Tuya servers) to control and read the status of devices. This Hubitat device driver supports versions 3.1 - 3.4 of the Tuya API protocol.
- The Dywarmic Towel Warmer uses the tuya API protocol 3.4
-
All Tuya devices communicate over the network using AES ECB encryption. The key for encrypting and decrypting is created to pair the device with the SmartLife mobile app. To use the Hubitat device driver, you need to obtain this key.
- You need to get the Dywarmic Towel Warmer device ID, device key, device local ip-address, and device endpoints by following this tuya Guide and the 'Install steps' listed below.
Be aware that a new local key may be generated when a new device is added to or paired with the SmartLife app; hence, it must be updated when/if you get another device and add it to Smart Life!
- Install the latest version of Python on a computer, if needed.
- Install the Tinytuya module on this same computer.
- Install the Smart Life app (Apple or Google) and pair all devices you want to use in Hubitat. Refer to the device user guide on how to pair the device.
- Scan your network for the paired Tuya devices by writing the following in the Unix/Dos command line:
python -m tinytuya scan - Create a iot.tuya.com developer account and log in. Connect your SmartLife app to this developer account using these instructions.
- Run the tinytuya wizard
- Now you should have a complete overview of everything you need to get the Hubitat device driver working
- In Hubitat, open "Devices", then click "Add Device", and click "Virtual".
- Assign a Device Name and select the Type: "Hubitat SmartLife Integration." Then, click "Save Device."
- Now, add the "Device IP", "Device ID", "Device local Key", and select the Tuya protocol version that you got from point 6.
- Lastly, set the Endpoint you want to control. During step 6, you should see something called "Status" together with each device, something like this:
Status: {'1': False, '2': False, '3': False, '5': 0}, the endpoints are the numbers in front of theFalse. This status block is for a "Dywarmic Towel Warmer," where each number corresponds to the status of the device. - Click "Save Preferences."
- You should now be able to control your Towel Warmer device via Hubitat on the local network only.
- It is highly recommended that you lock a static IP on your (wifi)router to the towel warmer device so it does not change its IP address. If it gets a new ip address, then this Hubitat integration won't be able to find the device, and you will need to change the ip address in the device driver preferences.
Q: Will I be billed after the 1-year free trial of the API product expires?
A: After expiration, you can renew the subscription for free. The Trial Edition allows you to use all free API products but limits the quota of API calls. For more information about the quota, see Pricing.
Q: Issues / Limitations
A: Updates to a towel warmer firmware or API may render this custom device driver's connectivity in the future. Please report to Habitat's open forum support thread.
- Added some debugging information for when the TCP/IP pipe raw socket is disconnected
- Added capability "PresenceSensor" to track device connectivity state