This is the Frontend code for the ForkBook application, you can find the latest deployed project at https://forkbook.co
| James Eneh | Carnun Marcus-Page | Chinedu Nwume | Samuel Mpere Annor | Kiyani Bamba |
|---|---|---|---|---|
| |
|
|
|
|
| Patrick Rodrigues | Temitope Akinsoto | |||
| |
|
Trello Board
Product Canvas
UX Design files
Eating and by extension, cooking should be a fun activity. If cooking isn’t fun why eat? The aim of this project is to make cooking fun, seamless, and most importantly personal.
- User should be able to sign up and login
- User should be able to easily create a recipe
- User should be able to view recipes
- User should be able to save a (reference) recipe to their cookbook
- User should be able to view their cookbook
- User should be able to create a new version of a recipe
- User can search for specific ingredients and/or categories
- User should be able to search for their desired recipe
- User can exclude certain ingredients from search
- User can make their recipe private or public
- User can enter in a different unit and the application will convert the unit
- REACT JS (Axios) (Funtional)
- REDUX (for state manangement)
- Styled-Components
- @material-ui/core
- axios
- formik
- less
- styled-components
- yup
We use Cloudinary for images/videos content delivery
For the app to function correctly, the user must set up their own environment variables. There should be a .env file containing the following:
REACT_APP_API_HOST = link to your API host
REACT_APP_CLIENT_ID = your Slack app's client ID, can be found in you app's settings --> basic information
REACT_APP_CLIENT_SECRET = your Slack app's client secret, can be found in you app's settings --> basic information
These instructions will get you a copy of the project up and running on your local machine for development and testing purposes. See deployment for notes on how to deploy the project on a live system.
For development, you will only need Node.js installed on your environment.
$ node --version
v10.16.3

$ npm --version
6.10.3
$ https://github.com/LABS-EU3/rvc_frontend
$ cd forkbook
$ npm install
$ npm start
Runs the app in the development mode. Open http://localhost:3000 to view it in the browser. The page will reload if you make edits.
$ npm test
Launches the test runner in the interactive watch mode.
$ npm run build
Builds the app for production to the build folder.
It correctly bundles React in production mode and optimizes the build for the best performance.
$ npm lint:fix
Fixes linting automatically.
$ npm coverage
Reports coverage with disabled test-watching.
Eject hidden modules
$ npm eject
Ejects hidden modules into package.json.
  src
  |
  ├── actions
  |   ├── recipe-actions.js
  |   └── user-actions.js
  |
  ├── components
  |   ├── recipes
  |   |   ├── recipe.js
  |   |   ├── recipe-styles.js
  |   |   └── recipe.test.js
  |   |
  |   └── users
  |       ├── user.js
  |       ├── user-styles.js
  |       └── user.test.js
  |
  ├── reducers
  |   ├── reducer.js
  |   ├── reducer.js
      ├── recipe-reducer.js
      └── user-reducer.js
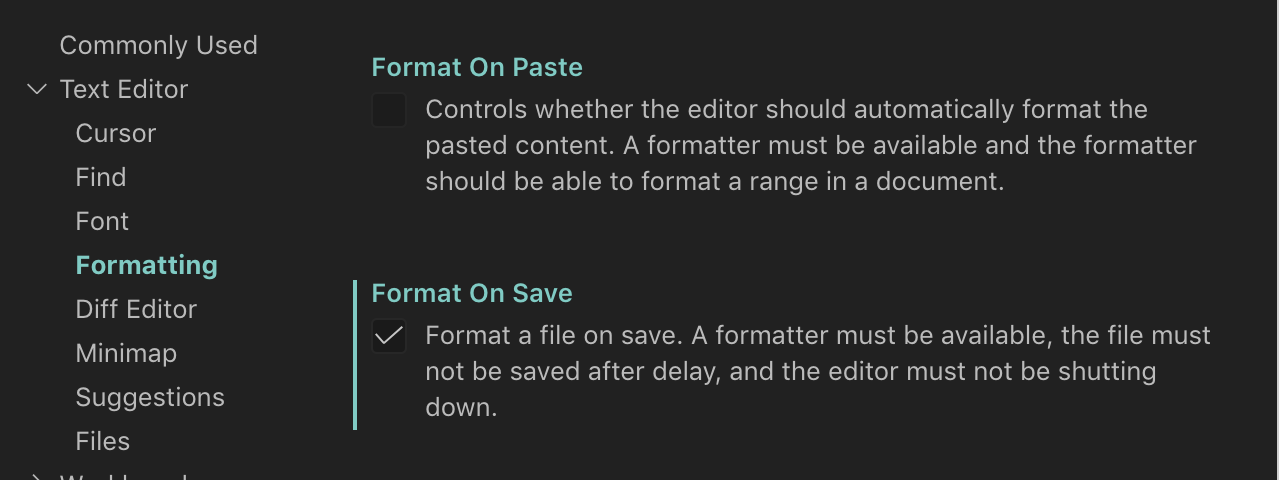
On VsCode:
- Go to
Settings>Text Editor>Formatting - Check
Format on Save
- Tab Size: 2
- Use the single quote
' - Always export objects even if only one function is being exported
- Always name your files accordingly
- Only one index.js can exist and must be top level
Async/Awaitinstead of.then()etc...- All component files should have the .jsx extension e.g login.jsx, signup.jsx.
- Use relative units and values for example { fonts-size: 2rem; } instead of hard-coded pixels { fonts-size: 20px } etc
- Use flexbox or percentages for layout instead of rems/ems/px
- TDD is preferable but Test as soon as possible once you finish something
- Never work on the same file!
-
Install VS-Code extension below;
- Name: Prettier - Code formatter
- Id: esbenp.prettier-vscode
- Description: VS Code plugin for prettier/prettier
- Version: 1.9.0
- Publisher: Esben Petersen
- VS Marketplace Link
-
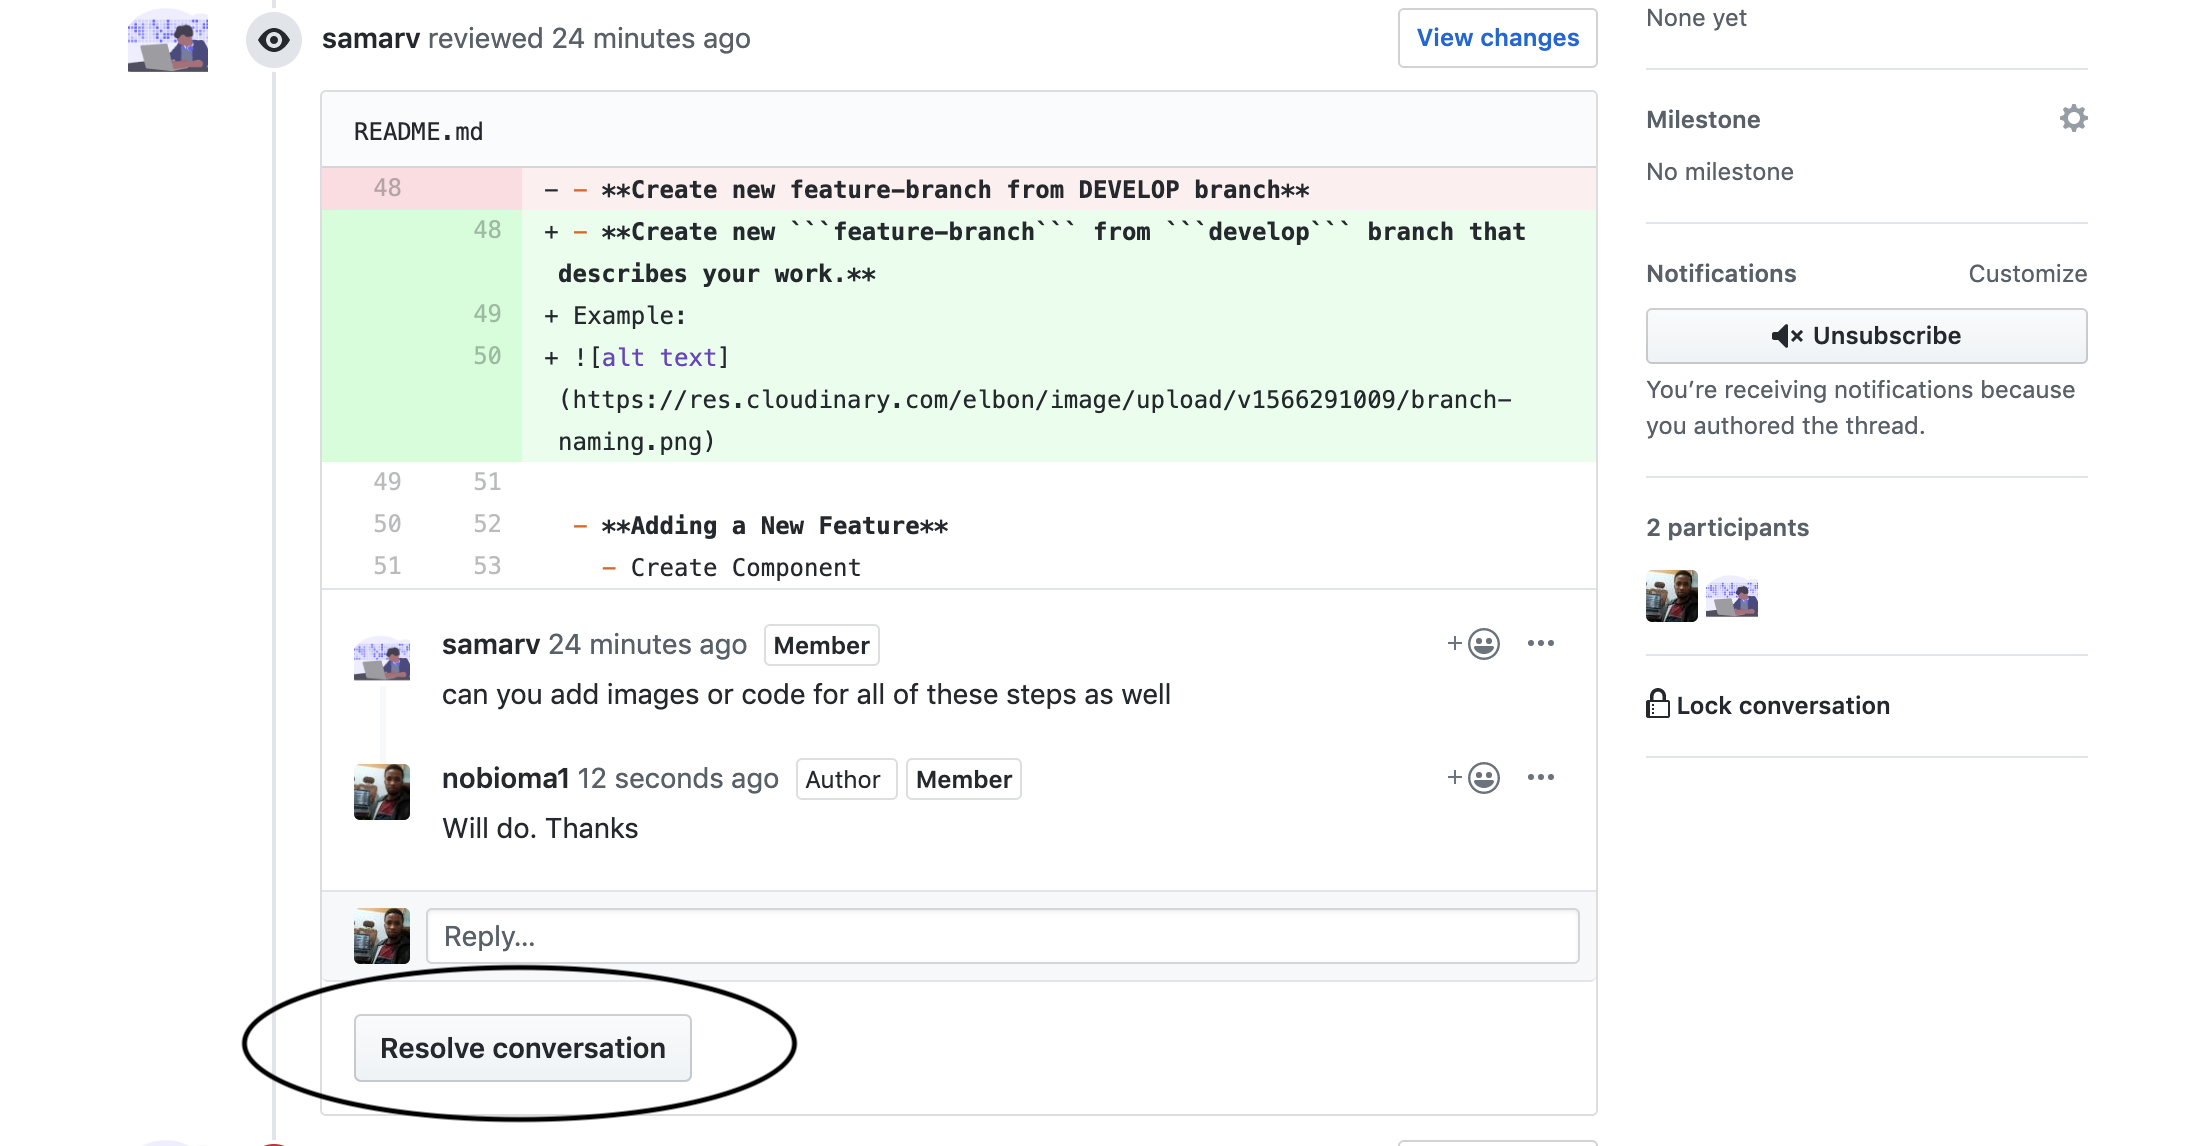
Create a new
feature-branchfromdevelopbranch that describes your work.git checkout -b feature-branch
-
Adding a New Feature
-
Create Component named
index.jsrelated folder.// src/Home/index.js const Home = () => <h1>Welcome to ForkBook</h1>; export default Home;
-
Define Route
// src/routes/AppRouter.js
import Home from '../components/Home';

...
<Route exact path="/" component={Home} />;
-
Create Action
// src/actions/home.js
export const GET_HOME = 'GET_HOME';

export const getHome = user => {
  return { type: GET_HOME, payload: user };
};
-
Create Reducer
// src/reducers/homeReducer.js
import { GET_HOME } from '../actions/recipe.js';

const recipesReducer = (state = initialState, action) => {
  switch (action.type) {
    case GET_HOME:
      return { ...state, home: action.payload };
    default:
      return state;
  }
};

export default recipesReducer;
-
Add Reducer to root reducer
// src/reducers/index.js
import recipesReducer from '../recipesReducer.js';

const rootReducer = combineReducers({
  recipe: recipesReducer,
});

export default rootReducer;
-
Create Test Suite for Component
// src/Components/Home/__tests__/home.test.js
import React from 'react';
import * as rtl from '@testing-library/react';

import '@testing-library/jest-dom/extend-expect';

import Recipe from '../index';

afterEach(rtl.cleanup);
describe('Recipe Component', () => {
  it('Should render recipe component', () => {
    const { container } = rtl.render(<Home />);
    expect(container).toBeTruthy();
  });
});
-
Create Test Suite for Reducer
// src/reducers/__tests__/home.test.js
import { cleanup } from '@testing-library/react';
import userReducer from '../userReducer';
import { FETCH_START } from '../../actions/user';

const initialState = {
  loading: false,
  user: null,
  error: '',
};

afterEach(cleanup);
describe('User Reducer', () => {
  it('Should return initial State', () => {
    expect(userReducer(undefined, {})).toEqual(initialState);
  });

  it('Should Toggle Loading state', () => {
    expect(userReducer(initialState, { type: FETCH_START })).toEqual({
      ...initialState,
      loading: true,
    });
  });
});
-
Create Test Suite for Action
// actions/__tests__/user.test.js
import configureMockStore from 'redux-mock-store';
import thunk from 'redux-thunk';
import nock from 'nock';
import { setUser } from '../user';

const mockStore = configureMockStore([thunk]);

describe('Home Action Creator', () => {
  let store;
  beforeEach(() => {
    store = mockStore({});
  });
  afterEach(() => {
    nock.cleanAll();
  });

  it('Should return FETCH_SUCCESS Action with payload', () => {
    nock('https://home.com/api')
      .post('/user')
      .reply(200, {
        user: 'Sample User',
      });
    const expectedActions = [
      {
        type: 'SET_USER_START',
      },
      {
        type: 'SET_USER_ERROR',
        payload: 'Sample User',
      },
    ];
    store = mockStore({});
    return store.dispatch(setUser()).then(() => {
      expect(store.getActions()).toEqual(expectedActions);
    });
  });
});
-
-
Creating SVG Components
-
Get raw SVG
<svg width="21" height="5" viewBox="0 0 21 5" fill="none" xmlns="http://www.w3.org/2000/svg">
  <circle cx="2.5" cy="2.5" r="2.5" fill="#7D8597"/>
  <circle cx="10.5" cy="2.5" r="2.5" fill="#7D8597"/>
  <circle cx="18.5" cy="2.5" r="2.5" fill="#7D8597"/>
</svg>
-
Remove any unnecessary attributes
Here I've removed all fill, width and height attributes. We'll be setting those later with CSS<svg viewBox="0 0 21 5" xmlns="http://www.w3.org/2000/svg"> <circle cx="2.5" cy="2.5" r="2.5" /> <circle cx="10.5" cy="2.5" r="2.5" /> <circle cx="18.5" cy="2.5" r="2.5" /> </svg>
-
Create component
Wrap all paths in a 'g' tag and spread props in so that styles import properly. Use the SVG component instyling/atoms/SVG.jsximport React from 'react'; import SVG from '../SVG'; function Ellipses(props) { return ( <SVG xmlns="http://www.w3.org/2000/svg" viewBox="0 0 21 5" {...props}> <g> <circle cx="2.5" cy="2.5" r="2.5" /> <circle cx="10.5" cy="2.5" r="2.5" /> <circle cx="18.5" cy="2.5" r="2.5" /> </g> </SVG> ); }
-
Component Usage
Colors, mitter limits and stroke can be set in props.Props:
fillColor="<fill color here>"
strokeColor="<stroke color here>"
strokeWidth="<stroke width here>"
mitter="<mitter limit here>"Here's an example with the Logo SVG:
<Logo fillColor="#4265ED" />
-
When contributing to this repository, please first discuss the change you wish to make via issue, email, or any other method with the owners of this repository before making a change
If you need to work on a file outside your ticket, let know everyone and create a seperate branch for it! Make sure you follow the guidelines below.
If you are having an issue with the existing project code, please submit a bug report under the following guidelines:
- Check first to see if your issue has already been reported.
- Check to see if the issue has recently been fixed by attempting to reproduce the issue using the latest master branch in the repository.
- Create a live example of the problem.
- Submit a detailed bug report including your environment & browser, steps to reproduce the issue, actual and expected outcomes, where you believe the issue is originating from, and any potential solutions you have considered.
We would love to hear from you about new features which would improve this app and further the aims of our project. Please provide as much detail and information as possible to show us why you think your new feature should be implemented.
If you have developed a patch, bug fix, or new feature that would improve this app, please submit a pull request. It is best to communicate your ideas with the developers first before investing a great deal of time into a pull request to ensure that it will mesh smoothly with the project. Remember that this project is licensed under the MIT license, and by submitting a pull request, you agree that your work will be, too.
-
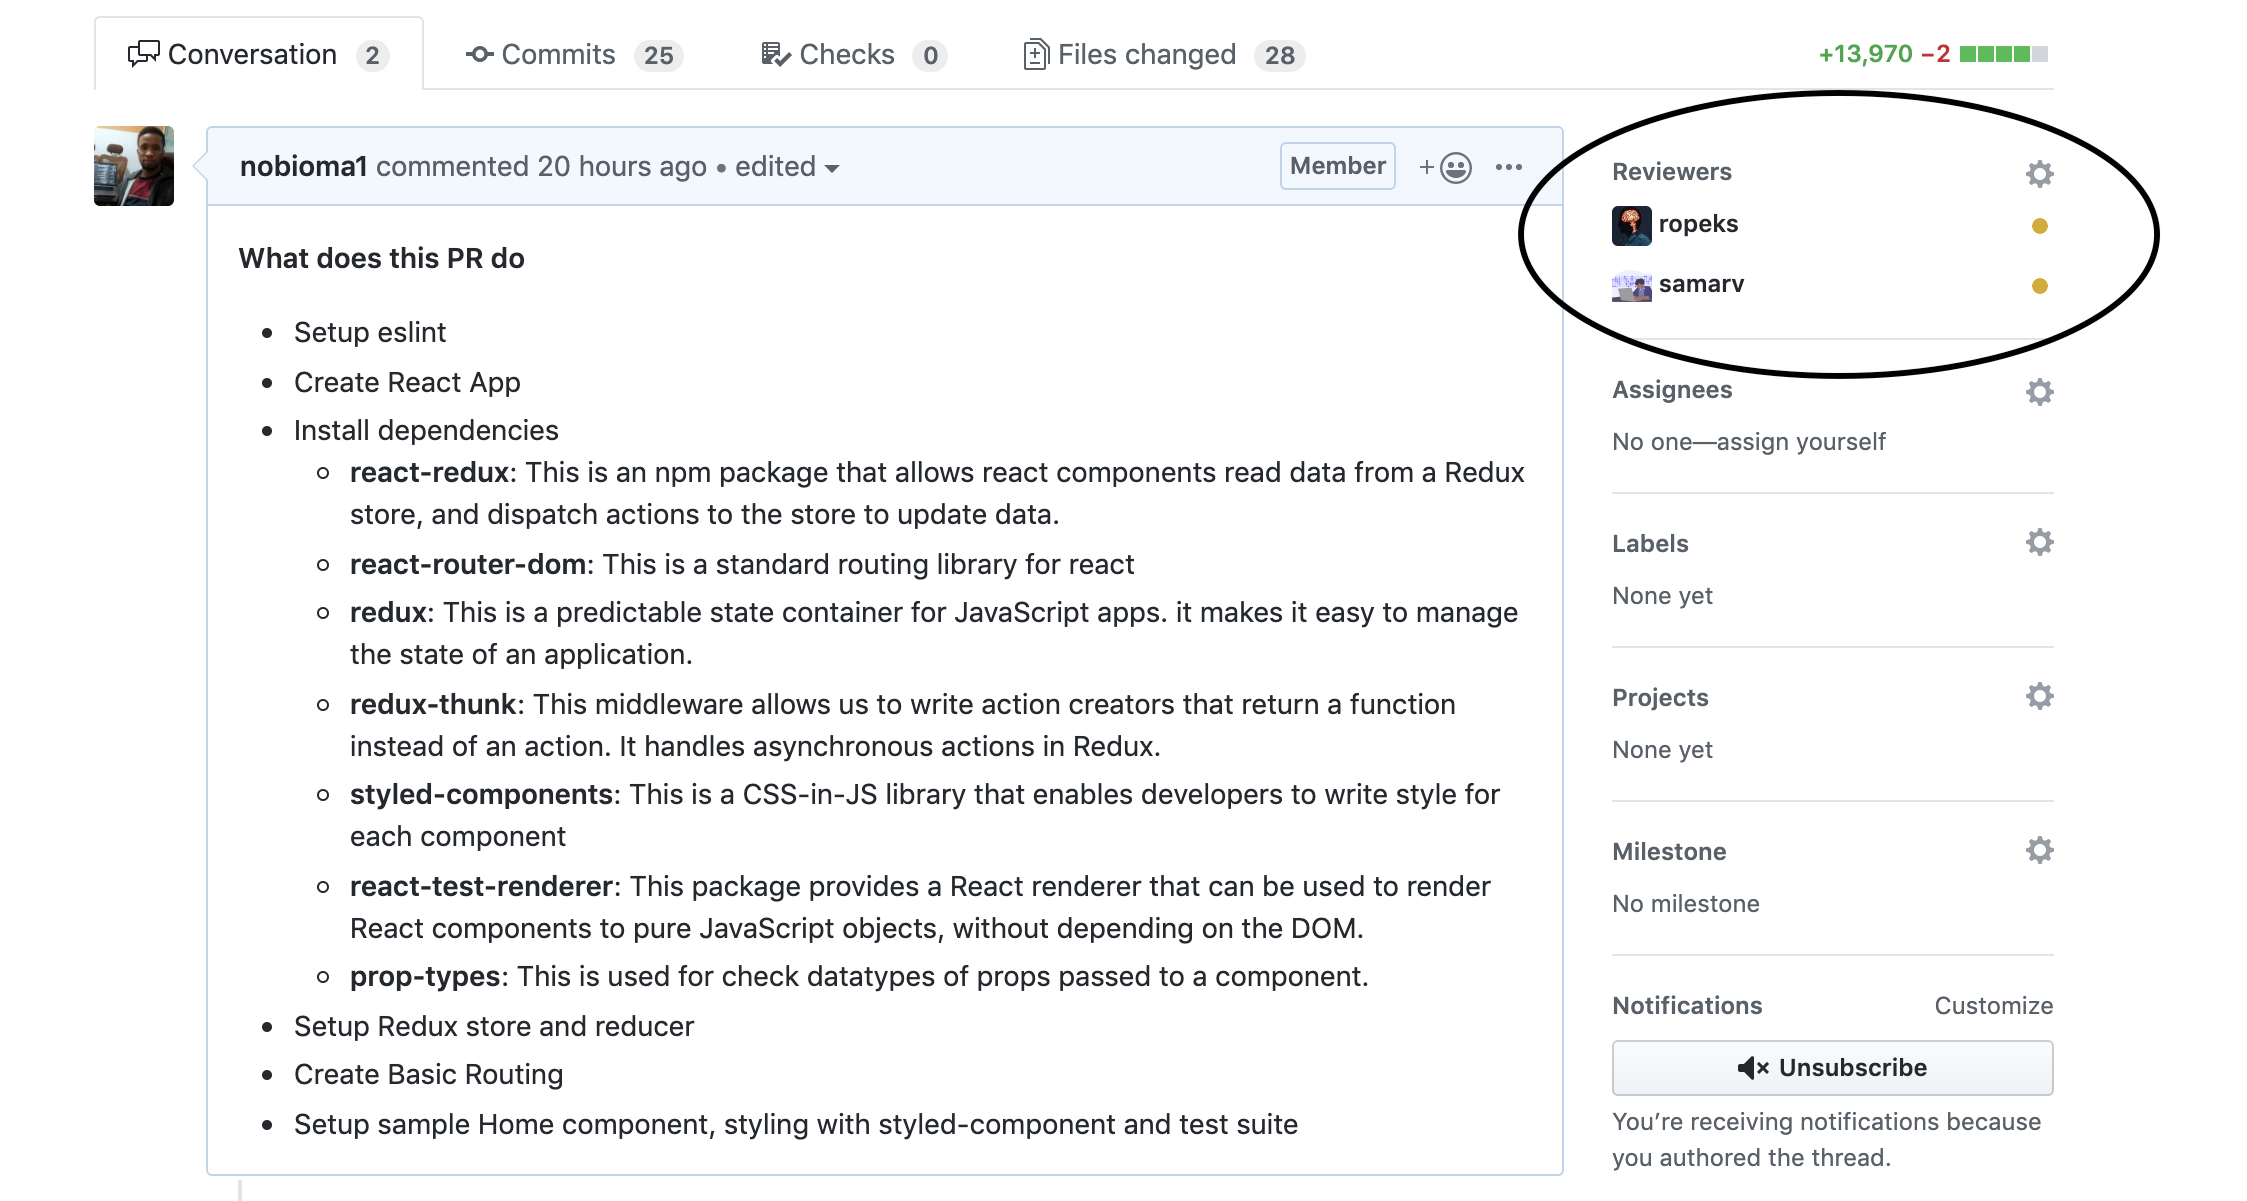
Create Pull Request
-
All CI status checks should be green
-
Review approval should have been submitted before merging
See Backend Documentation for details on the backend of our project.
This project is licensed under the MIT License - see the LICENSE file for details
These contribution guidelines have been adapted from this good-Contributing.md-template.


