Basic example of how to use Google Maps with Django and PostGIS
-
Django REST framework is a powerful and flexible toolkit for building Web APIs.
-
PostgreSQL is the World's Most Advanced Open Source Relational Database.
-
PostGIS is a spatial database extender for PostgreSQL object-relational database. It adds support for geographic objects allowing location queries to be run in SQL.
-
Geopy is a Python client for several popular geocoding web services.
-
Amazon S3: Amazon Simple Storage Service (Amazon S3) is an object storage service that offers industry-leading scalability, data availability, security, and performance.
- Ubuntu 18
Clone this project:
git clone https://github.com/LegolasVzla/django-google-maps.git
Makefile will help you with all the installation. First of all, in django-google-maps/core/ path, execute:
make setup
This will install PostgreSQL, PostGIS and pip on your system. After that, you need to create and fill up settings.ini file, with the structure as below:
[postgresdbConf]
DB_ENGINE=django.contrib.gis.db.backends.postgis
DB_NAME=dbname
DB_USER=user
DB_PASS=password
DB_HOST=host
DB_PORT=port

[GEOSGeometryConf]
max_distance=5

[googleMapsConf]
API_KEY=yourGoogleAPIKey
defaultLat=<Your_default_latitude>
defaultLng=<Your_default_lingitude>

[amazonS3Conf]
S3_ACCESS_KEY=<Your_access_key>
S3_SECRET_KEY=<Your_secret_key>
s3_bucket_name=<Your_bucket_name>

[font-awesomeConf]
KEY=<Your_key>
-
postgresdbConf section: fill in with your own PostgreSQL credentials. By default, DB_HOST and DB_PORT in PostgreSQL are localhost/5432.
-
GEOSGeometryConf section: a
max_distancesuggested could be from 1-5 kilometers, to display nearby places. -
googleMapsConf section: google maps API KEY needed to load the map, also a default lat and longitude to focus your map
-
font-awesomeConf section: optional, if you have a Font Awesome key for icons
Then, activate your virtualenv already installed (by default, is called env in the Makefile):
source env/bin/activate
And execute:
make install
This will generate the database with default data and also it will install python requirements and nltk resources. Default credentials for admin superuser are: [email protected] / admin.
Run django server (by default, host and port are set as 127.0.0.1 and 8000 respectively in the Makefile):
make execute
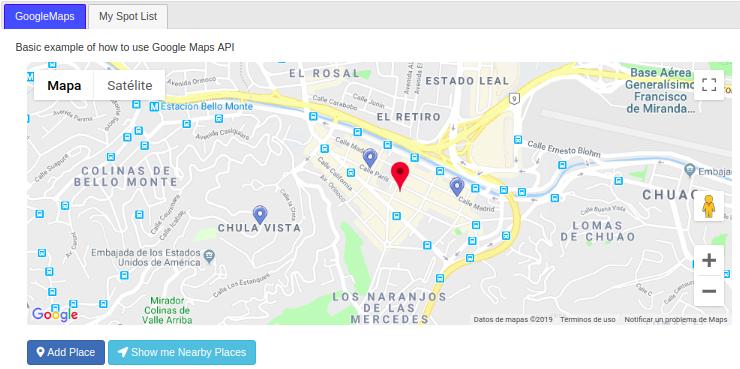
You could see the home page in:
http://127.0.0.1:8000/index/
The map will be setting in the defaultLat and defaultLng position.
- Spots: table to store places of the users. This table contains a position (PostGIS geometry) column that works to store information of latitude and longitude in WGS 84 format.
- Tags: table to store tags related with the spots
In a RESTful API, endpoints (URLs) define the structure of the API and how end users access data from our application using the HTTP methods (GET, POST, PUT, DELETE), making all posssible CRUD (create, retrieve, update, delete) operations.
http://127.0.0.1:8000/api/spots/
| Endpoint | HTTP Method | CRUD Method | Result |
|---|---|---|---|
api/<instance> |
GET | READ | Get all the record |
api/<instance>/:id |
GET | READ | Get a single record |
api/<instance> |
POST | CREATE | Create a new record |
api/<instance>/:id |
PUT | UPDATE | Update a record |
api/<instance>/:id |
DELETE | DELETE | Delete a record |
Add a custom place (CREATE)
- Endpoint path:
api/spots/create_spot/
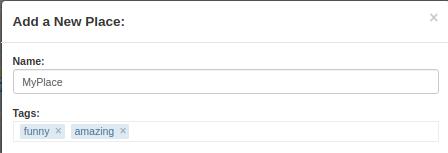
In "GoogleMaps" tab, you can create a new spot doing click in a position of the map and then doing click on the "Add Place" buttom:  , fill up the form and save your spot. Also, you can create a several list of tags for you place.
Note: I used tagEditor plugin to create and edit tags, unfortunately this project is death but was the most recent jQuery tag editor that I could found.
See spots details (READ)
- Endpoint path:
api/spots/user_places/
In "My Spot List" tab, you can see all the details of your spot list.
Spot details (RETRIEVE)
- Endpoint path:
api/spots/spot_details/
In "My Spot List" tab, you can click on any spot and see the information related with it.
Edit spots (UPDATE)
- Endpoint path:
api/spots/edit_spot/
In "My Spot List" tab, you can edit spots by changging name or tags related with it.
Remove a place (DELETE)
- Endpoint path:
api/spots/delete_spot/
In "My Spot List" tab, you can delete a spot in the garbage icon. This action will delete the tags related with the spot if those tags doesn't exists for any other spot.
Nearby places
- Endpoint path:
api/spots/nearby_places/
In "GoogleMaps" tab, you can display nearby places from your current position within 'max_distance' in the nearby buttom:  . The map will show your nearby places with the icon below:
 ![]()
Spots table contains two geometry columns in WGS 84 format (SRID 4326):
- geom
- position
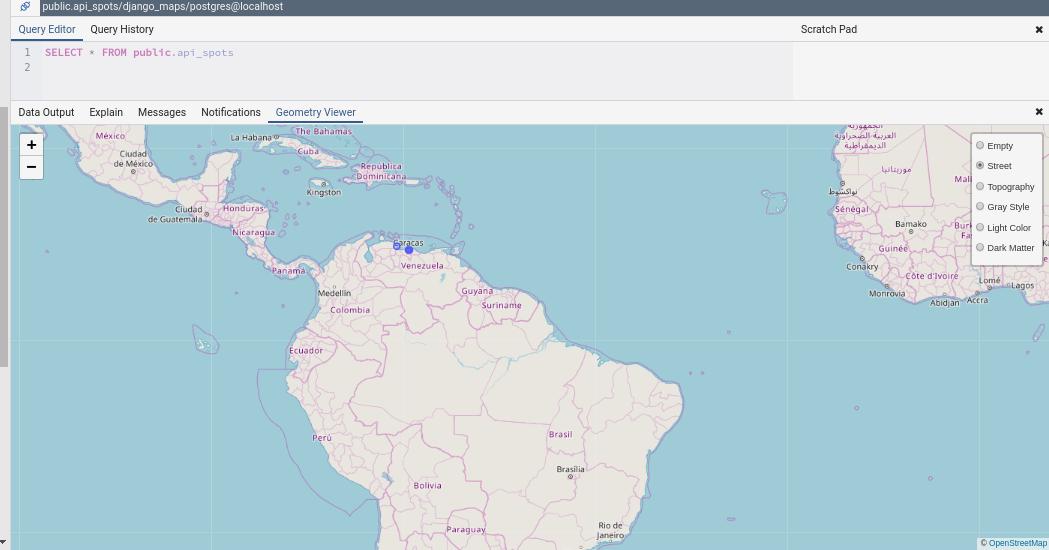
That means that you can querying and watch our geometry data in PgAdmin4 as follow:
Now you can see an Eye Icon that means you can watch our data in the pgadmin map:
That's great! also you can watch it in differents layers (street, topography...)
Note: If our layers have an SRID other than 4326, the map will show the layers, but without a background.
You can access of a administrative divisions data as below:
-
Cities:
administrative_area_level_1
-
County, Municipality:
administrative_area_level_2
-
Parish:
administrative_area_level_3
You can find more information about administrative divisions in:
I started this project from yt-google-maps-1 repository and I could learn and fun myself at the same time :)
All work to improve performance is good
Enjoy it!


