deploy a private ethereum blockchain network with kubernetes
another detailed guide can be found on medium.com
the manifest produced by kuberneteth should work on any platform where kubernetes is up and running.
Make sure to have kubernetes up and running, e.g. via the official documentation
the deployment of the ethereum network nodes happens via the deployment.yaml file that is created when calling the kuberneteth script
the deployment will set up a geth cluster consisting of:
- a bootnode
- genesis node (that writes the genesis block initially) - and starts to run normally afterwards
- miner node(s) (depending on the configuration in kuberneteth.yaml)
- member node(s) (depending on the configuration in kuberneteth.yaml)
- a monitor to watch the status of the cluster (via ethereum-netstats and eth-net-intelligence-api)
- persistent storage of blocks and any data that is usually in the
datadir(like.ethereum) is done via hostPath -> make sure to keep it clean, as it is not managed (usuallyrm -rf /var/lib/docker/geth-storageon all k8s nodes should do the trick) also make sure to disable the PodSecurityPolicy forhostPathor whitelist/var/lib/dockerin your PodSecurityPolicy - depending on the workers (cpu) the mining time may vary
the deployment can be configured on a high level via a yaml file kuberneteth.yaml
options are:
# configuration for the bootnode that makes the cluster nodes aware of each other - for that make sure bootnode has same genesis block
bootnode:
  nodekeyhex: 3bed8e0fa771475049cddac0fcc20a6cf1005e271e2b12ef339f213218b2dbdb
  # verbosity of the bootnode [1..9]
  verbosity: 9
  # assign an rpc/ipc port
  geth:
    NodeP2P_ListenAddr: 30301
    NodeP2P_DiscoveryAddr: 30303
    Node_DataDir: /etc/testnet/bootnode
# here you can add as many nodes as you like, name and configure them
nodes:
- miner:
    # this config values will end up in the k8s manifest directly
    k8s:
      # open a port on each node (optional)
      nodePort_rpc: 30001
      nodePort_ipc: 30002
      replicas: 1
    # this config values will alter the geth config toml file which will end up as a ConfigMap in the k8s manifest
    geth:
      # address where the mining rewards will go to (optional)
      Eth_Etherbase: "0x023e291a99d21c944a871adcc44561a58f99bdbc"
      # threads (optional)
      Eth_MinerThreads: 1
      Node_UserIdent: miner
      Node_DataDir: /etc/testnet/miner
      Node_HTTPPort: 8545
      Node_WSPort: 8546
      NodeP2P_ListenAddr: 30301
      NodeP2P_DiscoveryAddr: 30303
      # experimental built in dashboard (optional) only works on > v1.7.3
      #Dashboard_Port: 8080
      #Dashboard_Refresh: 3000000000
# keep adding nodes
# - member:
# ...
monitor:
  name: monitor
  # verbosity can be within [0..3]
  verbosity: 0
  k8s:
    nodePort: 30007
# create a private key and add it to the keystore folder
# ... or just use the example one for testing
keystore:
  name: UTC--2017-04-06T08-30-06.659191254Z--023e291a99d21c944a871adcc44561a58f99bdbc
  # true: upload secret first via 'kubectl create secret generic geth-key --from-file /path/to/keyfile'
  # false: use the key in keystore folder
  secret: false
# generic geth related options
geth:
  # you can find suitable tags in https://hub.docker.com/r/ethereum/client-go/tags/
  # due to some config file changes in geth it needs to be > 1.8.0
  version: stable
  network:
    # network id (1: mainnet, 3: ropsten, 4: rinkeby ... )
    id: 1101
    # public (true|false) is it a public network?
    public: false
  # hex value of initial difficulty defined in the genesis block
  difficulty: "0x400"
  # as it is a private cluster, provide a CIDR of the cluster's network
  # to prevent other nodes connecting from the outside
  NodeP2P_Netrestrict: "172.16.0.0/12"
  # general verbosity of geth [1..5]
verbosity: 3once the kubernetes cluster is up and healthy (verify via kubectl cluster-info), you can deploy the geth cluster via the following sequence:
if you have set keystore.secret to true in kuberneteth.yaml create an account and upload the key
# create a new encrypted keyfile
$ geth account new
Your new account is locked with a password. Please give a password. Do not forget this password.
Passphrase:
Repeat passphrase:
Address: {30a75c364a57d7479b7c5d16c5dc4dcc2176eb5b}
# upload it to the kubernetes server
$ kubectl create secret generic geth-key --from-file ~/.ethereum/keystore/UTC--2017-11-20T18-36-59.948336313Z--30a75c364a57d7479b7c5d16c5dc4dcc2176eb5b
if not, just copy any existing geth key to the keystore folder, and add it's name to kuberneteth.yaml or use the key that is already present in the folder if you just want to play around (password is 'linux')
once the key is provided you can just create the cluster with those 2 commands:
./kuberneteth # this will create a file called 'deployment.yaml'
kubectl apply -f deployment.yaml # this will deploy the cluster to kubernetes
there are some services that are using specific ports to interact with the pods, which you can port forward to access them from your local machine. services are:
- (json)rpc/ipc for each node, to connect e.g. mist a useful application to send transactions deploy smart contracts, and interact with the network -> runs at http://localhost:8545
- the
eth-netstatsdashboard -> visit http://localhost:3001
kubectl port-forward $(kubectl get pod | grep monitor | awk '{print $1}') 3001:3001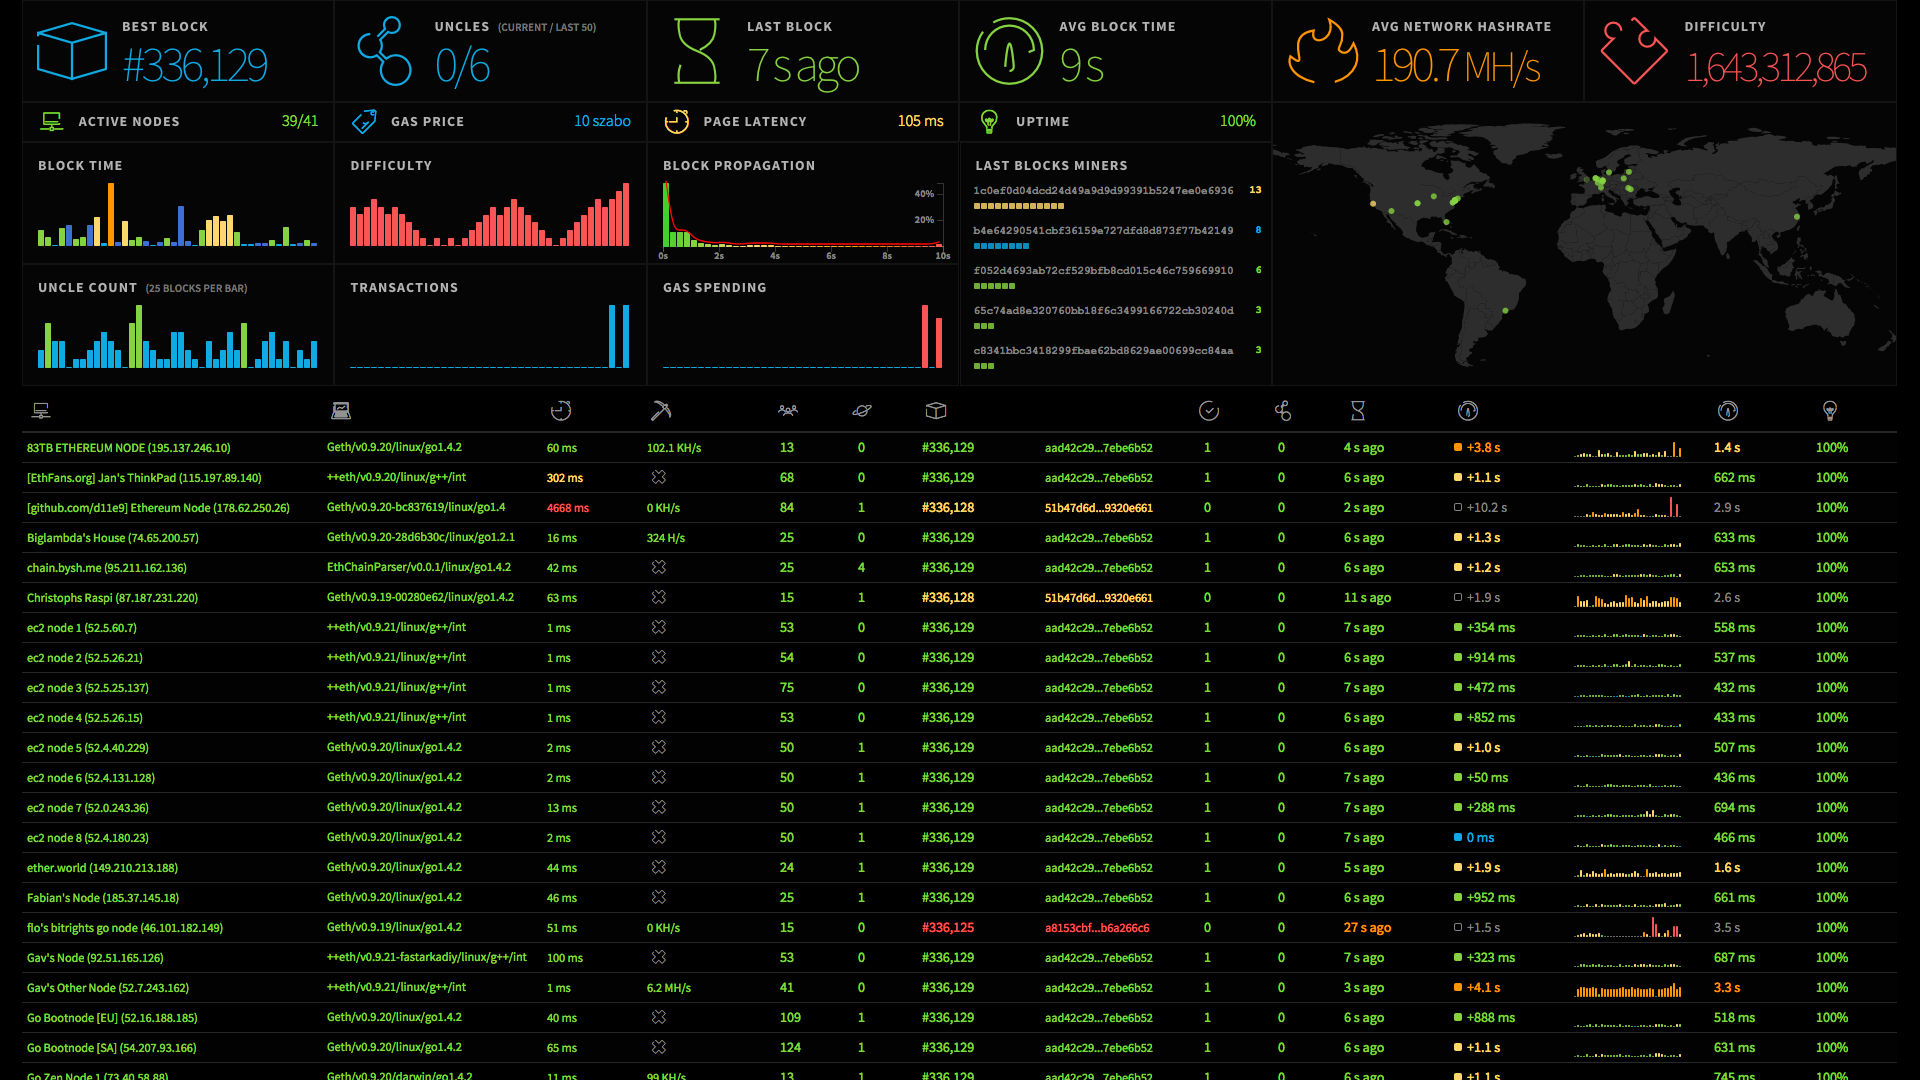
kubectl port-forward $(kubectl get pod | grep [SOME_NODE_POD_NAME] | awk '{print $1}') 8545:8545if you're using mist to interact with the network, make sure to connect it to the network via:
./ethereumwallet --rpc http://localhost:8545 --node geth --network testto clean up and start from scratch:
kubectl delete -f deployment.yamlmake sure to clean up the hostPath manually
once your ethereum cluster is running, you can start to publish contracts. i have started with a simple example derived from a good introduction that you can find here
however i have also starte my own example, it's a small video ad platform, that you can find here. just deploy this contract, adapt index.html by adding the right contract address and contract abi.
the next step is to write an application that leverages the capabilities of your smart contract. there are several ways to do this, as there are already many integrations and libraries around that are able to communicate with a contract.
a good point to start is: