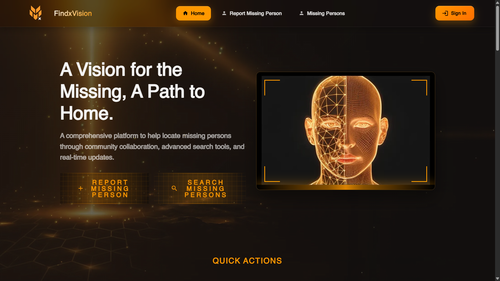
FindXVision is a comprehensive platform designed to streamline the process of managing missing person cases. By leveraging modern web technologies, it provides tools for reporting, tracking, and resolving cases efficiently while fostering collaboration among responders, volunteers, and families.
- Create, update, and resolve cases with detailed profiles and timelines.
- Attach evidence like photos, documents, and notes.
- Track case progress with audit-ready timelines.
- Guided form for reporting missing persons with validation.
- Image uploads for attaching photos.
- Geolocation support to pinpoint last-seen locations.
- Search by name, location, or case number.
- Filter cases by status, priority, or age range.
- Sort results to prioritize high-urgency cases.
- Role-based access for responders, admins, and law enforcement.
- Audit logging to track every action.
- Privacy tooling to protect sensitive data.
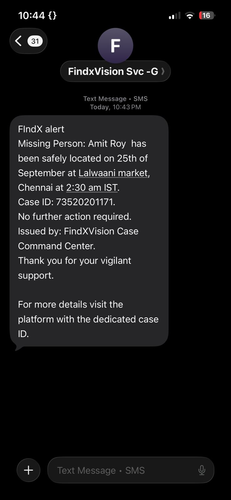
- SMS and email alerts for critical updates.
- Customizable notification preferences.
- Real-time updates to ensure no lead is missed.
- Upload images or videos for face matching.
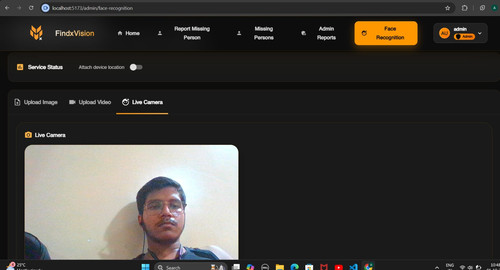
- Live camera mode for real-time recognition.
- Store detections with metadata like timestamps and geolocation.
- Track case throughput and response times.
- Monitor notification activity.
- View system-wide statistics.
- React
- Vite
- Material-UI
- Redux
- Node.js
- Express.js
- MongoDB
- Passport.js for authentication
- Prometheus for metrics monitoring
- Twilio for SMS notifications
- Node.js (v16 or higher)
- MongoDB (local or cloud instance)
-
Clone the repository:
git clone https://github.com/Sandesh13fr/FindXVision.git
-
Navigate to the project directory:
cd FindXVision -
Install dependencies for both frontend and backend:
npm install cd Server npm install -
Set up environment variables:
- Create a
.envfile in theServerdirectory. - Add the following variables:
MONGO_URI=your_mongodb_connection_string
JWT_SECRET=your_jwt_secret
TWILIO_SID=your_twilio_sid
TWILIO_AUTH_TOKEN=your_twilio_auth_token
- Create a
-
Start the development servers:
- Backend:
cd Server npm run dev - Frontend:
cd FindXVision
npm run dev
- Backend:
-
Open the application in your browser:
http://localhost:3000
-
Report a Missing Person
- Navigate to the "Report Missing Person" page.
- Fill out the form with details and upload images.
-
Search for Missing Persons
- Use the search bar and filters to find cases.
-
Admin Tools
- Approve or reject cases.
- Manage user roles and permissions.
-
Face Recognition
- Upload images to identify individuals.
- Use live camera mode for real-time recognition.
FindXVision/
├── public/                # Static assets
├── src/
│   ├── components/        # React components
│   ├── pages/             # Page-level components
│   ├── services/          # API services
│   ├── store/             # Redux store
│   ├── theme/             # Theme configuration
│   └── App.jsx            # Main app entry point
├── Server/
│   ├── src/
│   │   ├── routes/        # API routes
│   │   ├── models/        # Database models
│   │   ├── middleware/    # Middleware functions
│   │   ├── services/      # Backend services
│   │   └── index.js       # Server entry point
│   └── .env               # Environment variables
└── package.json           # Project metadata
We welcome contributions to FindXVision! To contribute:
- Fork the repository.
- Create a new branch:
git checkout -b feature/your-feature-name
- Commit your changes:
git commit -m "Add your message here" - Push to the branch:
git push origin feature/your-feature-name
- Open a pull request.
This project is licensed under the MIT License. See the LICENSE file for details.
This repository combines the FindXVision MERN application with the Tenet face-recognition workflow. The integration adds an administrator-only console that can:
- Upload still images or video clips for recognition.
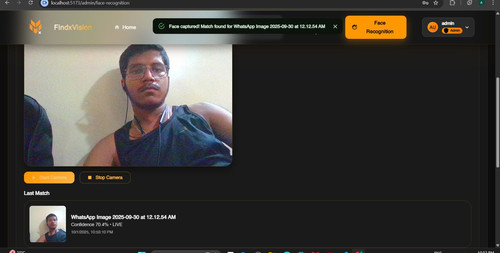
- Stream frames from the browser webcam and surface matches in real time.
- Store every detection in MongoDB, including optional device geolocation.
- Retrieve history snapshots so administrators can review recent matches.
- Face matching service – Run the Flask service from the
Tenetproject (or any compatible service) and note its public URL. - MongoDB – The Express API already connects using the
.envconfiguration. Ensure the database is reachable. - Node.js 18+ & npm – Required for both the API (
Server/) and the Vite React app (FindXVision/FindXVision/).
Add the following value to Server/.env (create the file if it does not exist):
FACE_SERVICE_URL=http://localhost:5001
Adjust the URL to match where the Flask face service is running.
The frontend uses FindXVision/FindXVision/.env to read VITE_API_URL (defaults to http://localhost:5000/api). Update as needed when deploying.
-
Back-end API
Set-Location -Path 'd:\face\FindXVision\Server'
npm install
npm run dev
-
Face service (Flask) – Run the Python service from the
Tenetproject in a separate terminal. -
Front-end admin console
Set-Location -Path 'd:\face\FindXVision\FindXVision'
npm install
npm run dev
Navigate to
http://localhost:5173and sign in with an administrator account. The Face Recognition entry appears in the navigation.
- Frontend linting:
npm run lintinsideFindXVision/FindXVision/. - Backend linting:
npm run lintinsideFindXVision/Server/. - Backend tests:
npm testinsideFindXVision/Server/(runs Jest – add coverage as features grow).
Heads-up: Some pre-existing frontend components outside the new face-recognition console still flag unused variables under linting. They do not affect functionality but should be tidied up in a follow-up pass.
- Enable the Attach device location switch to capture GPS coordinates alongside detections. The browser will prompt once per session.
- Live camera mode samples frames every ~750ms. Matches trigger a momentary visual flash and push detections into MongoDB.
- The Recent Matches section aggregates results by person and tracks the first/last sighting plus source channel (image, video, live).
- Wire alerting (SMS/WhatsApp) using the stored detection metadata.
- Add automated tests for the new
/api/faceendpoints. - Resolve outstanding lint warnings in legacy auth components.