Navigate to: http://downloads.raspberrypi.org/raspbian/images/
Click on Raspbian-2017-03-03 folder.
Download the OS image (I recommend zip file).
Extract the zip file.
Use Etcher or Rufus to create the bootable SD card (I recommend to fully format the pen drive before doing that).
After the bootable SD card has been created, plug it in the Raspberry Pi and start the device. Open the terminal and execute the following command:
sudo apt-get update && sudo apt-get dist-upgrade -y
I also recommend to install vim as text editor:
sudo apt-get install vim
In order to install TensorFlow, run the following commands:
sudo apt-get install python3-pip python3-dev
wget https://github.com/samjabrahams/tensorflow-on-raspberry-pi/releases/download/v1.1.0/tensorflow-1.1.0-cp34-cp34m-linux_armv7l.whl
sudo pip3 install tensorflow-1.1.0-cp34-cp34m-linux_armv7l.whl
sudo pip3 uninstall mock
sudo pip3 install mock
For further information, visit: https://github.com/samjabrahams/tensorflow-on-raspberry-pi
Use the following command to install GPIO dependencies:
sudo apt-get install python-rpi.gpio
In case you want to clone SD card after everything has been installed, you can use the imageUSB program at: https://imageusb.br.uptodown.com/windows
If you have any doubts on how to use it, take a look on the following tutorial: https://www.tecmundo.com.br/pendrive/54921-criar-imagem-pendrive-clona-lo.htm
Download the solution using the following command (I recommend cloning it into HOME folder):
git clone "https://github.com/KaisenSan/SmartParkingMaua"
In order to run the solution, you will need a webcam supported by the pygame library and a proximity sensor connected in the IOs shown in the image below:

Feel free to change the code in order to make it runnable with your ends.
Having everything set up, go to SmartParkingMaua folder and execute the following commands in different terminals:
python3 captureImg.py
python3 classifyImg.py
The former is responsable for capturing the images when the sensor detects something within its range. The later is responsable for classifying and deleting the images and posting the results into the database.
If you want to see the images being captured and deleted, check the SmartParkingMaua/images folder inside HOME folder.
And that's it!
In case you have any problems, improvements or tips, please let us know.
Tutorial para configuração da placa
Acessar o site https://www.instructables.com/id/Configure-Arduino-IDE-for-Atmega-328P-to-Use-8MHz-/ e baixe o arquivo breadboard.zip, realize todos os passos para instalação da placa fornecido pelo site.
Esse processo só é necessário quando a placa não está com o bootloader correto(8MHz)
Conecte o ATmega328 em uma interface de programação ou Arduino Uno conectado ao computador por cabo USB
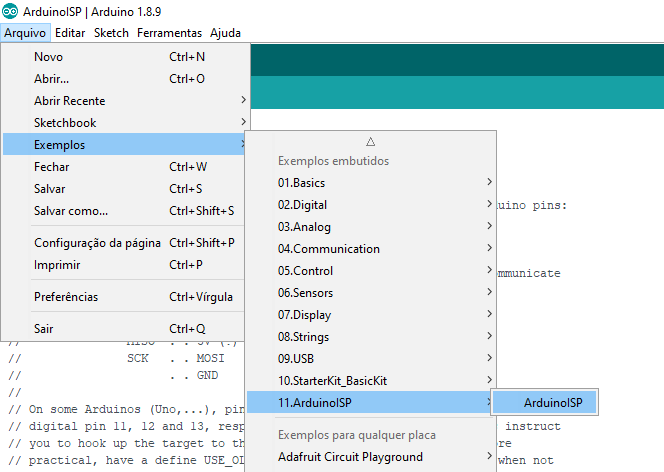
Abra o arquivo de exemplo ARDUINO ISP na IDE
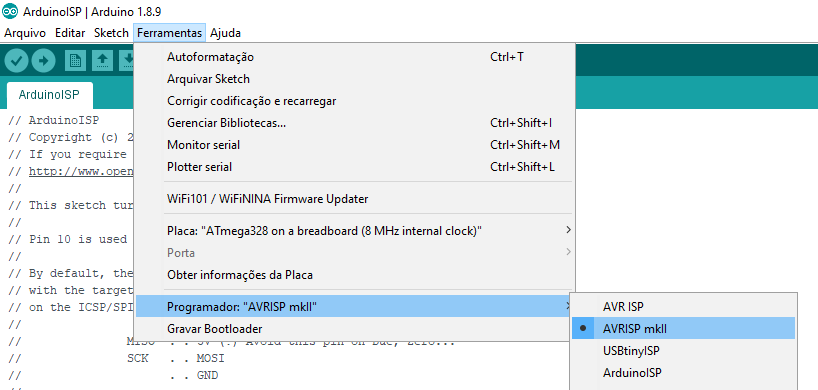
Configurar Programador como "Arduino as ISP"
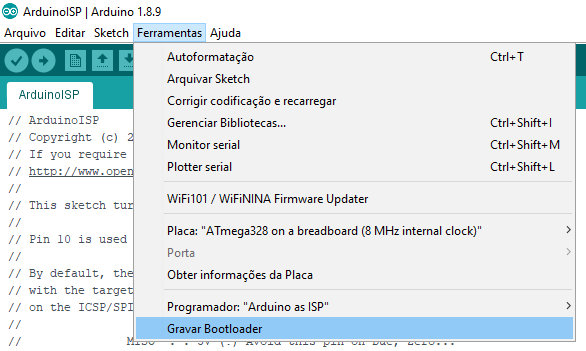
Configurar Placa como "ATmega328 on a breadboard(8Mhz internal clock)"
ambas na aba de Ferramentas

Selecione a opção "Gravar Bootloader" na aba Ferramentas
Agora a placa ja possui bootloader e pode ser programada revertendo a configuração de Programador: AVRISP mkll