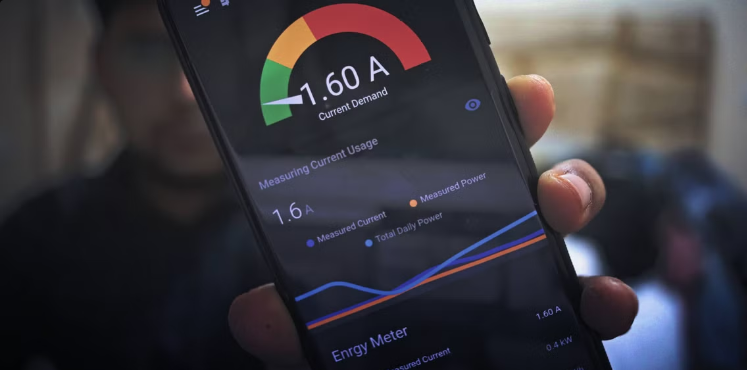
An IoT-based system to monitor energy usage in real-time using ESP8266/ESP32 and SCT013 current sensors integrated with Home Assistant.
This project allows you to build a smart electricity meter from scratch that:
- Tracks energy usage in real-time
- Displays data in meaningful visualizations
- Sends alerts when power usage exceeds thresholds
- Helps conserve energy and prevent wastage
- Integrates with Home Assistant for smart home automation
| Component | Details |
|---|---|
| Microcontroller | NodeMCU (ESP8266), D1 Mini, or ESP32 |
| Current Sensor | SCT013 30A 1V Non-Invasive AC Current Clamp Sensor |
| Other Components | • MicroUSB Cable • General-purpose PCB • 10µF 16V capacitor • Two 10K resistors (1/4 watt) • One 33 Ohm resistor (1/4 watt) • 3.5mm female audio jack (optional) |
Caution
This DIY project involves AC voltage/current, which can be lethal. If you are not experienced with electrical work, seek professional assistance.
Install Home Assistant on a Raspberry Pi or other supported device. Follow the official installation guide.
- In Home Assistant, go to Configuration > Add-ons, Backups & Supervisor
- Click Add-On Store
- Search for "ESPHome" and install it
- Start the add-on and enable:
- ✅ Watchdog
- ✅ Auto-update
- ✅ Show in sidebar
- Open the ESPHome Dashboard
- In ESPHome Dashboard, click + New Device > Continue
- Name your device (e.g., "smart-power-meter") and click Next
- Select your microcontroller type (ESP8266 for NodeMCU/D1 Mini or ESP32)
- Click Skip to edit the YAML directly
- Replace the default configuration with the
Smart-Energy-Monitoring.yamlfile from this repository - Modify the WiFi credentials and voltage settings (change from 230V to 110/120V if needed for your country)
- Click Save and then Install > Plug into this computer
- Download the compiled firmware
- Flash the firmware using ESPHome-Flasher tool
Connect the SCT013 sensor to your ESP8266/ESP32 following the circuit diagram:

- Clamp the SCT013 sensor on the phase wire (usually red) from your electricity meter
- In ESPHome Dashboard, click Logs under your device name
- Note down several "Measured Current" values and take the average
- Edit your YAML file to add calibration under the sensor section:
filters:
  - calibrate_linear:
      - 0 -> 0
      - [average_value] -> [actual_current]
- Save and install the updated firmware wirelessly
- Go to Configuration > Devices & Services > Add Integration
- Search for and select ESPHome
- Enter the IP address of your sensor (found in ESPHome logs)
- Select the appropriate area for your device
- Add the device to your dashboard
The Automation.yaml file in this repository contains example automations for:
- 📱 Sending notifications when energy usage exceeds thresholds
- 🔌 Turning off non-essential devices during peak usage
- 📊 Logging energy consumption data
- 📈 Creating daily/weekly/monthly reports
Add these automations to your Home Assistant configuration or modify them to suit your needs.
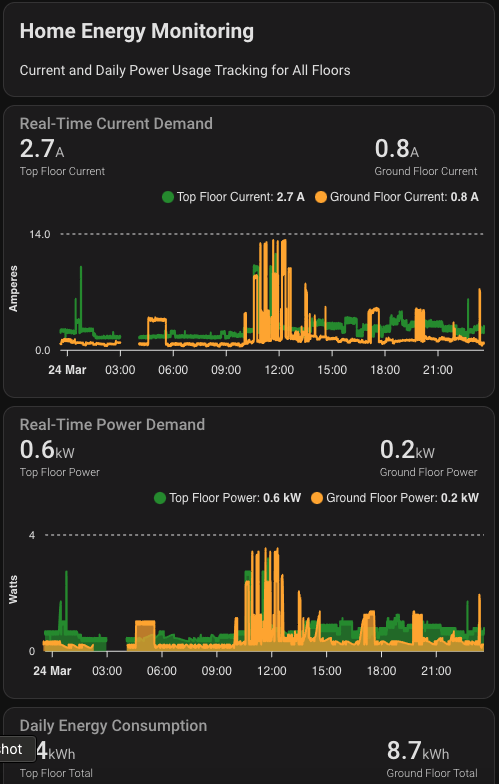
Use Home Assistant's built-in Energy Dashboard to:
- Monitor daily, monthly, or yearly energy usage
- View hourly breakdowns of consumption
- Track energy costs (with proper configuration)
- Identify trends and optimize usage
To monitor individual appliances:
- Build additional sensors with the same configuration
- Clamp them on the power cord of specific devices
- Integrate them into Home Assistant for granular monitoring
- Create appliance-specific automations
| Issue | Solution |
|---|---|
| Inaccurate Readings | Double-check calibration using a multimeter |
| Connection Issues | Verify WiFi signal strength where the sensor is installed |
| Sensor Not Detecting | Ensure the SCT013 is properly clamped and oriented correctly |
Contributions are welcome! Please feel free to submit a Pull Request.
This project is licensed under the MIT License - see the LICENSE file for details.
- ESPHome project for making firmware creation simple
- Home Assistant community for integration support
- All contributors and testers who provided feedback
Project Status
- Initial documentation
- Circuit design
- ESPHome configuration
- Sample automations
- Advanced usage tutorial