-
Notifications
You must be signed in to change notification settings - Fork 28
Coregistration: Template Brain
When creating a new experiment, the template brain has to be added to the experiment’s files. This needs to be done manually, before staring the coregistration utility.
First create an MRI-directory in the experiment’s root directory.
Assuming the experiment’s folder is ~/Data/Experiment:
$ cd ~/Data/Experiment
$ mkdir mri
Next, create the template brain in the new MRI-directory. In Python:
>>> import mne
# First argument: path to your FreeSurfer installation
# subjects_dir: path to your experiment's MRI-directory
>>> mne.create_default_subject('/Applications/freesurfer/7.4.1', subjects_dir='~/Data/Experiment/mri')The coregistration utility is part of MNE-Python. It can be started from a bash terminal (Linux) with:
$ mne coreg -d ~/Data/Experiment/mriOr from a Python session (Windows and Linux):
>>> import mne
>>> mne.gui.coregistration(subjects_dir='~/Data/Experiment/mri')
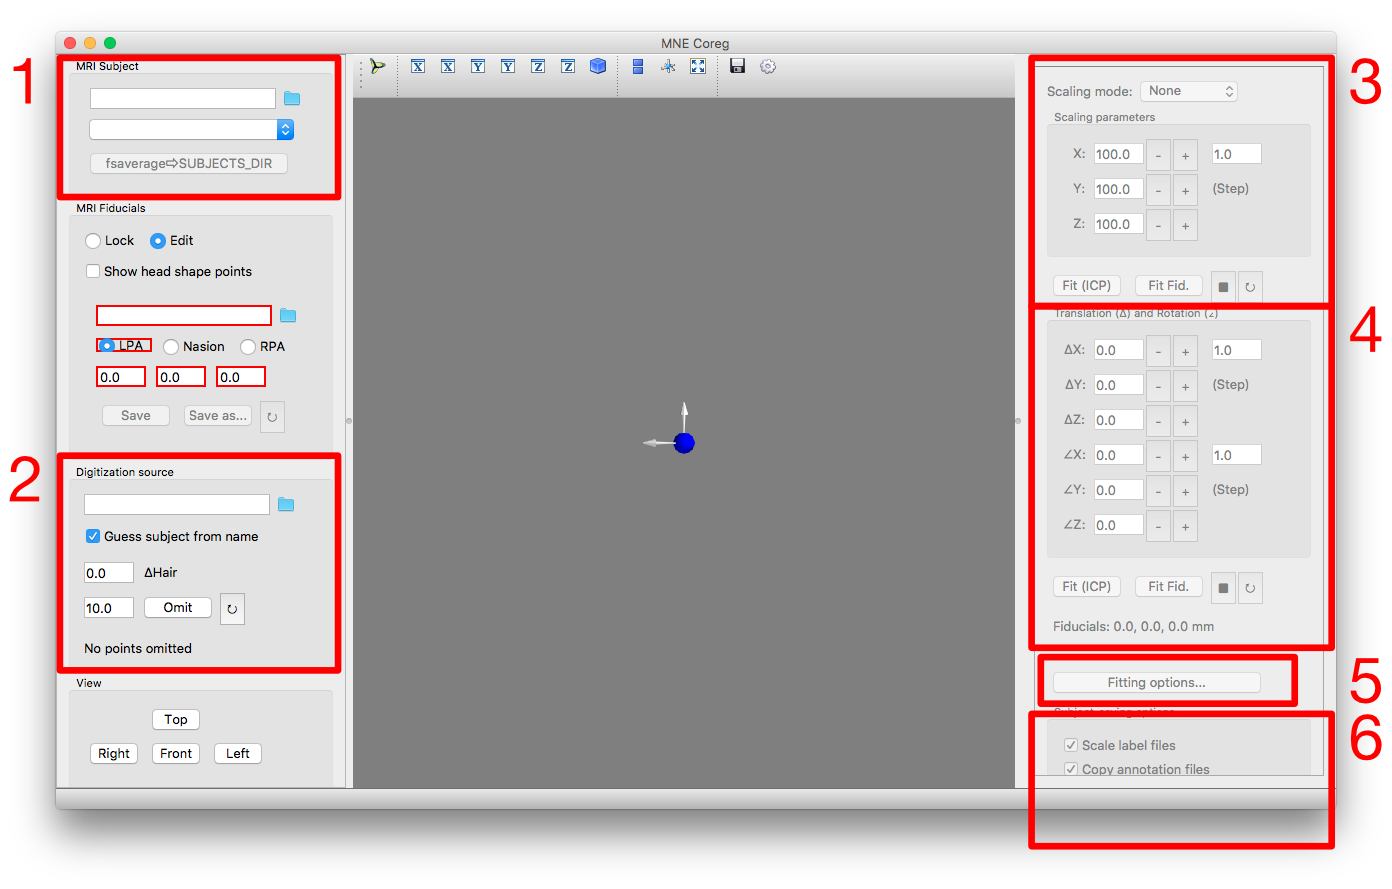
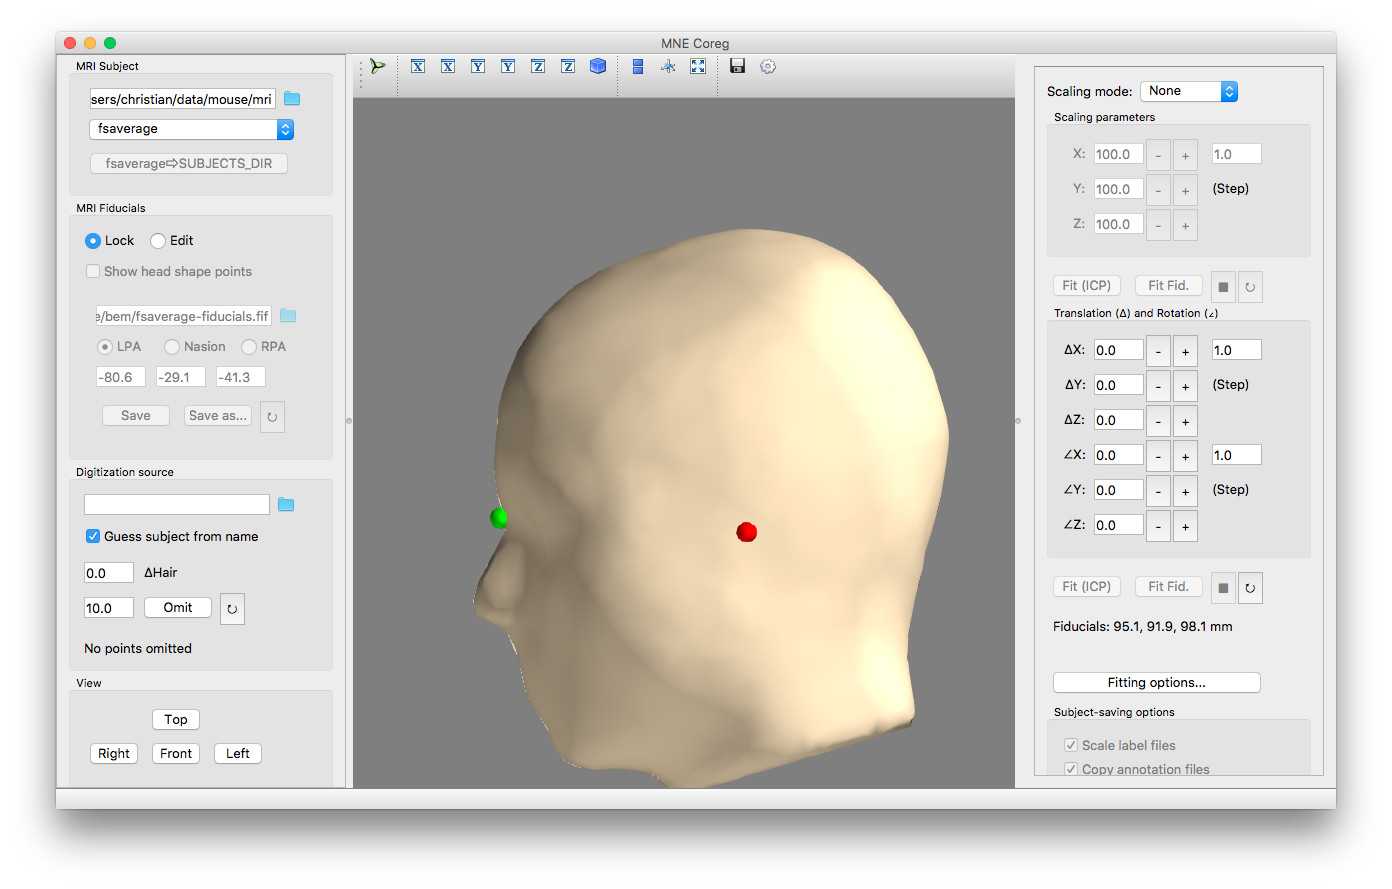
In the top field, specify the directory that contains the brain models. This is probably your_experiment/mri. After that, the existing brain models should appear in the dropdown menu below. If the fsaverage brain does not exist yet, create it with the corresponding button below the menu. After selecting fsaverage in the drop-down menu, the fsaverage head should appear in the GUI as below. If it does not appear, you might need to restart the GUI, and possibly specify the subjects-directory as command-line argument ($ mne coreg -d experiment_root/mri).

|
Important
|
If the head shape does not appear in the GUI upon selecting an MRI, try restarting the GUI while specifying the subjects-directory: $ mne coreg -d ~/Data/Experiment/mri
|
This panel is for selecting the head shape associated with the MEG recording. Click the folder icon and find a -raw.fif file for the subject for which you want to generate a brain. If several -raw.fif files were acquired in a single visit, they can be treated interchangeably, as long as the same head shape is embedded in them.
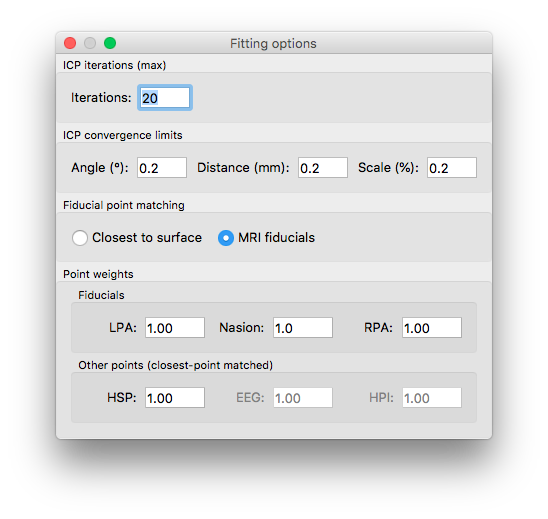
In the drop-down menu, select how to scale the brain (Uniform: scale the MRI uniformly along all axes; 3-axis: estimate a separate scaling parameter for each axis). Open the fitting options (number 5) to adjust the settings (e.g. like below). These options will stay as long as the GUI is open, but they will reset once you close and re-open the GUI.

Click Fit Fid. to compute an approximate fit using the fiducial points (the colorful balls). Then, click Fit (ICP) to fin-tune the fit. If necessary you can do manual adjustment using the fields in panels 3 and 4. The Fit buttons in panel 4 will estimate rotation and translation without changing the scaling factor.