This is an example of a SaaS app using Stytch's B2B auth for:
- Multi-tenancy
- RBAC
- Organization and member settings management via your own UI
- Multi-modal login (magic link and OAuth implemented)
This demo is specifically designed to be a reference for anyone building their own B2B SaaS application. The auth-specific logic is well documented, and the demo code kept simple and separate for easy review and subsequent deletion.
The source code is thoroughly documented inline, including links to the underlying API calls being used.
This project has two components: a client built as an single-page app (SPA) React app dashboard embedded in an Astro site (source in client) and a server built as a Node Express API (source in server). Both live in this repo, and you can run them both at the same time by opening two terminals.
For an app dashboard, a React SPA is a straightforward way to deliver the client experience. It makes calls to the server API by sending a session cookie, which allows the API to ensure that the current user is authorized to see the data they've requested.
For non-dashboard pages, such as the homepage, the best user experience is to deliver zero JavaScript. For that reason, the marketing side of the client is delivered by Astro, which will ship static files and zero JavaScript by default.
To handle business logic that requires secret credentials, Node + Express is one of the most common approaches for JavaScript developers. It’s got a great ecosystem and it's deployable anywhere.
For local development, you'll need:
- A Stytch account: https://stytch.com/
- Node >= 20.6.0
# clone the repo
gh repo clone stytchauth/stytch-b2b-saas-example

# move into the cloned project
cd stytch-b2b-saas-example/

# install dependencies
cd client/
npm i

cd ../server/
npm iBefore you can run the app, you'll need a Stytch project. For dev, this app assumes the test env.
Sign in or sign up at:
Create or select the project you want to use for this app.
Optional: if you want to allow signing in with Google and/or Microsoft OAuth, follow the steps in your Stych dashboard to configure the OAuth apps:
https://stytch.com/dashboard/oauth
Your API keys will be in your dashboard at this URL:
https://stytch.com/dashboard/api-keys?env=test
Add the project ID, secret, and public token to server/.env:
APP_URL="http://localhost:4321"
STYTCH_PROJECT_ID=""
STYTCH_PUBLIC_TOKEN=""
STYTCH_SECRET=""
Next, add the same public token to client/.env:
PUBLIC_API_URL="http://localhost:3000"
PUBLIC_STYTCH_TOKEN=""For the app to work properly, we need to create custom resources and roles. This allows the app to use Stytch's RBAC to manage permissions for app-specific actions.
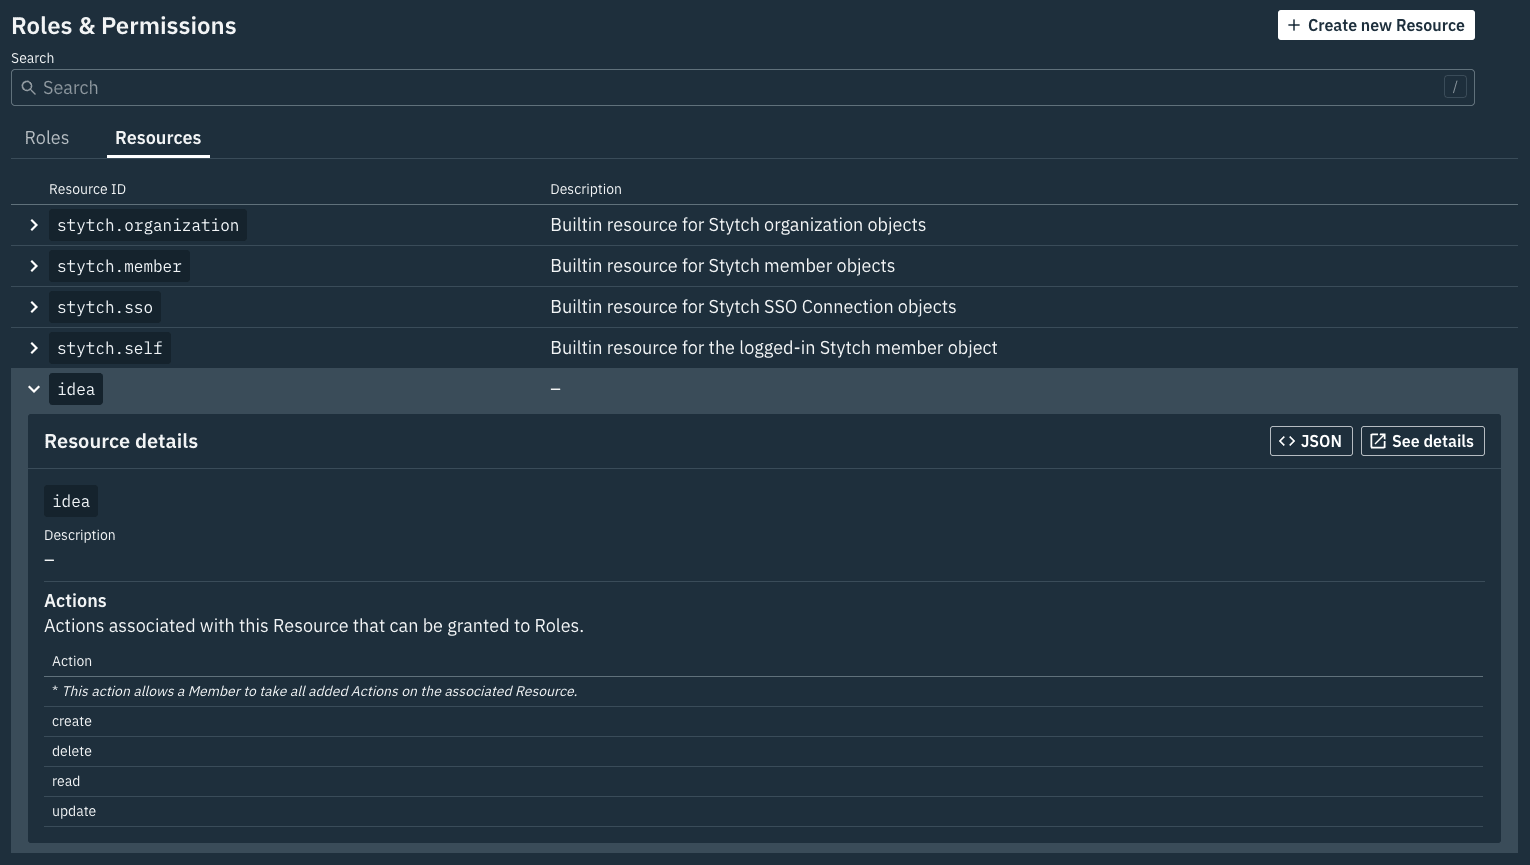
In your Stytch dashboard, create a resource called idea. Give the idea resource the following actions:
createdeletereadupdate
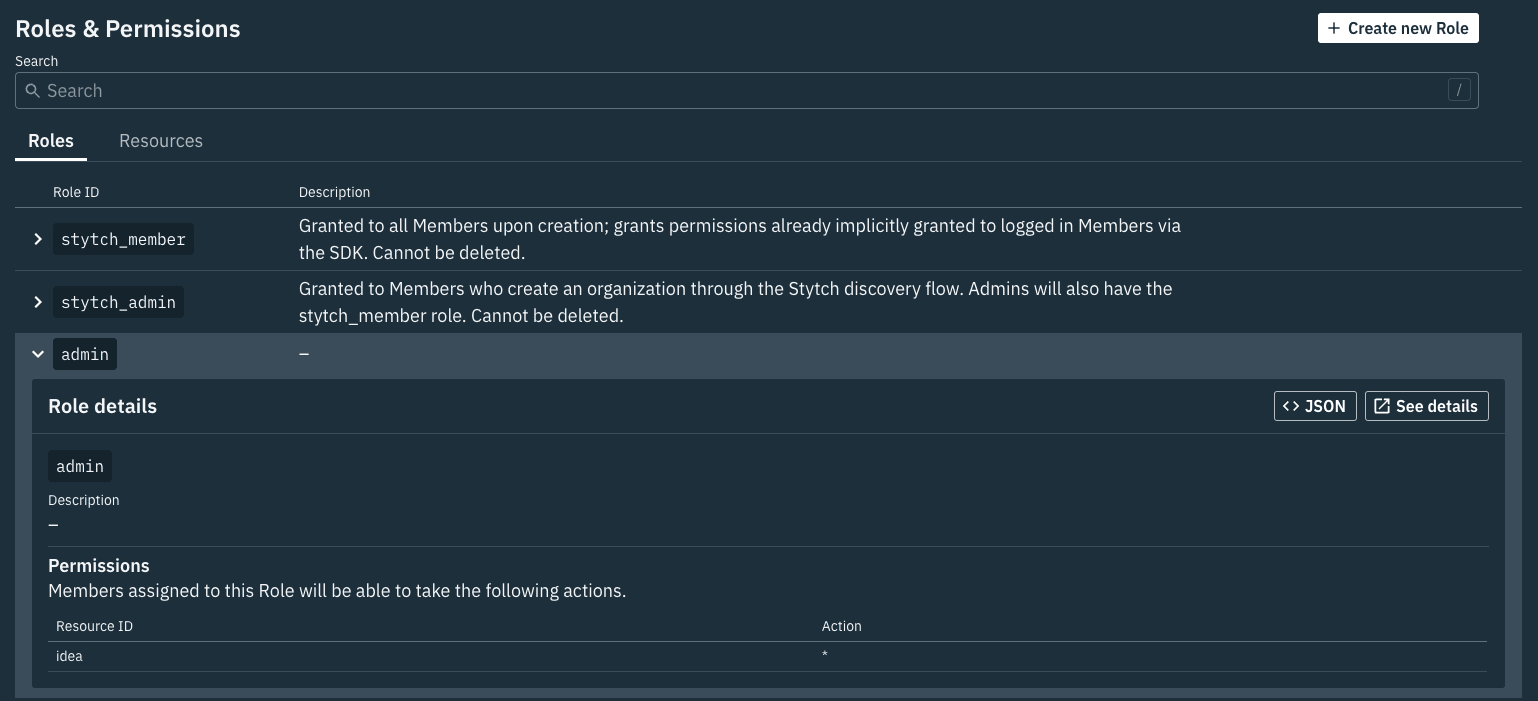
Next, create a new role called admin and assign the permissions for the idea resource and * to allow all actions.
In one terminal, start the server:
# make sure you're in the server directory
cd server/

# start the app
npm run dev
This will start the server at localhost:3000.
In a second terminal, start the client:
# make sure you're in the client directory
cd client/

# start the dev server
npm run dev
This will start the client at localhost:4321.
From here, you should be able to open the site in your browser, and clicking on the "Dashboard" or "Start now" links will take you to the login page, which will let you register for your app and create an organization.
NOTE: In test mode, you can only use emails matching the domain you signed up with. Trying to use other emails will result in Stytch errors.
- Update the
RequireAuthcomponent with Stytch team recommended flow

