Home Assistant integration to control XY Screens and See Max projector screens and lifts over the serial and RS-485 interface.
This Home Assistant integration was first implemented for XY Screens. After I was informed that the See Max devices use a very similar protocol support for these devices has been added.
XY Screens and See Max are OEM manufacturers of projector screens and lifts, their devices are sold around the world under various brand names.
- Installation/Configuration through Config Flow UI
- Set the up and down duration of your projector screen/lift
- Position control, move the screen/lift to any position along the way
- Use multiple devices on the same RS-485 interface
- Invert the default Cover Entity behaviour
The XY Screens and See Max projector screens and lifts do not provide any positional feedback. The state of the screen is thus always an assumed one. The screen position is calculated based on the time the cover has moved and the configured up and down durations. This results in a potential error margin. Every time the screen reaches it maximum up or down position the position and thus any potential error is reset accordingly. If the screen is controlled outside of Home Assistant, for instance with the remote control, the screen position and state will no longer represent the actual state.
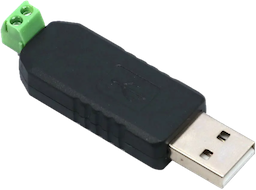
I use a cheap USB RS-485 controller to talk to the projector screen where position 5 of the RJ25 connector is connected to D+ and position 6 to the D-.
See the documentation of your specific device on how to wire yours correctly.
If your devices follows the following protocol it's supported by this Home Assistant integration:
2400 baud 8N1
Up command : 0xFF 0xXX 0xXX 0xXX 0xDD
Down command: 0xFF 0xXX 0xXX 0xXX 0xEE
Stop command: 0xFF 0xXX 0xXX 0xXX 0xCC
Where 0xXX 0xXX 0xXX is the three byte address of the device.
For XY Screens devices the default address is 0xAA 0xEE 0xEE, while for See Max devices the default
address is 0xEE 0xEE 0xEE.
The following projector screens is known to work:
- iVisions Electro M Series
The following projector screens and lifts are not tested but use the same protocol according to the documentation:
- iVisions Electro L/XL/Pro/HD Series
- iVisions PL Series projector lift
- Elite Screens
- KIMEX
- DELUXX
- Telon
See Max:
- ScreenPro
- Monoprice
- Grandview
- Dragonfly
- WS Screens
- Cirrus Screens
- Lumien
- Celexon
Please let me know if your projector screen or lift works with this Home Assistant integration so I can improve the overview of supported projector screens and lifts.
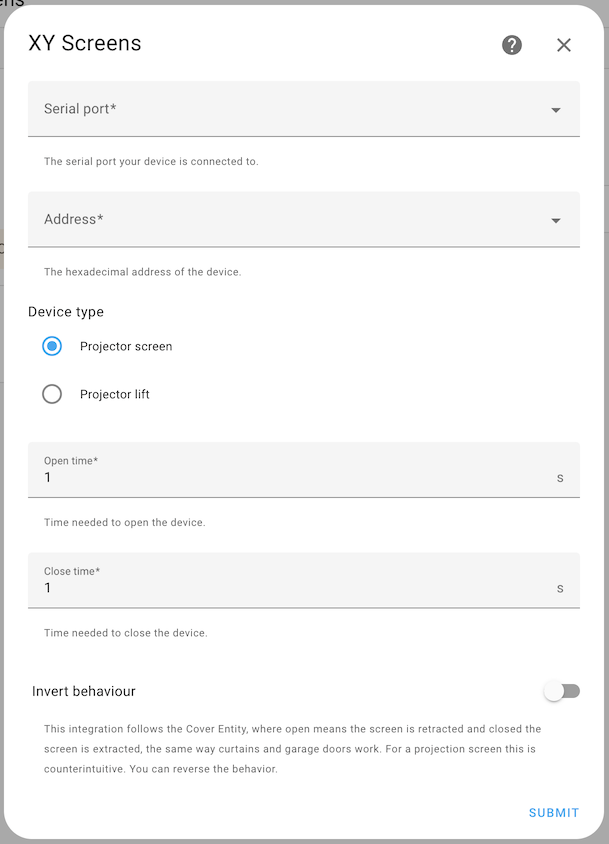
This integration follows the Cover Entity where open means raising the screen and close lowering the screen, like how roller blinds, garage doors and curtains work. For a projector screen this is counter intuitive. You can chose to invert this behaviour when adding your screen or lift to Home Assistant. The dahsboard will then show the screen controls inverted, arrow up will lower the screen while arrow down will raise the screen. However the voice commands Open and Close will then work as expected.
Thanks to the power of Home Assistant translations the entity state in a non-inverted screen will show correctly, however the voice commands and actions are inverted.
The recommended way to install this Home Assistant integration is by using HACS. Click the following button to open the integration directly on the HACS integration page.
Or follow these instructions:
- Go to your HACS view in Home Assistant and then to Integrations
- Select + Explore & download repositories and search for XY Screens projector screens and lifts
- Select Download
- Restart Home Assistant
- Copy the
custom_components/xyscreensdirectory of this repository into theconfig/custom_components/directory of your Home Assistant installation - Restart Home Assistant
- After restarting go to Settings then Devices & Services
- Select + Add integration and type in XY Screens
- Select the serial port or enter the path manually
- Select the address of your device or enter the address manually
- Select the type of device, projector screen or projector lift
- Set the up and down times of your device.
- Select Submit
A new XY Screens integration and device will now be added to your Integrations view.
If you would like to use this Home Assistant integration in your own language you can provide me
with a translation file as found in the custom_components/xyscreens/translations directory.
Create a pull request (preferred) or issue with the file attached.
More on translating custom integrations can be found here.
Do you enjoy using this Home Assistant integration? Then consider supporting my work using one of the following platforms, your donation is greatly appreciated and keeps me motivated:
If you would like to have a Home Assistant integration developed for your product or are in need for a freelance Python developer for your project please contact me, you can find my email address on my GitHub profile.


