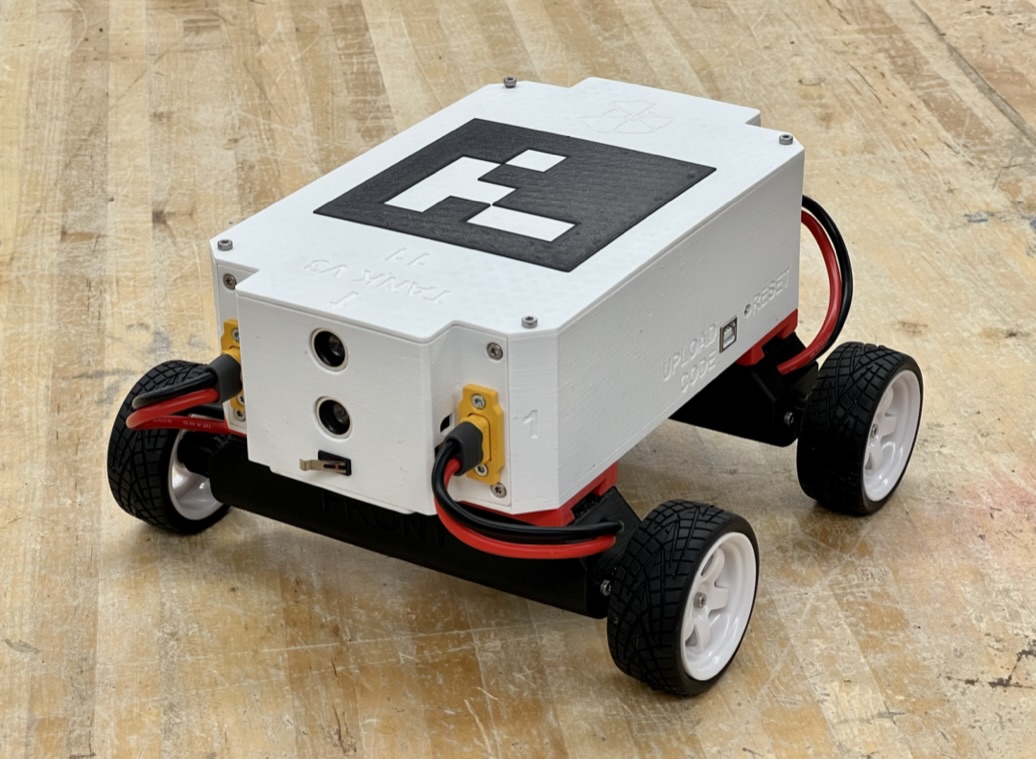
TANK - Traction And Navigation Kit
As the name suggests, the Tanks serve two purposes in ENES100:
- The modular design of the physical Tanks allows you to test multiple different tractive systems. For example, experimenting with different wheel sizes to understand the tradeoff between speed and torque. Another example, experiemnting with four-wheel-drive versus two-wheel-drive to see which is better for zero-point turning.
- The physical Tanks are designed to mimic the Tank on the simulator. You can write and test your code in the simulator, then further test your code on a physical Tank to observe how the robot is affected by variables in the real world (wheel slip, motor slop, vision system inaccuracies, etc.).
The Tank Arduino library is used to control both the simulator Tanks and the physical Tanks. Using the library, you can control the Tank's motors and pull data from it's sensors.
To download this library, click on the blue Download button on the right. Make sure the file is unzipped and move it to the arduino libraries folder (Documents->Arduino->libraries). You must have Arduino IDE version 1.5.0 or above. The most current version of Arduino IDE can be downloaded from the Arduino website.
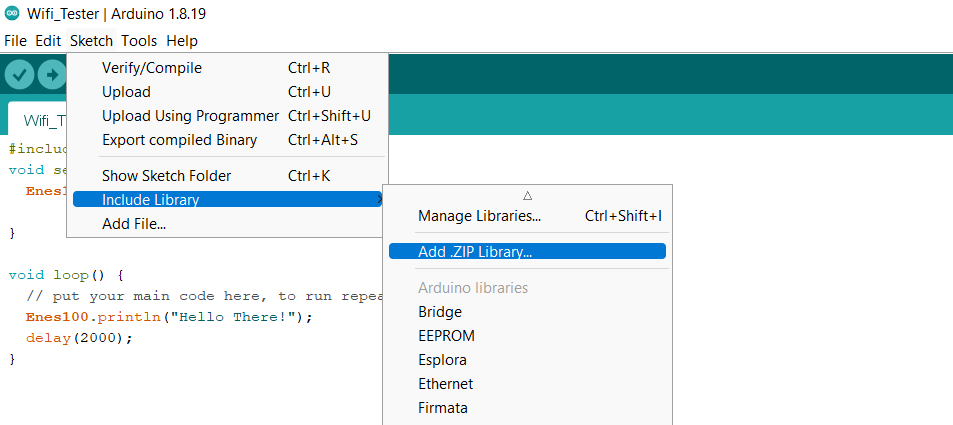
- If this does not work, you can extract the library inside the Arduino IDE (Sketch->Include Library->Add .ZIP Library...).
If you have an older version of the library on your computer, you must delete it before adding a newer version. Failure to do this may cause file conflicts and it is not guaranteed that the library will work properly.
To use the library, you have to direct the compiler to include it in your code. Go to Sketch > Include Library > Tank , or add it manually by typing #include "Tank.h" at the top of your sketch.
To use the library, call Tank.begin(); in the setup portion of the code.
If uploading your code to a physical Tank, be sure to set the board as an Arduino Mega. Tools > Board > Arduino Mega or Mega 2560
The following functions are available in the Tank library on the simulator:
Tank.begin()
initializes the tank to be controlled.
Tank.turnOffMotors()
sets the pwm of both motors to 0.
Tank.setLeftMotorPWM(int pwm)
sets the left motor pwms to the specified pwm speed (pwm: -255 to 255).
Tank.setRightMotorPWM(int pwm)
sets the right motor pwms to the specified pwm speed (pwm: -255 to 255).
Tank.readDistanceSensor(int sensorId)
reads and returns distance in meters (maximum of 1) from specified ultrasonic distance sensor. It will only give distances to obstacles (white blocks) and not walls!
You must enable the sensor by clicking on it in top down view of the OTV. It will become less transparent when it is enabled. Ultrasonic 1 is already enabled.
The following functions are available in the Tank library on the physical tanks:
Tank.begin()
required on startup for setting pinModes.
Tank.turnOffMotors()
sets the pwm of both motors to 0.
Tank.setLeftMotorPWM(pwm)
sets motors 1 and 2 speeds to specified pwm (pwm: -255 to 255).
Tank.setRightMotorPWM(pwm)
sets motors 3 and 4 speeds to specified pwm (pwm: -255 to 255).
Tank.readDistanceSensor(int sensorId)
reads and returns distance in meters (maximum of 1) from specified ultrasonic distance sensor (only valid for sensorIds 1 or 7).
Tank.setMotorPWM(int motorId, int pwm)
sets the speed of the specifed motor to the specified pwm (only valid for motorIds 1 through 4) (pwm: -255 to 255).
Tank.readIrSensor(int sensorId)
reads and returns the state of the specified infrared sensor (only valid for sensorIds 1 through 4).
Tank.readBumpSensor(int sensorId)
reads and returns the state of the specified infrared sensor (only valid for sensorIds 1 or 7).
Once you have your code working on the simulator using the Tank library, you can test the same code on a physical tank. These are modular, Arduino Mega controlled vehicles that can function the same as the simulator Tanks, plus some extra.
Follow the steps below to get your simulator code running on a physical tank:
- Download and install the Enes100 and Tank libraries to your computer (see the Download and Installation section above)
- Change the
ENES100.begin()command to have the correct Aruco marker number on your tank - Change the
ENES100.begin()command to have the correct TX/RX pins (52 and 50, respectively) - Set the board as an Arduino Mega. Tools > Board > Arduino Mega or Mega 2560
Testing your simulator code on a physical tank can help give you some insight into how real-world uncertainties like how friction and motor slop will affect your OTV's performance.
See the page "Physical Tank Guide" for more information on the physical Tanks.