-
Notifications
You must be signed in to change notification settings - Fork 8
Configure target balance (internal) action
Edwin Woudt edited this page Aug 2, 2020
·
3 revisions
This action allows you to maintain a certain balance on a given account, either by:
- topping up the account from another account in case the balance is lower than the target
- skimming excess balance off the account to another account
- or both of the above, depending on the balance
This action can only be used if the other account is one of your bunq accounts as well. Use the target balance (external) action to achieve a similar effect with external accounts.
In IFTTT platform, go to API -> Actions and click on the New action button. You can then enter the following details:
-
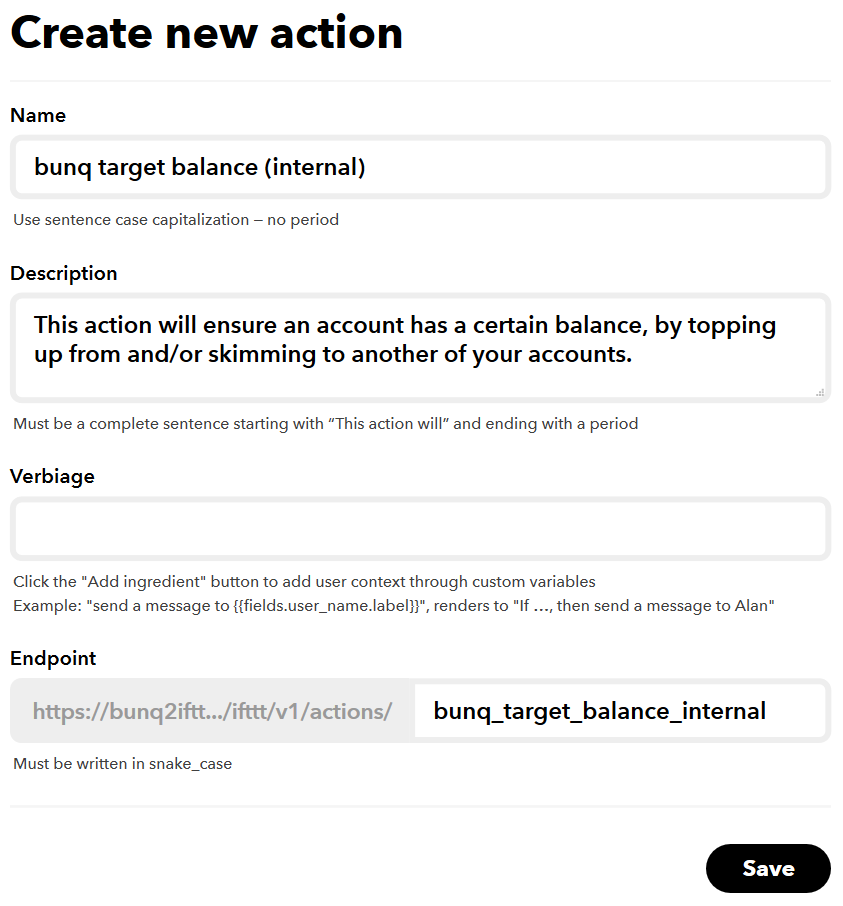
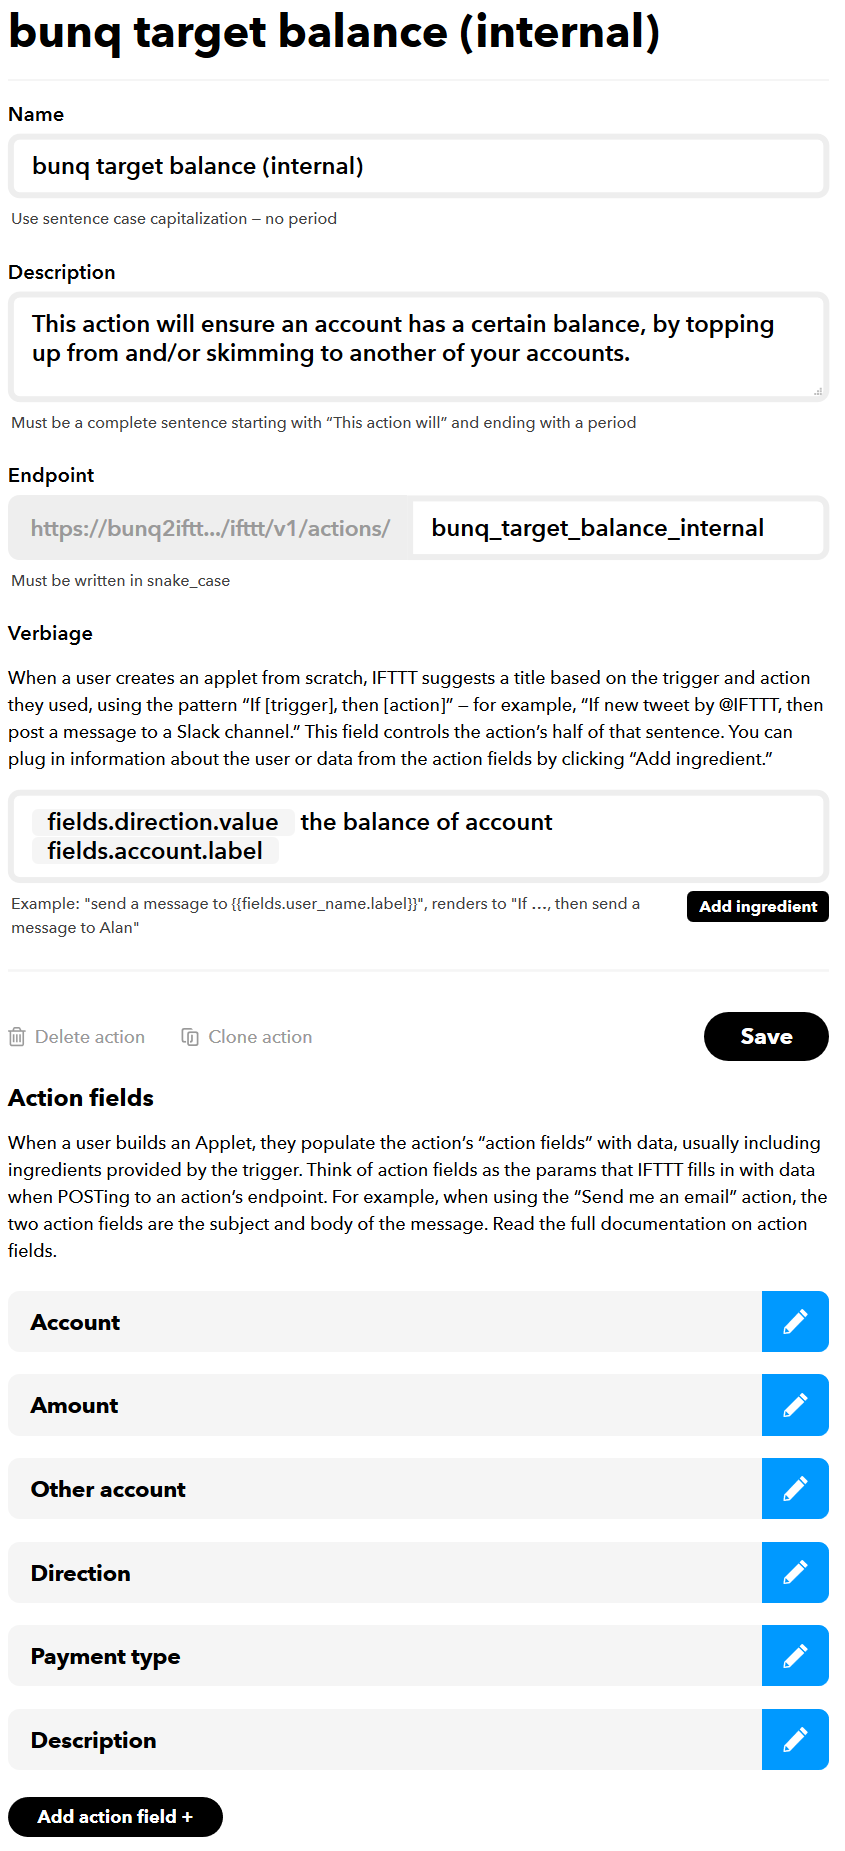
Name:
bunq target balance (internal)(can be changed to anything you like) -
Description:
This action will ensure an account has a certain balance, by topping up from and/or skimming to another of your accounts.(can be changed to anything you like) - Verbiage: leave empty for now, we will update it later
-
Endpoint:
bunq_target_balance_internalNote: this must match exactly!
See screenshot
Once the action is created, you need to add the following action fields:
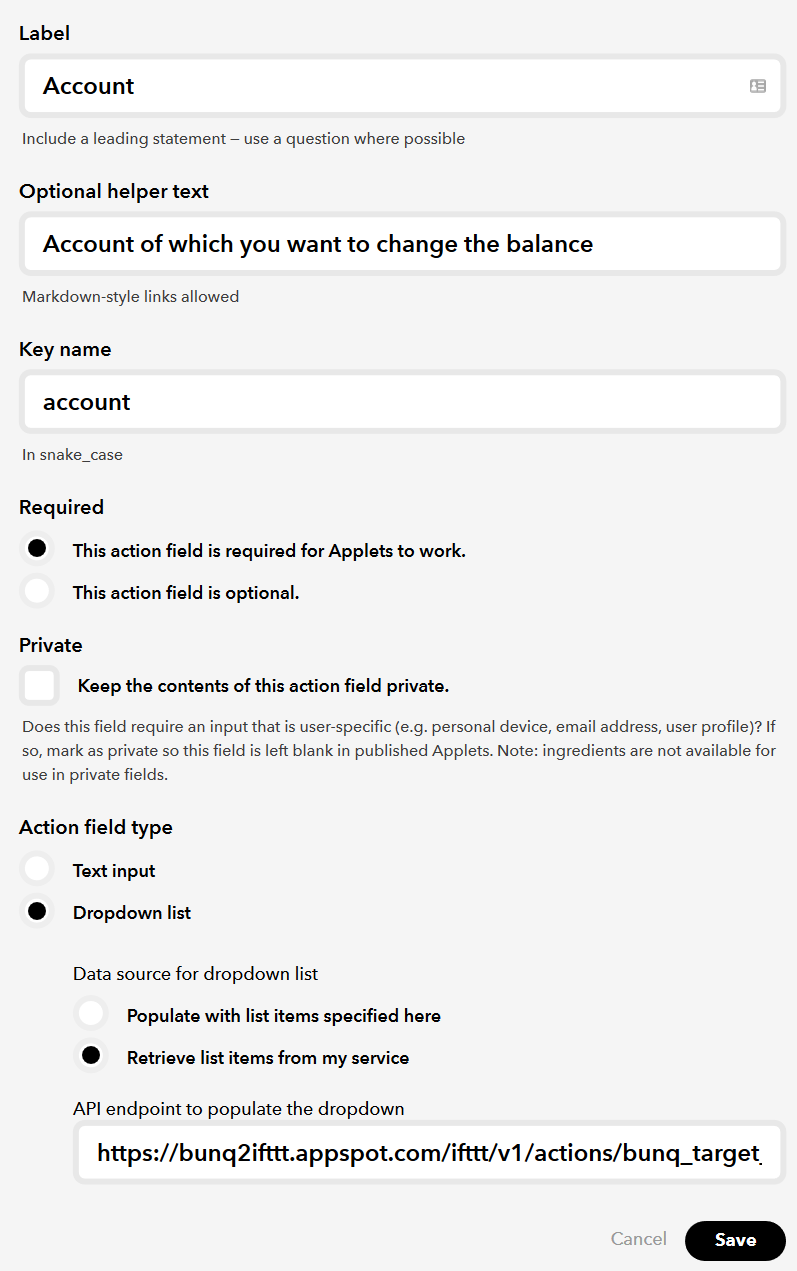
| Account | [ screenshot ] |
|---|---|
| Label: | Account |
| Optional helper text: | Account of which you want to change the balance |
| Key name: | account |
| Required: | yes (This action field is required for Applets to work) |
| Action field type: | Dropdown list / Retrieve list items from my service |
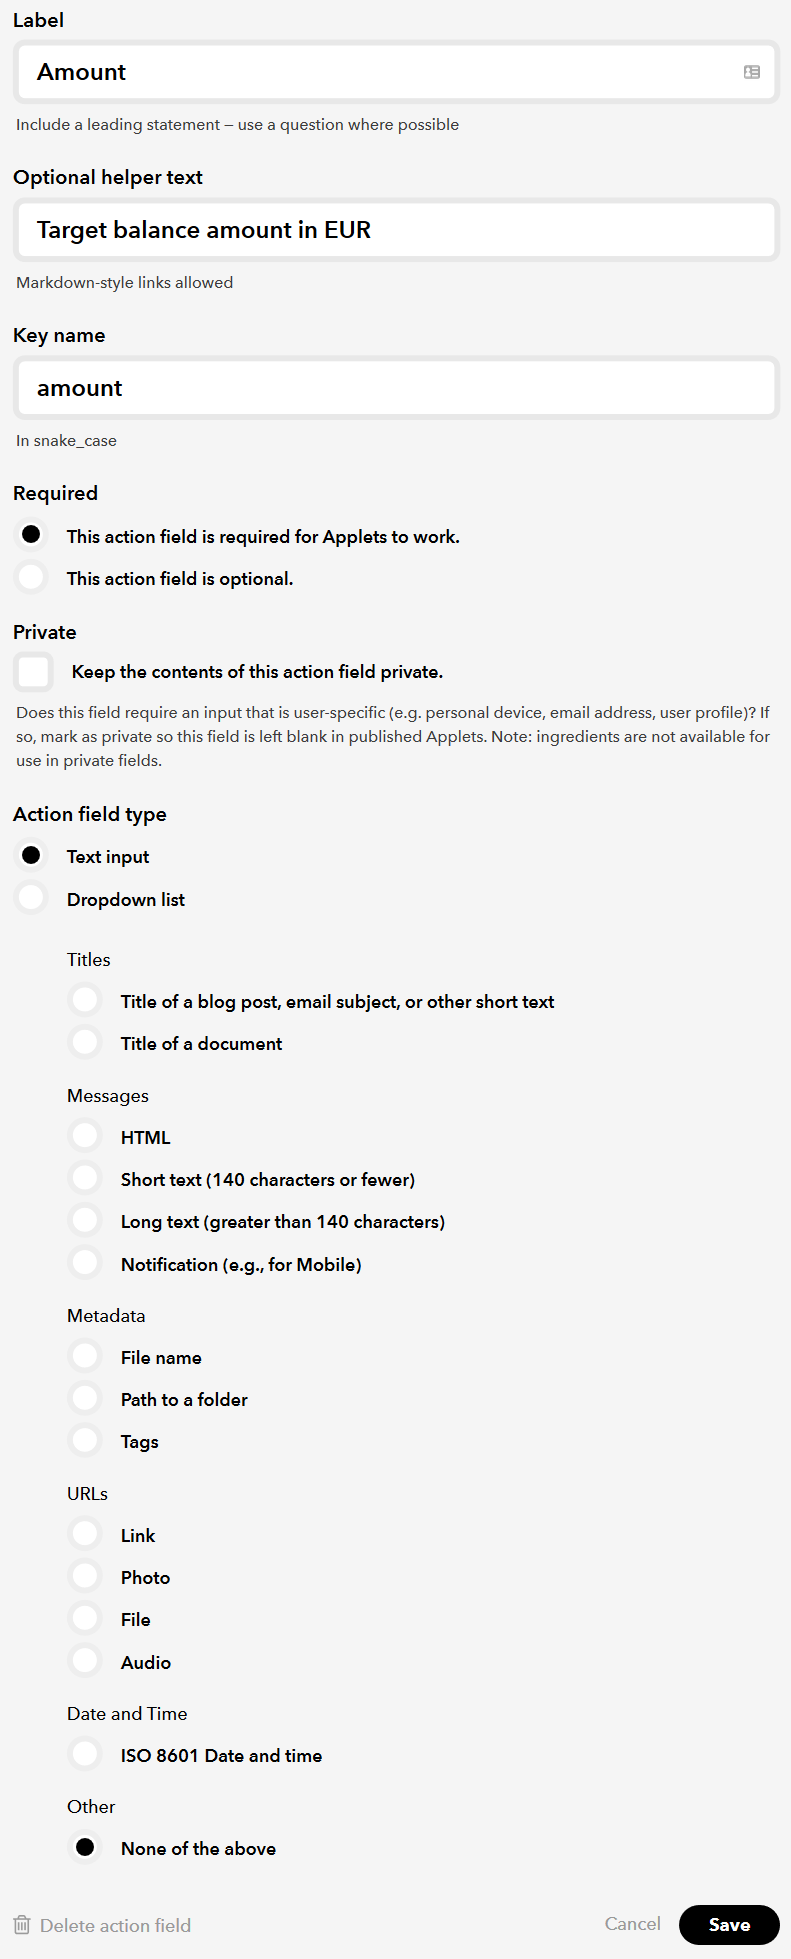
| Amount | [ screenshot ] |
| Label: | Amount |
| Optional helper text: | Target balance amount in EUR |
| Key name: | amount |
| Required: | yes (This action field is required for Applets to work) |
| Action field type: | Text input / Other / none of the above |
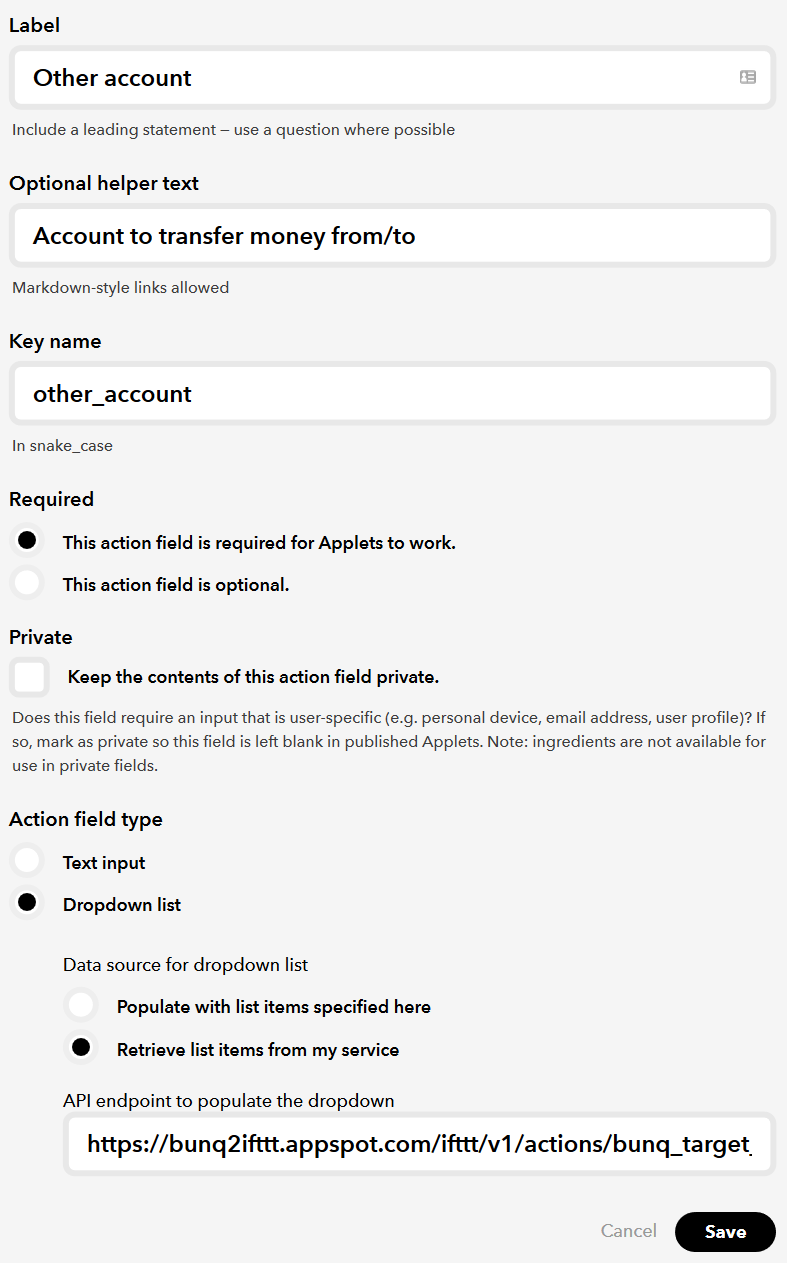
| Other account | [ screenshot ] |
| Label: | Other account |
| Optional helper text: | Account to transfer money from/to |
| Key name: | other_account |
| Required: | yes (This action field is required for Applets to work) |
| Action field type: | Dropdown list / Retrieve list items from my service |
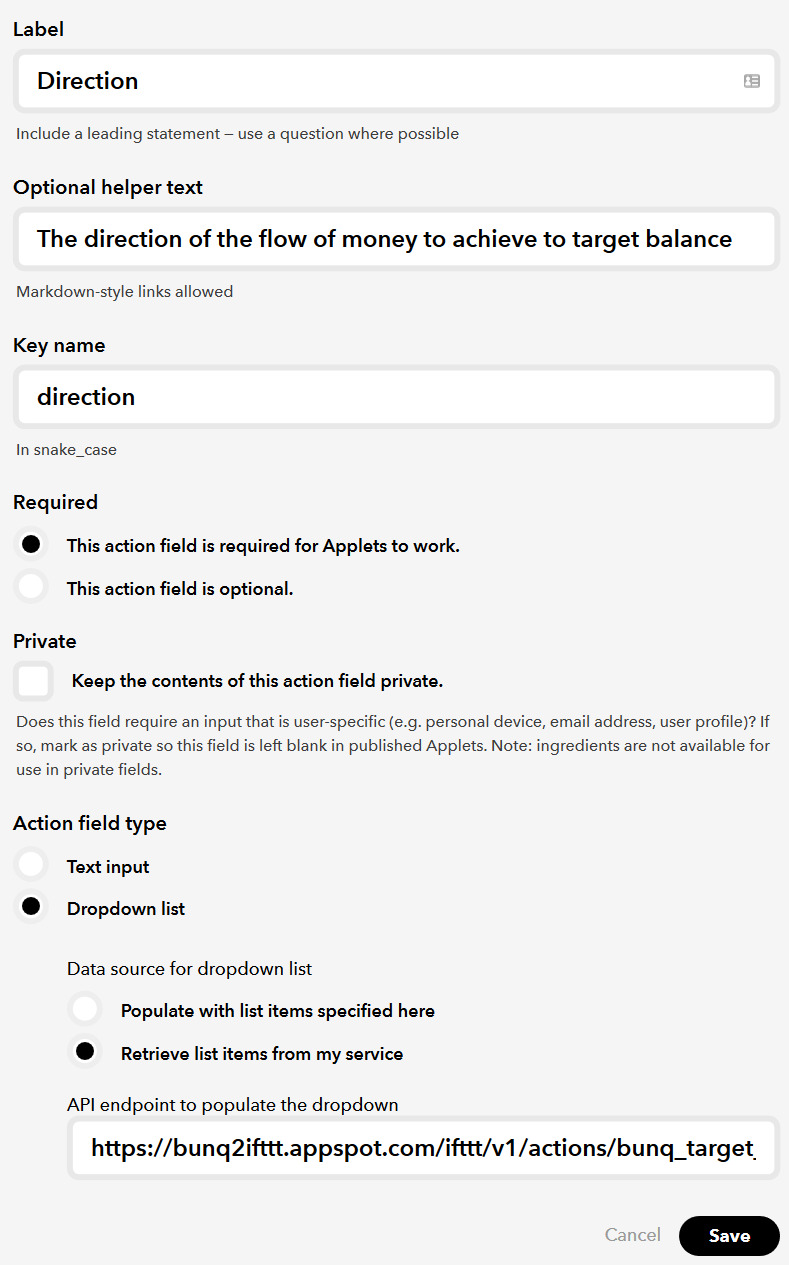
| Direction | [ screenshot ] |
| Label: | Direction |
| Optional helper text: | The direction of the flow of money to achieve to target balance |
| Key name: | direction |
| Required: | yes (This action field is required for Applets to work) |
| Action field type: | Dropdown list / Retrieve list items from my service |
| Payment type | [ screenshot ] |
| Label: | Payment type |
| Optional helper text: | Type of payment to create |
| Key name: | payment_type |
| Required: | yes (This action field is required for Applets to work) |
| Action field type: | Dropdown list / Retrieve list items from my service |
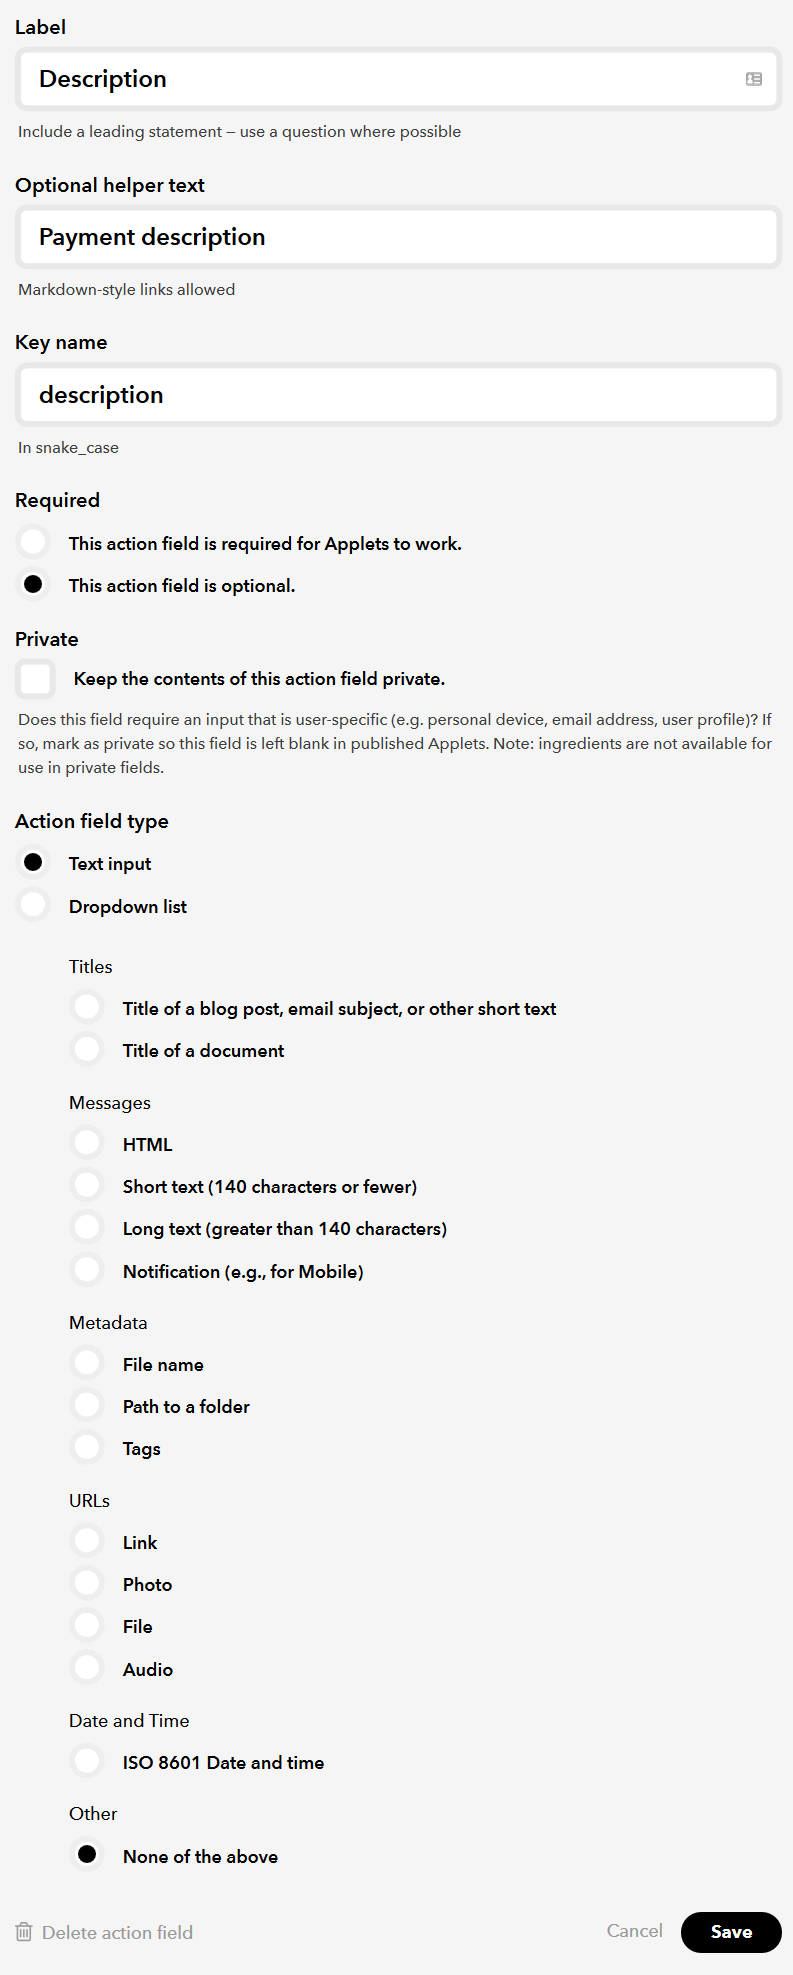
| Description | [ screenshot ] |
| Label: | Description |
| Optional helper text: | Payment description |
| Key name: | description |
| Required: | no (This action field is optional) |
| Action field type: | Text input / Other / none of the above |
You can now set the verbiage:
- First, you need to click on the save button underneath the verbiage field, as otherwise you cannot use any of the action fields values
- Then, enter the verbiage. A suggestion is to use
{{fields.direction.value}} the balance of account {{fields.account.label}}- but feel free to use anything else you like - Finally, click the save button again
See screenshot
Once you are done, the result should look something like this screenshot
Go to API -> Endpoint tests and click on the 'Begin test' button. In case all results are green: congratulations, you configured the draft payment action correctly!