Skip to content
Morris Winkler edited this page Feb 28, 2016 · 12 revisions

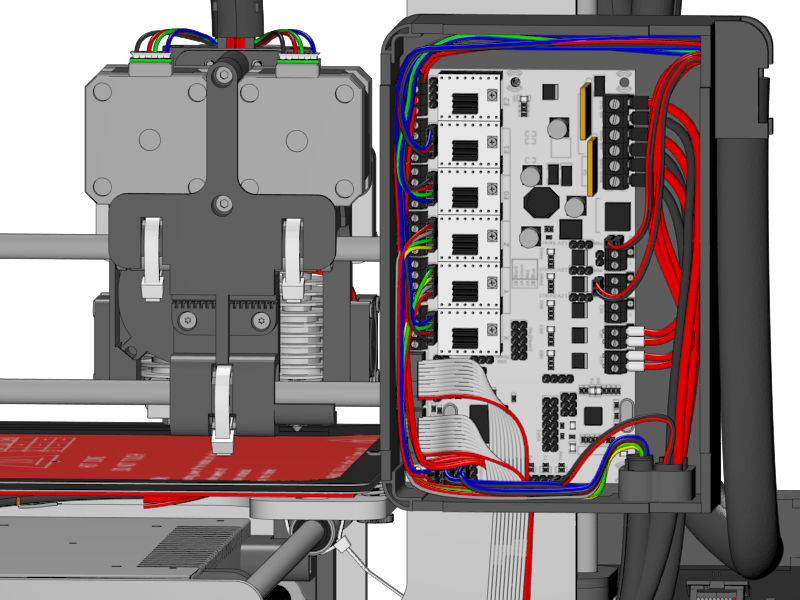
You made the main units. After wiring up the Y-Unit you will put them together. While you’re at it, just wire everything, including preparing the wiring for the extruder and the heatbed, that you will assemble later. We prefer organized wiring over spaghetti. It is important how you put the cables, so have a good look at all the nice 3D renders we made.

WiringDiagram

Section 4 0047

Section 4.1: Wiring the Power Supply
Section 4.2: Wiring the Z-Unit
Section 4.3: Wiring the Y-Unit
Section 4.4: Wiring the X-Axis
Section 4.5: Gluing the Endstop Magnets
Section 4.6: Uploading Firmware
Section 4.7: Wiring the Extruder
Section 4.8: Mounting the Heatbed

##i3 Berlin
1 Introduction
1.1: History
1.2: Tools and Parts
1.3: Preparing the Casings

2 Assembly of the Y-Unit
2.1: Rods and Power Supply
2.2: Front- and Back- Plate
2.3: Mounting Y-Carriage and Belt

3 Assembly of the XZ-Unit
3.1: Mounting the X-Axis
3.2: Mounting the Z-Axis
3.3: Mounting the Timing Belt
3.4: Assembling the Extruder

4 Wiring
4.1: Wiring the Power Supply
4.2: Wiring the Z-Unit
4.3: Wiring the Y-Unit
4.4: Wiring the X-Axis
4.5: Gluing the Endstop Magnets
4.6: Uploading Firmware
4.7: Wiring the Extruder
4.8: Mounting the Heatbed

Cable Lengths Rumba

5 Calibration
5.1: Testing Functionality
5.2: Calibrating the Y Axis
5.3: Calibrating the X Axis
5.4: Calibrating the Print Platform

6 Printing
6.1: Filament Holder
6.2: Cura
6.3: Kisslicer
6.4: Dual Printing

Clone this wiki locally