-
Notifications
You must be signed in to change notification settings - Fork 20
Section 4.3 Wiring the Y Unit
|
-
Look for the Y endstop cable, which is 58 centimeters long.
-
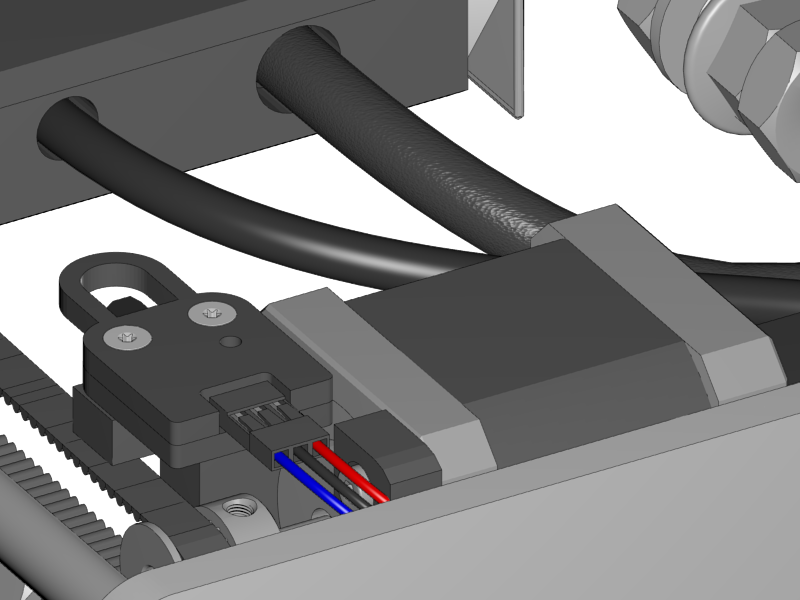
Connect the end stop. Mind the orientation of the connector. The red wire is on the right where the writing on the PCB says "S" for "signal".
|
-
Search for the Y motor cable, which is 60 centimeters long
-
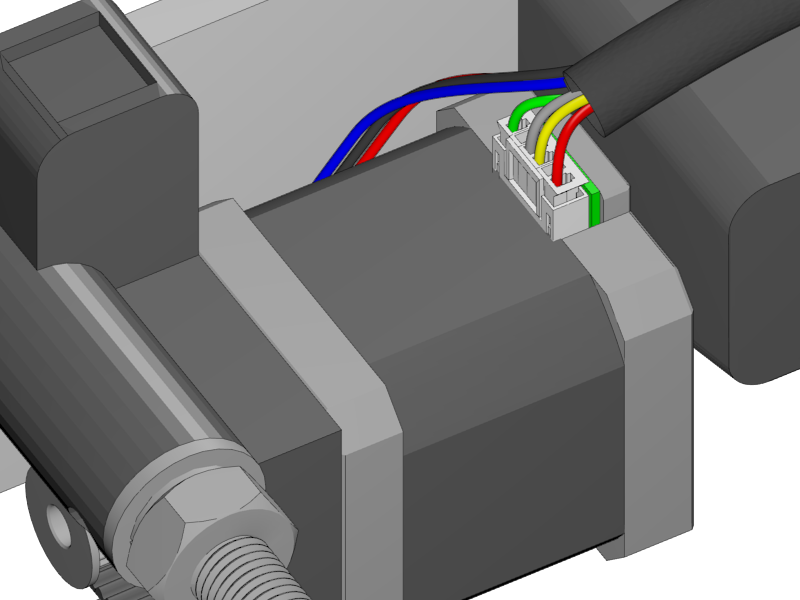
Connect it to the motor.
-
Lead the endstop cable through the back of the motor and join them at the motor connector
-
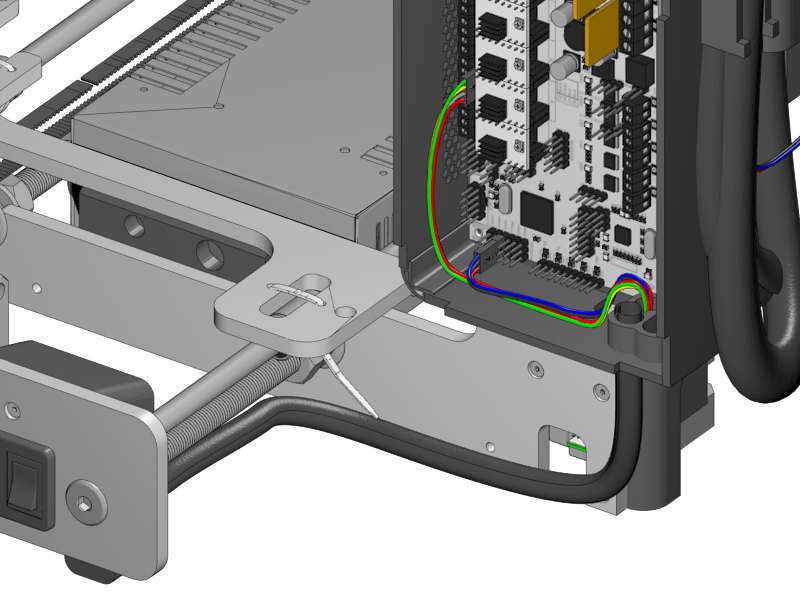
Put both cables into the Y Braided Sleeve, which is 39 centimeters long.
|
|
|
-
Lead the cables in the Braided Sleeve neatly through the hole in the Rumba casing.
-
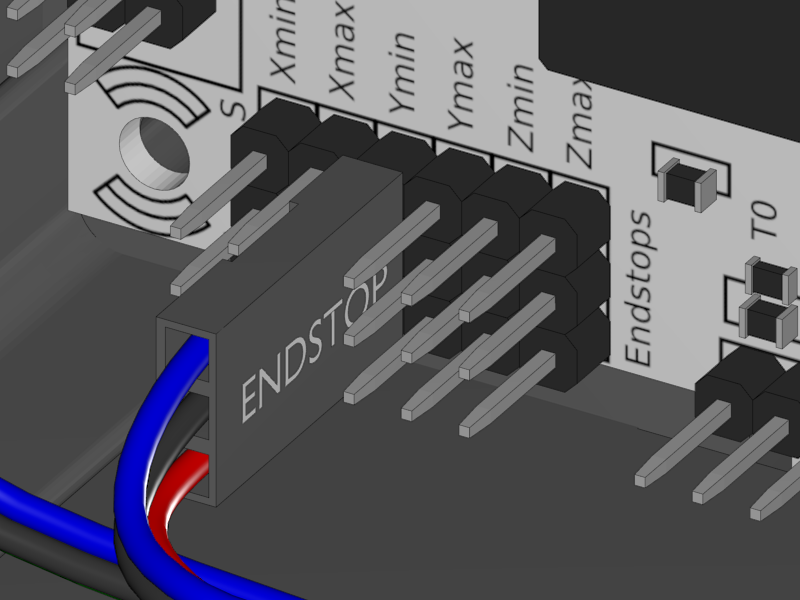
Connect the Y-Endstop to the "Y minus" in the endstop block. The red wire is at the bottom.
-
Connect the Y-Motor to the Y motor Driver. The black wire goes up.
-
If the colorscheme of your motor cable is red grey yellow green, the red one goes up.
-
##i3 Berlin
1 Introduction
1.1: History
1.2: Tools and Parts
1.3: Preparing the Casings
2 Assembly of the Y-Unit
2.1: Rods and Power Supply
2.2: Front- and Back- Plate
2.3: Mounting Y-Carriage and Belt
3 Assembly of the XZ-Unit
3.1: Mounting the X-Axis
3.2: Mounting the Z-Axis
3.3: Mounting the Timing Belt
3.4: Assembling the Extruder
4 Wiring
4.1: Wiring the Power Supply
4.2: Wiring the Z-Unit
4.3: Wiring the Y-Unit
4.4: Wiring the X-Axis
4.5: Gluing the Endstop Magnets
4.6: Uploading Firmware
4.7: Wiring the Extruder
4.8: Mounting the Heatbed
5 Calibration
5.1: Testing Functionality
5.2: Calibrating the Y Axis
5.3: Calibrating the X Axis
5.4: Calibrating the Print Platform
6 Printing
6.1: Filament Holder
6.2: Cura
6.3: Kisslicer
6.4: Dual Printing


