-
Notifications
You must be signed in to change notification settings - Fork 200
help.ShaderDevelopmentExample
In this article, we will build an effect that uses a large set of images to reconstruct a reference image. This challenge was proposed by Changes on Tooll's challenge channel after seeing this tutorial for TouchDesigner. He was also kind enough to provide a set of 1001 images.
I thought that this task is a great example of a more complex shader setup in Tooll and wanted to give it a try. To make it slightly more interesting, I didn't watch the original video to see what I would come up with.
This tutorial nicely covers the technical details of both ComputeShader and Vertex and PixelShader development with T3

At first glance, this effect seems very related to the [AsciRender] and the [DrawBillBoards] effect:

For the former, Tooll sorts the characters in a texture atlas by brightness and then maps the brightness of the target image to a position in the sorted index list. This works well for luminosity, but for reconstructing the color of the reference image, we will need another dimension.
The [DrawBillBoards] effect can use an optional reference fx-texture parameter to color its sprites. If we initialize and use an atlas-texture with all our images, we come surprisingly close to "faking it". However, every sprite permanently uses one of the source images, which is definitely not what we want.

If we consider the problem we need to solve, we can summarize it as follows:
- We aim to render a representation of a reference image.
- For each position xy of this image, we have an RGB color.
- Our goal is to find the source image where its average color is closest to the reference RGB.
- We obtain that average color when scaling the source images to 1x1 pixel and accessing the lowest mip map level.
Taking a small mental leap, we recognize that RGB could also be envisioned as three coordinates (xyz) of a cube. This might be where the term "color space" originates. Thus, the best matching set image is the one with the smallest distance: Vector3.Distance(referenceImage.rgb - setImage.rgb);
Unfortunately, performing this search for every pixel in our reference image won't be possible in real-time if we have more than a couple of hundred images in our set. Further experiments in compute shader development reveal that many algorithms rely on storing and sorting indices to other buffers. Therefore, I concluded that the basis for our effect should be a three-dimensional lookup table holding the indices of the image with the closest average color within a color space. Essentially, it's a cube with an edge length of 256 (or whatever color resolution we decide to use), where the bottom-left corner [0,0,0] represents black and has an index for the darkest image in our set, while the color [255,255,255] white holds an index to the brightest color.
Populating that lookup table will be SLOW (yes, in capital letters) because we have to perform 256×256×256×1001 tests for it. The upside: for a production use case, this could be cached as a 3D-texture that would result in 64MB uncompressed if we store our indexes with 4 bytes.
Loading all images and generating the lookup table takes several seconds on my GTX2080. I'm certain that further optimization could reduce this time until loading and decoding the images becomes the bottleneck, necessitating additional optimization (e.g., converting the images to DDS).
Whenever I hear the word "cache," I get a tingly feeling at my spine and hear Phil Karlton breathing "There are only two hard problems in computer science...". We'll delve much more into caching and cache invalidation later.
Here's what we have to do:
- Load all images in our set folder.
- Create a texture atlas or array that can be used when drawing the billboards.
- Create a list of average colors for each of those images.
- Write a compute shader that generates the lookup table.
- Write a billboard draw effect that uses a reference image, the lookup table, and the texture atlas to draw quads using the best matching texture.
- Find a method to initialize the image set and lookup table only once.
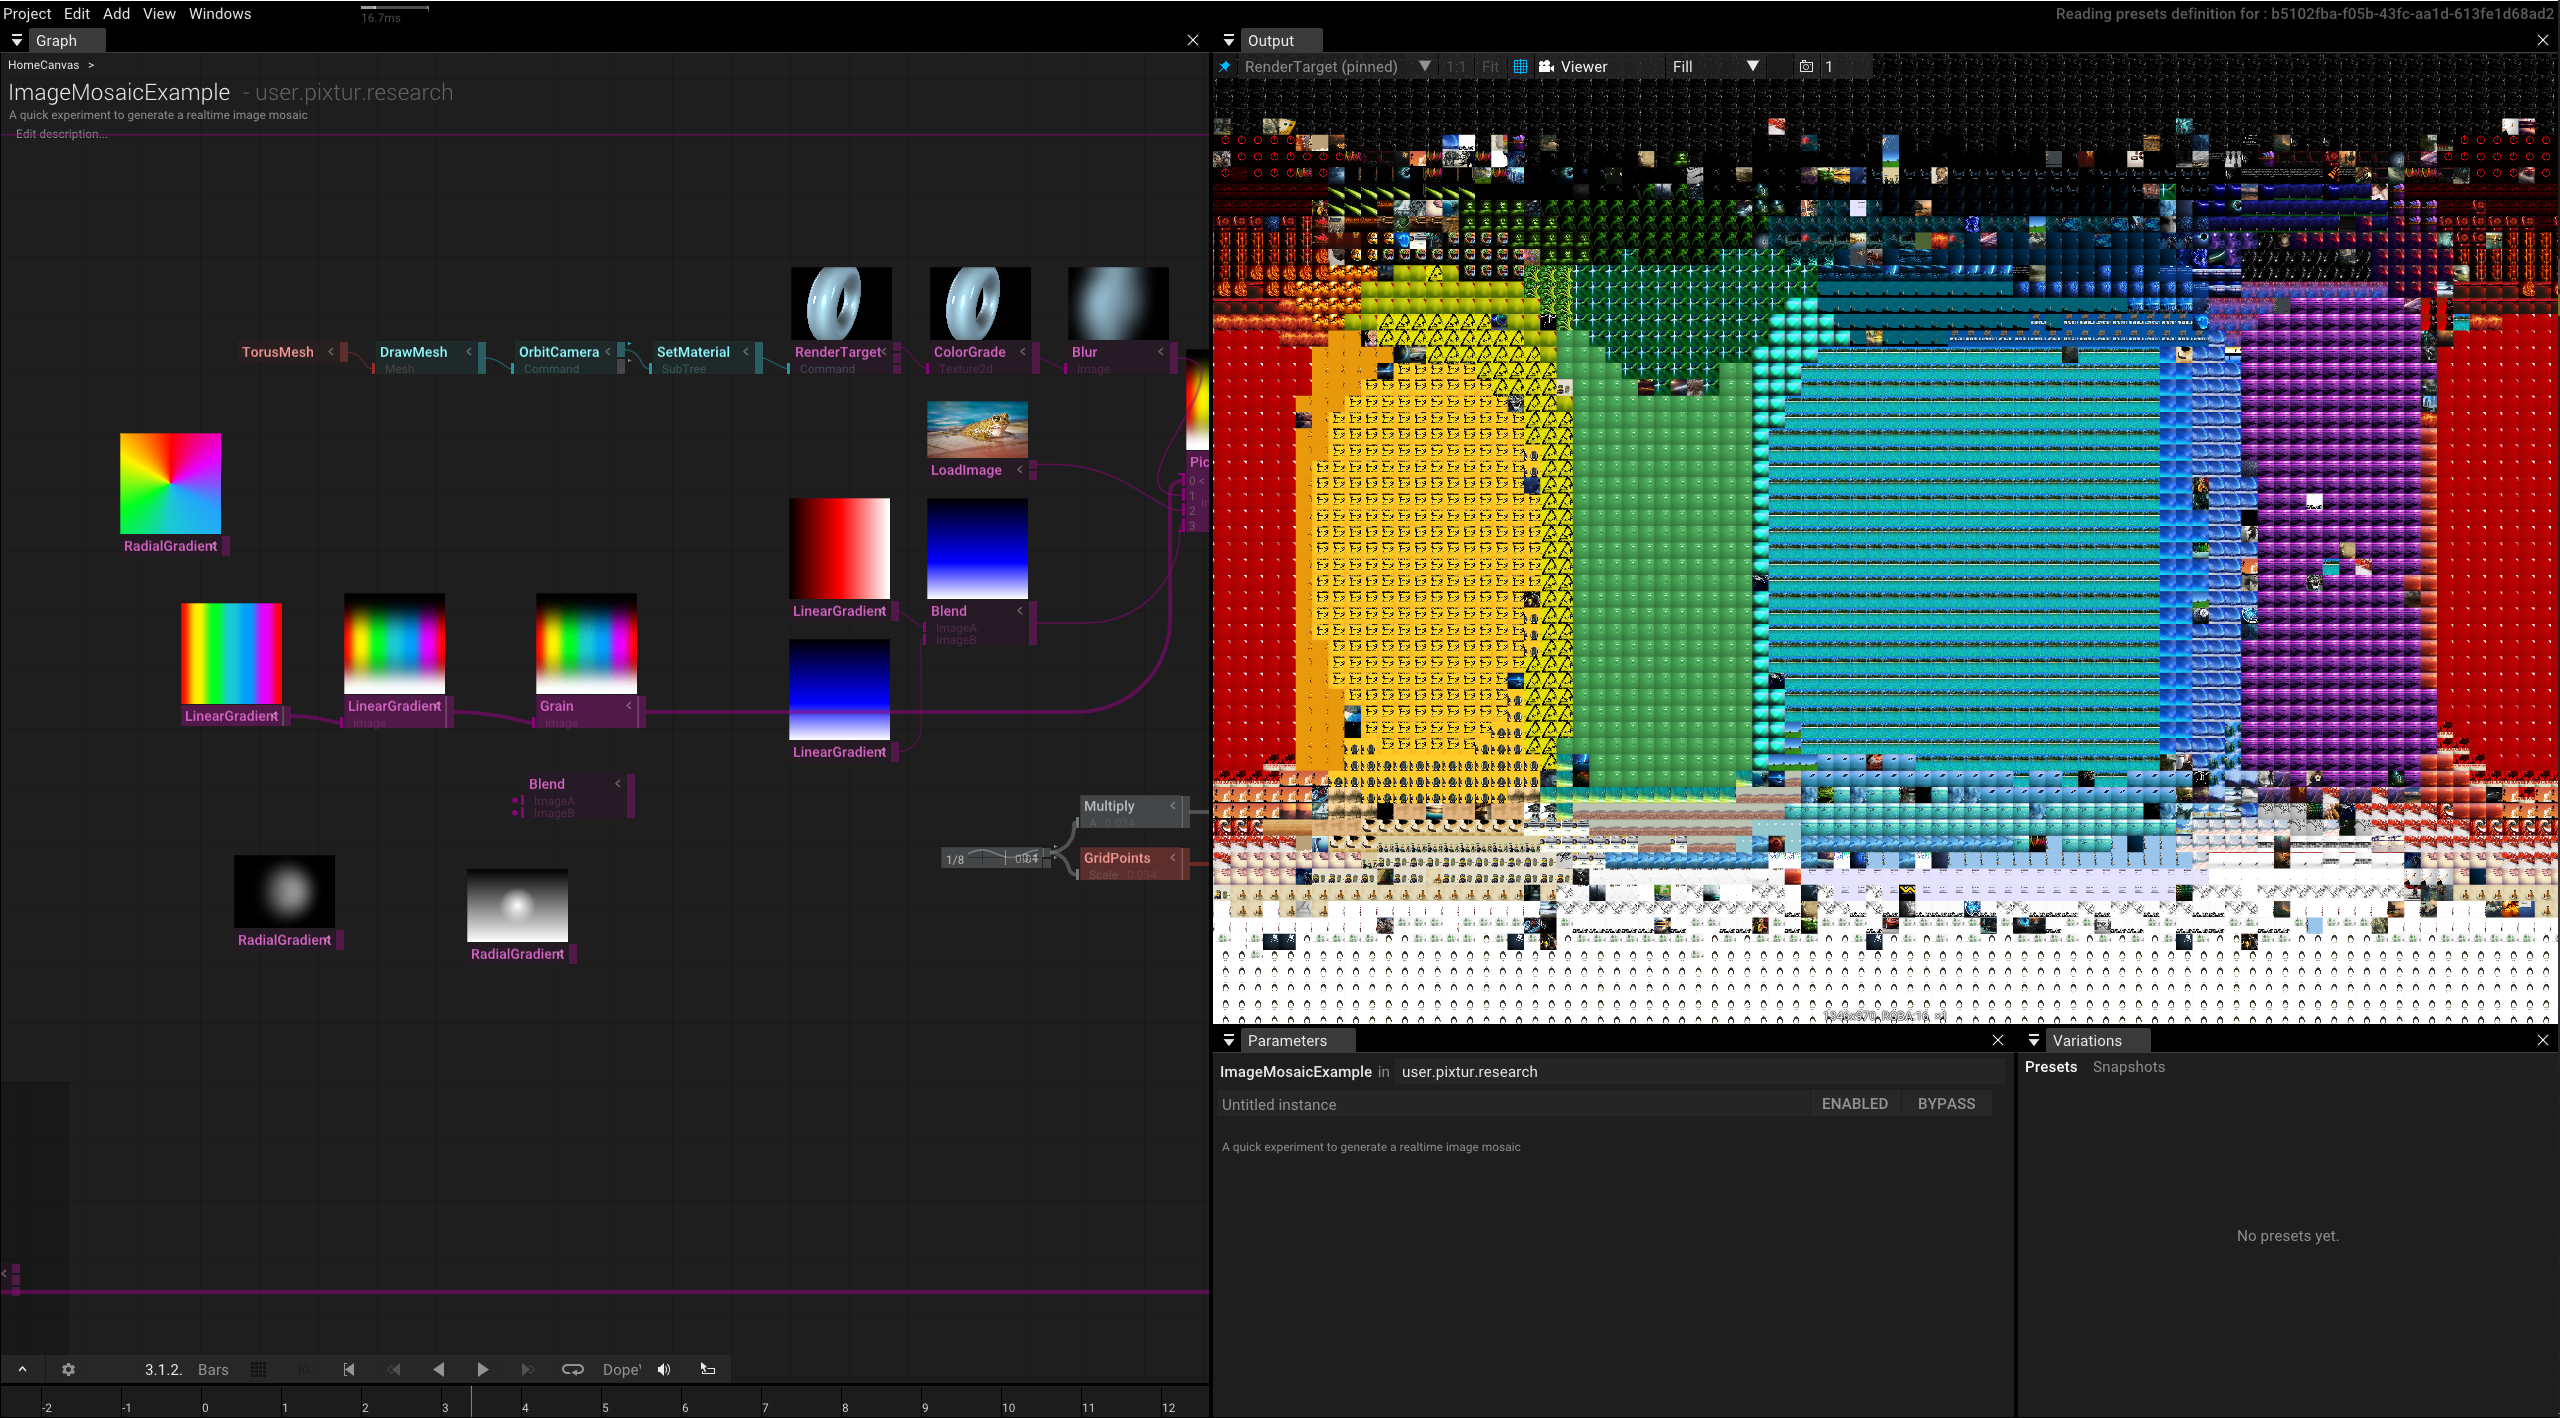
We recommend to open the [ImageMosaicExample] in Tooll and follow along. It contains many comments and annotations explaining what's happening. If you want to learn even more, you can try to open Tooll with RenderDoc to explore the state of the graphic card in further detail.
We've grouped the final effect into 3 operators to separate and clarify the different stages:
Feeds an animated grid of points and the reference image into the effect.

Controls the caching and draws the billboards.

Loads all images and builds the lookup table and the texture array.

You might notice that as the internalization level increases, the operators become more intimidating. However, in the rest of the article, I will walk you through all the details and code.
Let's begin with loading the images. For this, we're using the [FilesInFolder] operator:

We pass in the file path from the parent operator. [FilesInFolder] has two outputs: Files, which is a list of file paths, and Count. It also features a Filter parameter that we could use to filter only images, which we could set to .jpg to skip non-image files.
We clamp the count to 2000 just to be sure things don't get out of hand.
Then, we feed the Count into [Loop] to iterate over the images:

While [Loop] is iterating, it sets two variables to the context: by default, the index-variable is i, and the normalized float variable going from 0 to 1 is called f. We are going to use both of these.
Using the [GetIntVariable], we can pick a string from the file path list and feed it into the [LoadImage] operator:

You'll notice that its input has changed and requests to load that resource from the ResourceManager and create a new texture resource. By default, we generate mipmaps for all loaded images.
With this texture, we're going to do two things: Add it to our TextureArray and add a scaled-down 1x1 pixel average color to our pixel list.
A texture array is basically a stack of textures with the same format and resolution. It's different from a 3D-texture because the different slices can't be blended with a sampler. We can use the [Texture2d] operator to create a new texture resource and feed the count of images into the ArraySize parameter. Note that we also have to enable the ShaderResource and RenderTarget BindFlags so we can render into our texture:

To actually draw into our texture, we have to do a couple of things. We define the order of those with an [Execute] operator.
- Initialize the viewport and set it with the [Rasterizer]. Sadly, the viewport needs to be set in pixels so we have to take the size parameter, split its components, and convert them to floats.
- We have to define to which slice of your texture array we're rendering into. For this, we have to create a new RenderTargetView (RTV) and pass in
ito the ArrayIndex parameter. - We finally render the loaded image using a [Layer2d]. We set its ScaleMode to "Cover" so we don't have to deal with scaling or varying image aspect ratios.
Once we're done, the [Execute] operator will clean up all changes to the render state.
The next step is a hack to generate a texture that contains the average colors of our image set. If you zoom in a lot, you can actually see these colors:

Here's how we do it:

- We initialize the [RenderTarget] Resolution with the [Int2ToSize2] combining the image count for the width and 1 for the height.
- To clear the target for the first image, we use a [CompareInt] to test if
iis 0, and pass it into the Clear parameter:
- We create a 1x1 [RenderTarget] and render each image into that with a [Layer2d]. Then, we use the resulting texture to render a single pixel. To get the draw position, we use [Remap]. I'm sure there are smarter and more efficient ways to do this, but it worked, and I moved on.

Considering the previous steps, the setup for the compute shader looks suspiciously straightforward:

- We use a [ComputeShaderStage] and connect our shader.
- We connect the ShaderResourceView for our pixel texture. [RenderTarget] is bound to an SRV by default so we don't have to do anything here.
- We connect a sampler with point mode to avoid blending between the image colors:

- We set its DispatchCount to 256×256×256. This feels like a horrible thing to do, but inside the shader, we have a long loop, so I doubt that there is actually any parallel work possible.
- Finally, we create our [Texture3d], set its bind flags to make it accessible as a shader resource and as an "Unordered Access View" (UAV), use the [Texture3dComponents] to access it, and connect it:

Let's have a look at the actual shader code for our compute shader. You might be intimidated by shader code, but we will walk you through the details.
At the beginning, we register...
- the
ImagePixelstexture (a shader resource view) - the
LookUptexture as an Unordered Access View (UAV) - and our sampler:
Texture2D<float4> ImagePixels : register(t0);
RWTexture3D<float> LookUp : register(u0);
sampler texSampler : register(s0);
You might notice the : register(t0); syntax. It uses t for SRVs (Textures), u for Unordered Access Views (UAVs), and s for Samplers. If you look closely, you will notice that those indices are listed as multi-input parameters for the [ComputeShaderStage] operator:

The title of the main shader function, BuildLookupTable, is defined in the [ComputeShader] op:

Let's walk through it line by line. I will explain the OKLab LCH later.
// We set the thread count to 1,1,1. Thread counts are somewhat tricky topic and are very relevant for performance optimization. In this case we ignore that completely. 🙈

[numthreads(1,1,1)]
void BuildLookupTable(uint3 threadID : SV_DispatchThreadID)
{
    // Use the built in GetDimensions() to read the width of our pixel map
    uint width, _;
    ImagePixels.GetDimensions(width, _);

    // Convert the thread id to a normalized vector 3.
    float3 lchColor = (float3)threadID/255;

    // Loop over all images (this is extremely slow and will never work in realtime)
    int bestIndex= -1;
    float bestDistance = 99999999;

    for(int imageIndex=0; imageIndex< width && imageIndex< 1000; imageIndex++)
    {
        // Sample the pixel color as normalized RGB
        float4 pixelColor = ImagePixels.SampleLevel(texSampler, float2((imageIndex + 0.5)/width, 0.5),0);

        // Convert it into Oklab Luma, Chroma, Hue
        float3 imageLch = RgbToLCh(pixelColor.rgb);

        // Check whether this image is our new best match for
        // this position of the color space.
        float distance = length(imageLch - lchColor);
        if(distance < bestDistance) {
            bestDistance = distance;
            bestIndex = imageIndex;
        }
    }

    // Finally we write the best index into our map.
    LookUp[threadID] = (float)bestIndex;
}
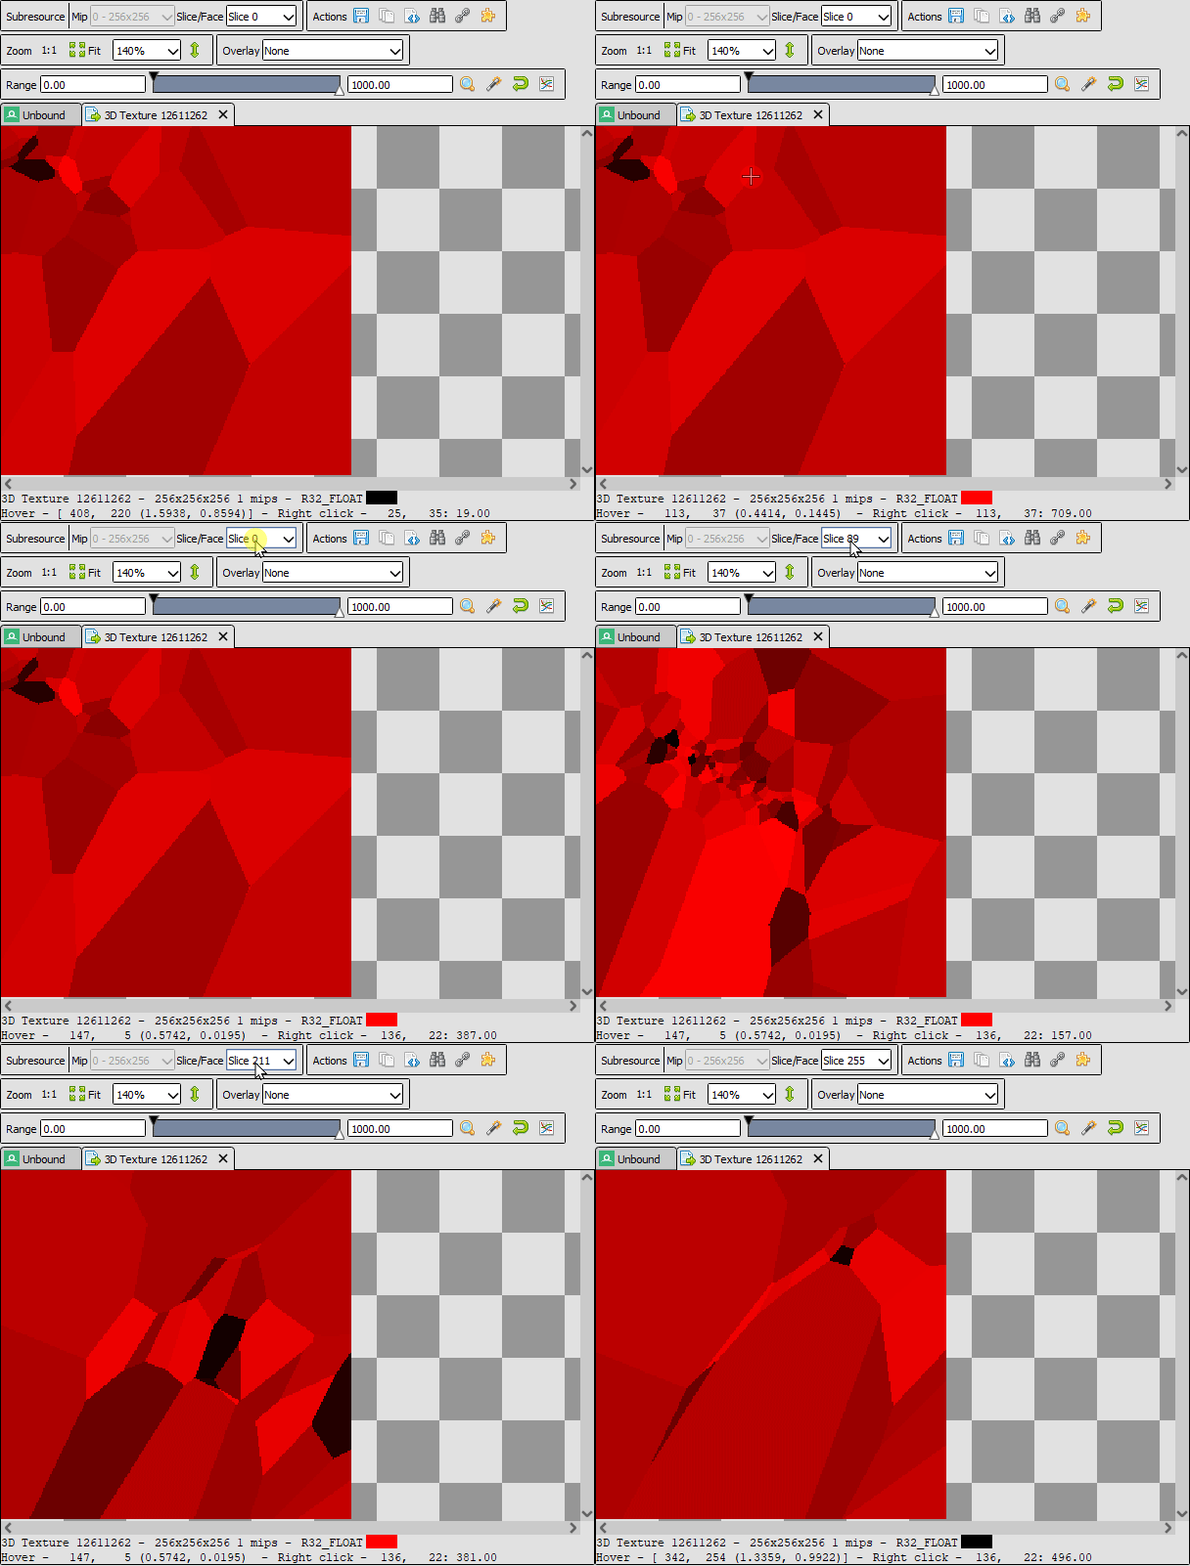
I used RenderDoc to check the results for the RGB color space. If you look closely, you'll see the image indices at the bottom right (381, 561, 556, 516, 387, etc.).

The internal shape of this lookup texture surprised me. Most images are densely clustered at the center of the space, which makes sense because images on the sides would need to be purely saturated colors. Additionally, the space is nicely tessellated into Voronoi areas around each image color.
Earlier, we discussed cache invalidation. This fancy term refers to the problem of updating something only when it's no longer valid and needs recomputation (i.e., "invalidated"). As mentioned earlier, this can be a terribly hard problem because it should "work as expected" without the user needing to perform any manual interactions.
In our case, there are two options:
An ideal candidate is the [Once] operator, which returns true if requested the first time and false thereafter. This can be a great solution connected to [RenderTarget]'s .IsEnabled parameter to trigger an initial update and then prevent any further updates.
The second solution is slightly more specific and also works when the user changes the path of the image folder:

As seen here, we connect the output of an [Any] operator to the [_ImageMosaicInitialize]-TriggerUpdate parameter. This operator returns true if any of its connected inputs are true. (Quick side note: unlike modern programming languages, the Any Operator evaluates all connected inputs even if the first input is already true.)
Thus, we update if any of the following is true...
- [HasStringChanged], which returns true if the connected ImageFolder path changes OR if it is the first evaluation
- a manual [Trigger] operator that is useful to trigger an update while developing the operator.
- a published TriggerUpdate parameter just in case.
After all that setup, we're finally ready to draw some mosaic sprites on the screen. The overview might look intimidating, but once we walk through it step by step, things seem less daunting.
What we see here is essentially the complete setup of a "draw call": We instruct the graphics card to set up and render a bunch of triangles with a given vertex and fragment shader. Everything is set behind an [Execute] operator to clean up all render stage settings after our draw call.

Using an [InputAssemblerStage], we inform the graphics card about what we want to draw, in our case, triangles:  . We don't connect any vertex or index buffers because we will generate that information on the fly in the vertex shader.
Note: In earlier screenshots, you might have noticed two different [VertexShaderStage] and [PixelShaderStage] operators. While writing this, I realized that this setup unnecessarily requires connecting all the resources twice. This is not only cumbersome but also error-prone because an inconsistent order will probably break the shader setup.
In the new setup, we use the [SetupVertexAndPixelShaderStages] and connect the [VertexShader], [PixelShader], the ConstantBuffers, ShaderResourceViews, and Samplers we need:
Let's break this down one by one:
- Our VertexShader uses
Resources\user\pixtur\research\1000Images\DrawPhotoMosaicBillboards.hlslwith the EntryPointvsMain. We'll talk more about the actual shader code further down. - Then, we use [FloatsToBuffer] to convert the connected float parameters into a constant buffer so they can be used in the shader. In our case, the only uniform parameter is the Size of the sprites.
- We also connect the [TransformConstantBuffer] operator to the constant buffer list. This provides a set of transform matrices that will allow us to convert coordinates from object space to world space and finally into the camera and clip space. We'll learn more about this when discussing the shader code further down.
- We connect the Shader Resource Views (SRV). These are buffers or textures the shader can only read from:
- We use [GetBufferComponents] to get the SRV for our point buffer.
- [SrvFromTexture2D] to get SRVs for our TextureArray and the connected reference image.
- Finally, we connect the two samplers we need for our shader:
- "ClampedSampler" and "PointSampler", renamed operators padded with "", define how to read pixels from a texture, especially interpolating between pixels and handling UV coordinates outside the 0..1 range. In our case, it's important that the graphics card never blend between two image indices; we switch to point sampling:

- "ClampedSampler" and "PointSampler", renamed operators padded with "", define how to read pixels from a texture, especially interpolating between pixels and handling UV coordinates outside the 0..1 range. In our case, it's important that the graphics card never blend between two image indices; we switch to point sampling:
The [RasterizerStateOp] operator tells the graphics card how to convert triangles to pixels on the screen. This operator combines many interesting settings, such as:
- CullModes (e.g., to render front sides, backsides, or both—essentially doubling the poly count),
- FillMode: Solid or Wireframe.
As with all the other DirectX specific operators can find all the details in the official API documentation for DirectX.
Finally, the [OutputMergerStage] defines how pixels are blended with the existing content of the currently active [RenderTarget].
These settings include depth testing...

...and blending...

Finally, we're ready to draw something.

With the following, we compute the number of vertices the graphics card should generate: Since we're drawing quads, we need 6 vertices for each entry in our point buffer.
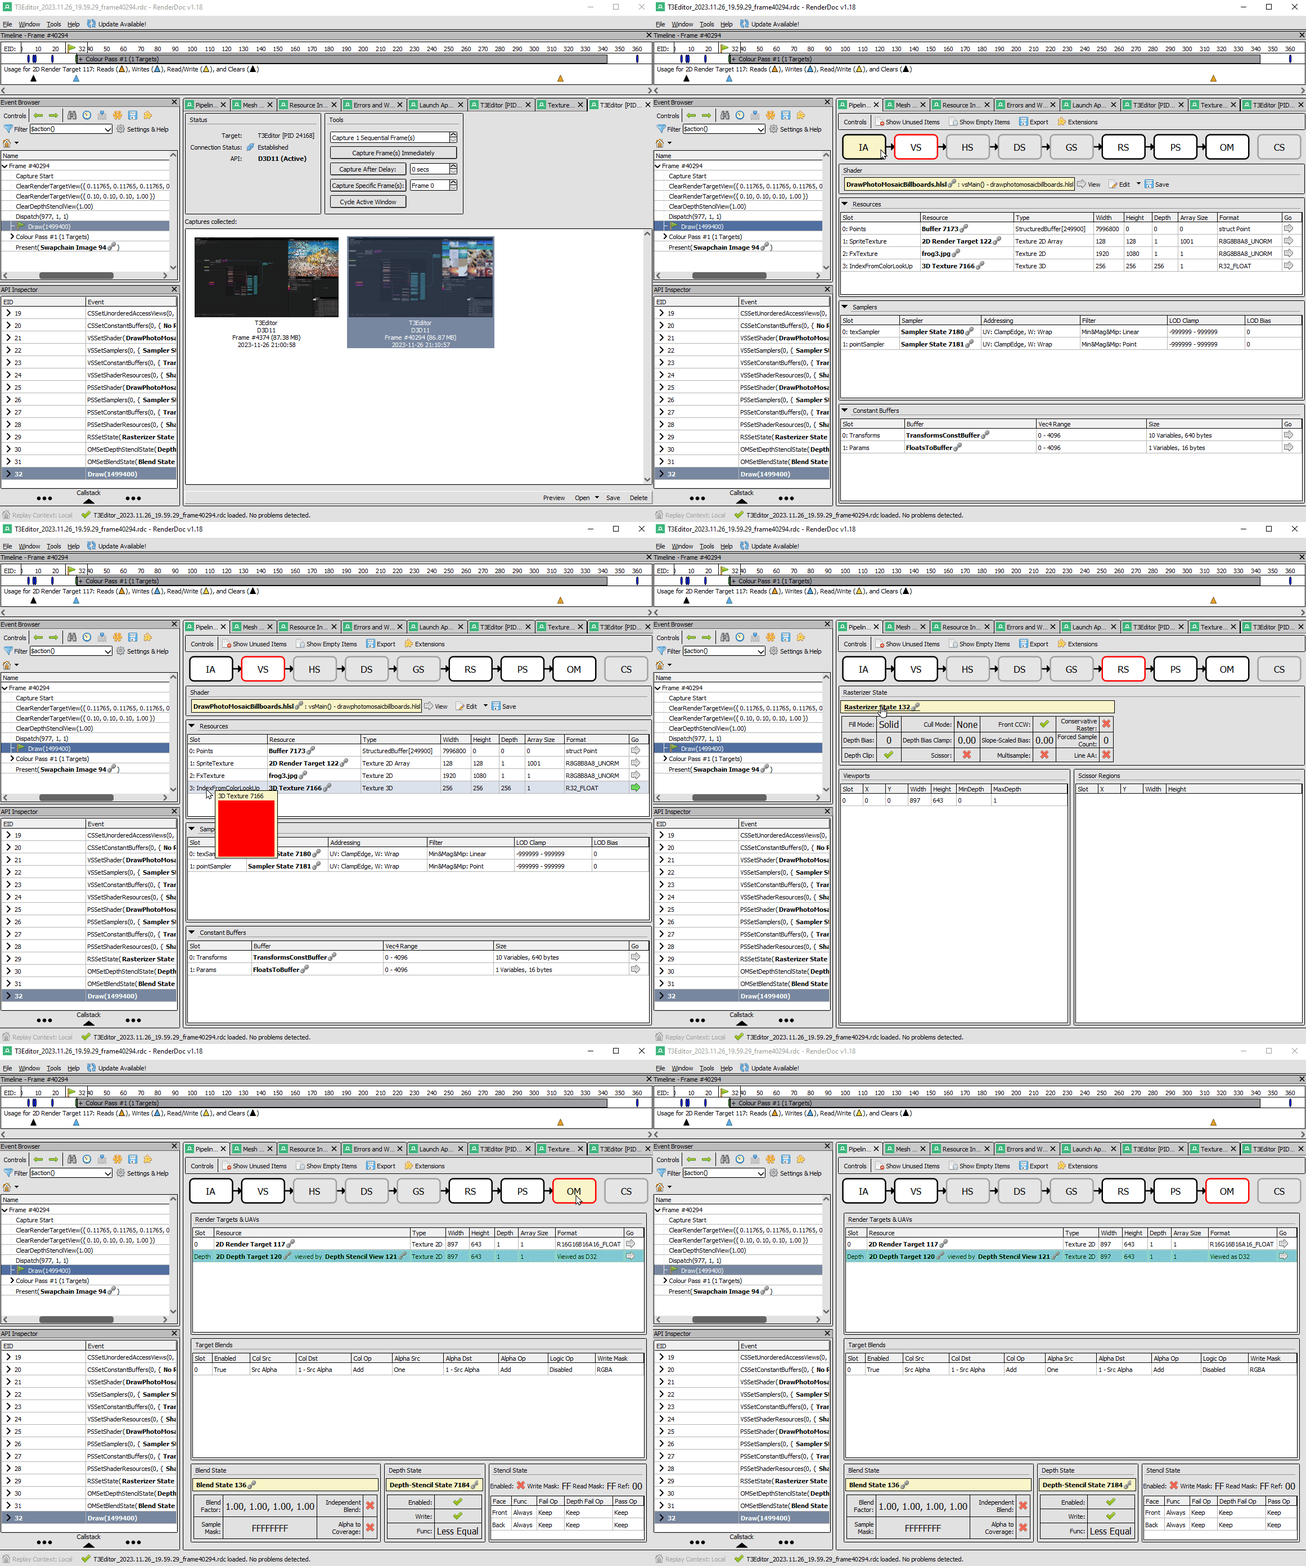
Let's take a look at our draw call in RenderDoc:

It lists the complete DirectX render Pipeline for our draw call (with 1499400 vertices) selected in the Event browser:
- IA - Input Assembler
- VS - Vertex Shader
- HS - Hull Shader
- DS - Domain Shader
- GS - Geometry Shader
- RS - Rasterizer State
- PS - Pixel Shader
- OM - Output Merger
- CS - Compute Shader
And all the details we set up above.
And finally can take a look at the actual vertex and pixel shaders. Here are the relevant sections of the shader file:
Registering samplers and resources:
sampler texSampler : register(s0);
sampler pointSampler : register(s1);

StructuredBuffer<Point> Points : register(t0);
Texture2DArray<float4> SpriteTexture : register(t1);
Texture2D<float4> FxTexture : register(t2);
Texture3D<float> IndexFromColorLookUp : register(t3);
Defining the data passed between vertex and pixel shader:
struct psInput
{
    float4 position : SV_POSITION;
    float2 texCoord : TEXCOORD;
    int arrayIndex: INDEX;
};
The vertex shader:
psInput vsMain(uint id: SV_VertexID)
{
    psInput output;

    uint particleCount, stride;
    Points.GetDimensions(particleCount, stride);

    uint quadIndex = id % 6;
    uint pointId = id / 6;
    float3 cornerFactors = Corners[quadIndex];

    Point p = Points[pointId];

    float f = pointId / (float)particleCount;
    output.texCoord = (cornerFactors.xy * float2(1, -1) * 0.5 + 0.5);

    float4 posInObject = float4(p.position, 1);
    float4 quadPosInCamera = mul(posInObject, ObjectToCamera);
    float4 posInCamera = mul(posInObject, ObjectToCamera);

    float4 centerPos = mul(float4(quadPosInCamera.xyz, 1), CameraToClipSpace);
    centerPos.xyz /= centerPos.w;

    // Sample reference image
    // Note: We need to sample an explicity mip level, because the texture scale can't be be
    // computed in the vertex shader
    float4 fxColor = FxTexture.SampleLevel(texSampler, (centerPos.xy * float2(1, -1) + 1) / 2, 0);
    float3 lch = RgbToLCh(fxColor.rgb);
    lch.x += hash11u(pointId) * 0.1;   // Add some variation to "dither"
    output.arrayIndex = IndexFromColorLookUp.SampleLevel(pointSampler, lch,0);

    float hideUndefinedPoints = isnan(p.w) ? 0 : 1;
    float computedScale = hideUndefinedPoints * Scale;

    float3 axis = ( cornerFactors ) * 0.010;
    axis = rotate_vector(axis, p.rotation) * computedScale;
    output.position = mul(posInObject + float4(axis, 0), ObjectToClipSpace);
    return output;
}
And finally the fragment (I.e. pixel) shader:
float4 psMain(psInput input) : SV_TARGET
{
    return SpriteTexture.Sample(texSampler, float3(input.texCoord, input.arrayIndex));
}Although the initial results looked nice, I wasn't satisfied with the distribution of the look-up table and the actual mapping to the reference image. I had a hunch that using different color spaces like Hue Saturation Value (HSV) might yield more promising results and allow for a closer scale to human perception. Humans are much better at distinguishing values than saturation.

A while ago, I stumbled across Björn Ottosson's OKLab color space, which addresses such problems. We already added the OKLab interpolation to gradients. You can imagine OK's LAB-Color space as a cubic space with L being the lightness and A and B being two color temperature vectors (for warm/cold and pink/green). This can then be directly translated into the OKLch (Lightness, Chroma, Hue) space, closely related to HSV but with a much better distribution. In fact, this space is so incredible that the W3C adopted it as a browser standard, and it's available on 85% of all web browsers only 3 years after its invention. I don't know any other standard that was adopted faster.
The conversion into LCH is very fast:
static const float3x3 invB = {0.4121656120, 0.2118591070, 0.0883097947,
                       0.5362752080, 0.6807189584, 0.2818474174,
                       0.0514575653, 0.1074065790, 0.6302613616};

static const float3x3 invA = {0.2104542553, 1.9779984951, 0.0259040371,
                       0.7936177850, -2.4285922050, 0.7827717662,
                       -0.0040720468, 0.4505937099, -0.8086757660};


inline float3 RgbToLCh(float3 col) {
    col = mul(col, invB);
    col= mul((sign(col) * pow(abs(col), 0.3333333333333)), invA);

    float3 polar = 0;
    polar.x = col.x;
    polar.y = sqrt(col.y * col.y + col.z * col.z);
    polar.z = atan2(col.z, col.y);
    polar.z= polar.z / (2 * 3.141592) + 0.5;
    return polar;
}
You don't really have to understand the math behind this (I sure don't) to use it.
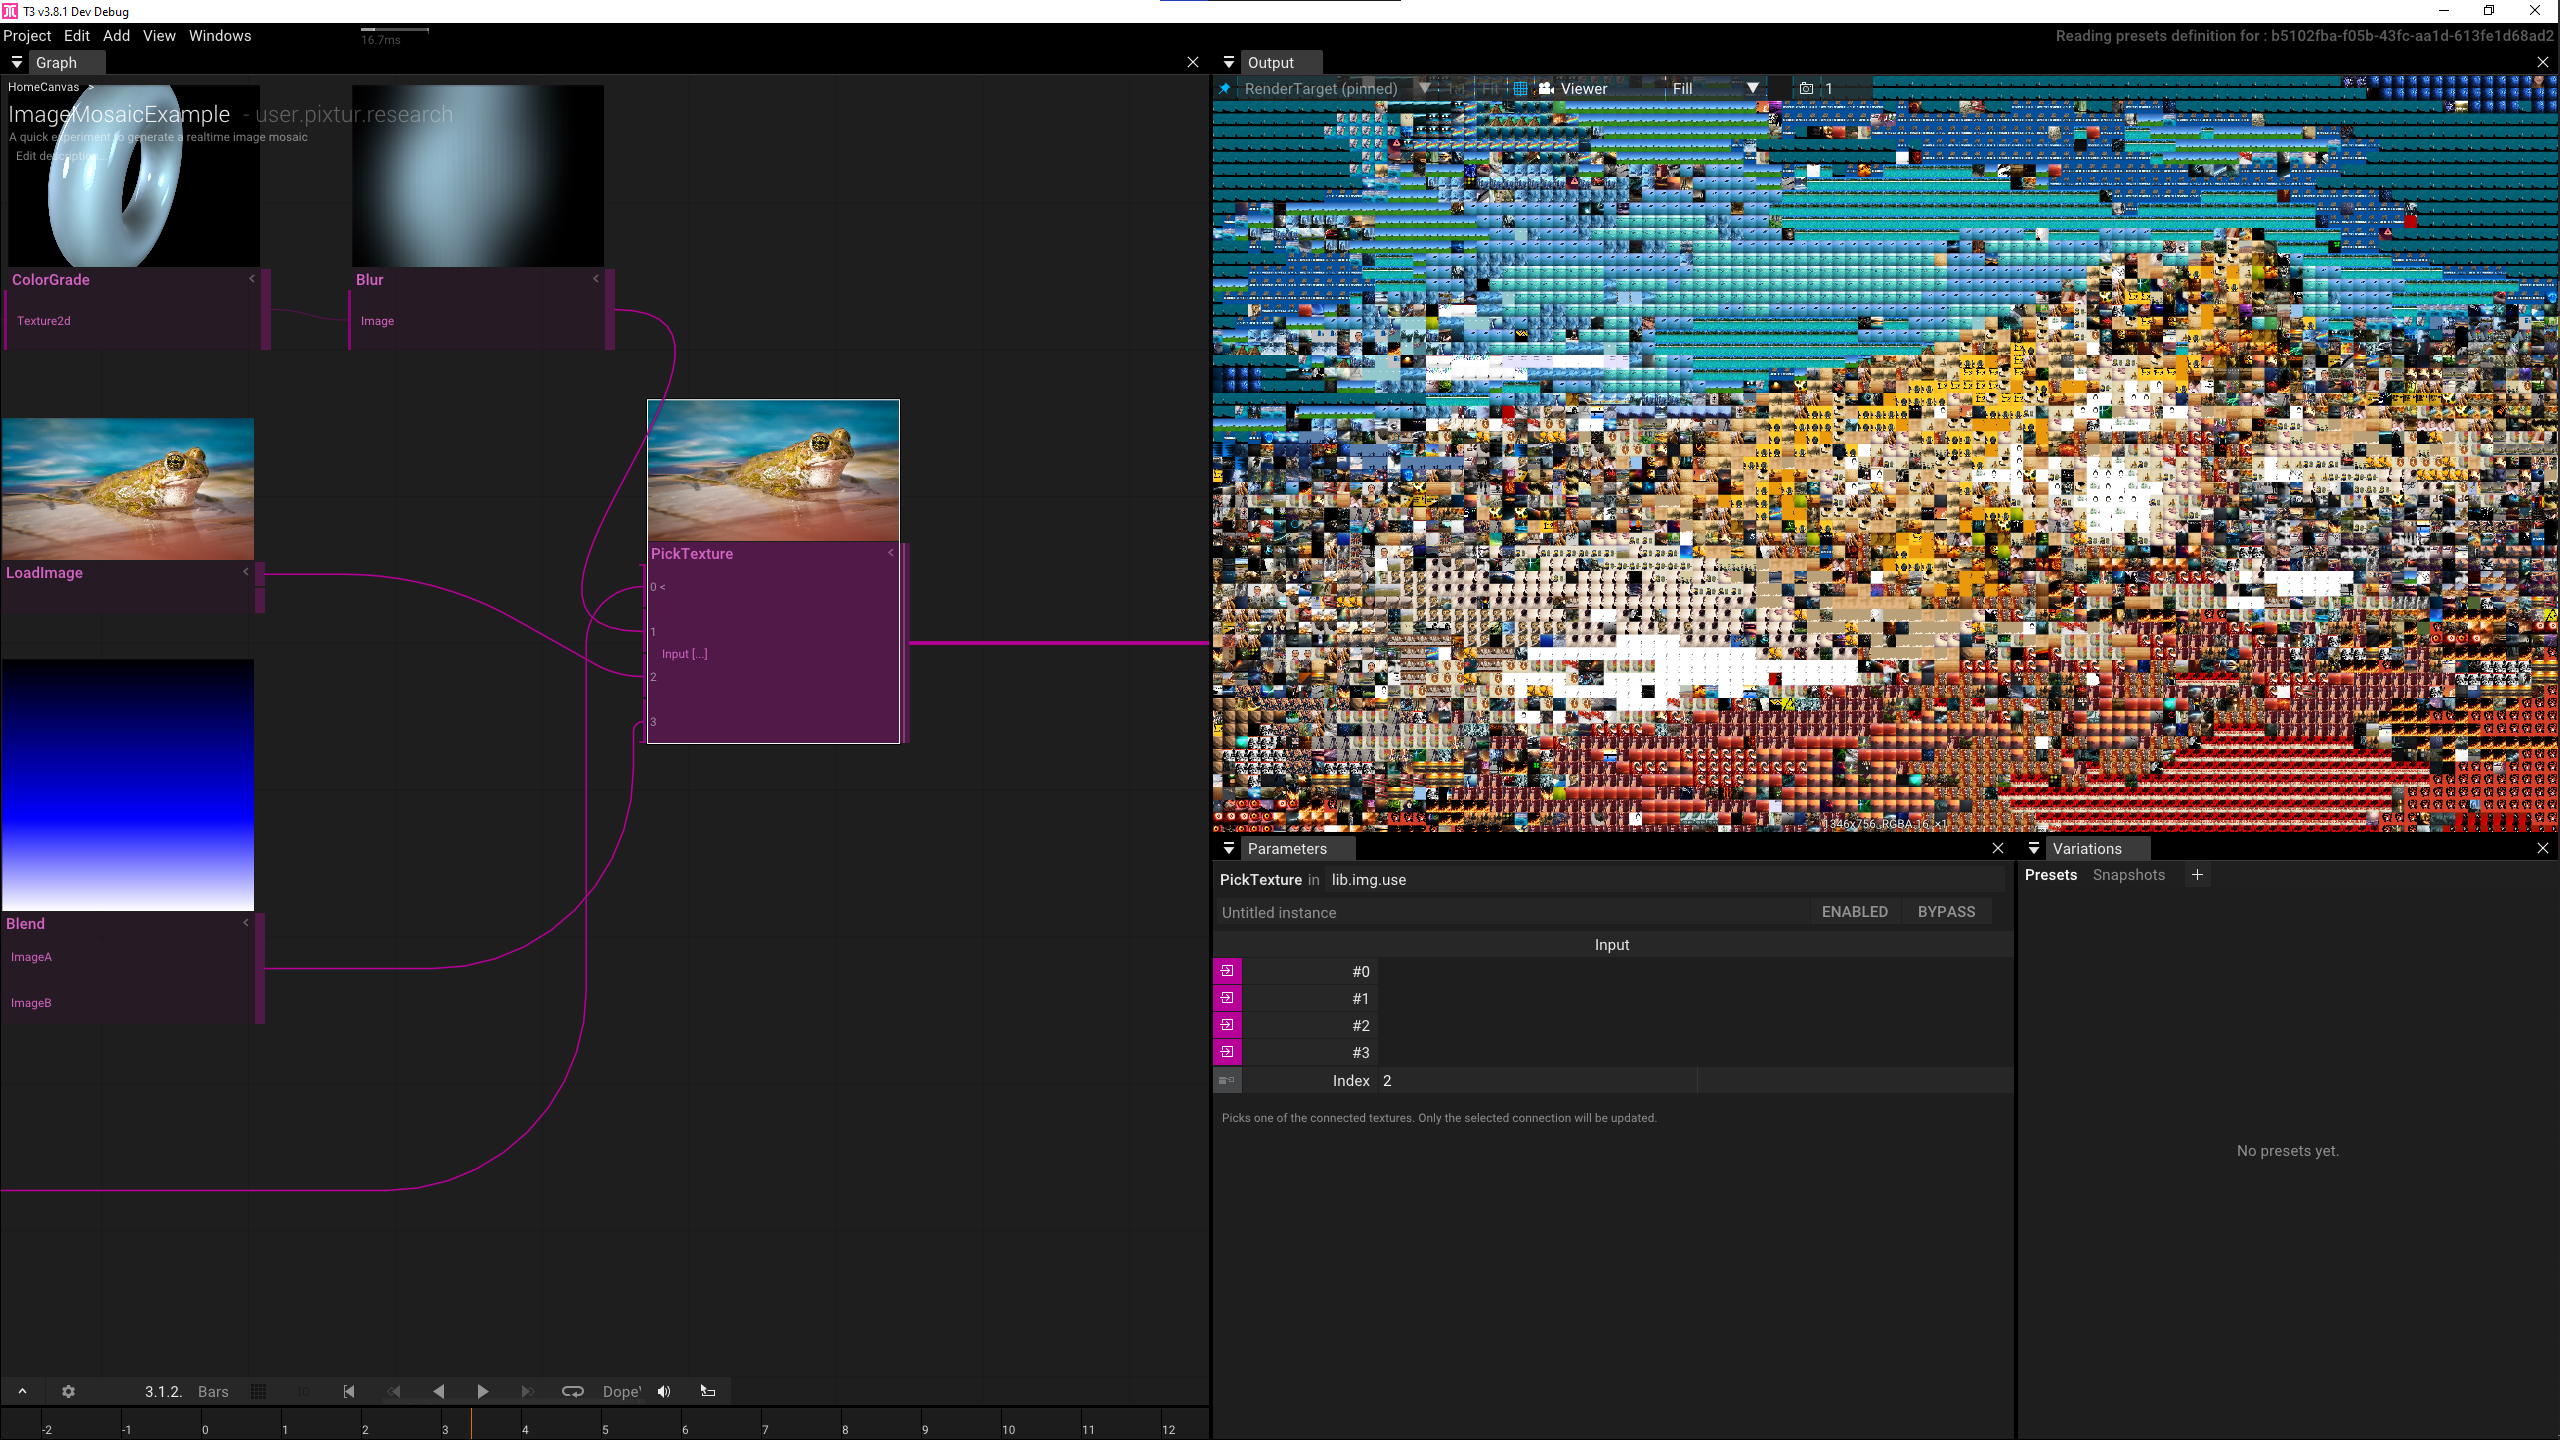
When computing the color distance in the OKLch space we get a much better distribution and usage of the available image set:

Phew. That was a lot to digest! But you made it! This article described all the details you need to write your own advanced multi-pass shader effects. Because all of the Tooll3 operators are directly derived from the DirectX11-API this can also be a great segway into learning and understanding in detail how your graphics card works and maybe apply this knowledge to other domains like game engines and direct development with other graphics API.
As always if you have any questions, don't hesitate to join us on Discord. We're a nice bunch and a love to learn together.
Reference
Getting started
- Basic Concepts
- How Tooll Works
- Keyboard shortcuts
- Video tutorials
- Rendering Videos
- Exporting to Executable
- Creating new Operators
- Tooll for live performances
- Presets and Snapshots
- Optimizing Rendering Performance
- Using backups
- Realtime Rendering for Artists
Advanced features